

 11-19-2014, 05:51 PM
Last edit by: IB Advertising
See related guides and technical advice from our community experts:
Browse all: Coolant System Guides
- How to Replace Thermostat
Step by step instructions for do-it-yourself repairs
Browse all: Coolant System Guides

V10 Thermostat Replacement "How To"
#1
03-03-2013, 09:00 PM


V10 Thermostat Replacement "How To"
Hey everyone,
Ever since my X had a COP fail I've noticed that my engine has been running cooler than usual. It always used to stay between 180-187°, but in recent weeks it's been staying about 10 degrees cooler than that, and sometimes dipping into the 160's when coasting down a hill. Time for a thermostat swap!
This is about the easiest repair that can be done, and if you can change a tire this is well within your capability.
Tools required:
Vice grips to remove factory constant-tension hose clamps
Ratchet with 10mm socket and extension
Bucket to catch coolant(CLEAN if you want to reuse your coolant)
Parts required:
Thermostat - Motorcraft RT1195
Seal - Fel Pro 35489
To start, place a bucket under your radiator drain **** and unscrew it a few turns to start draining your radiator.
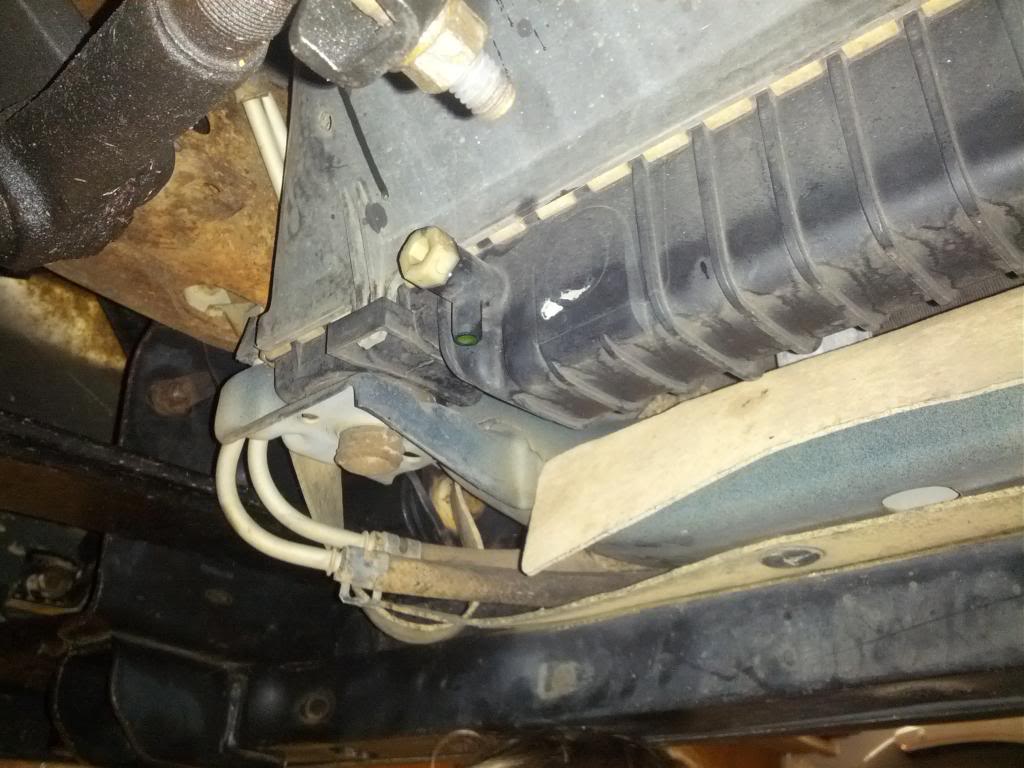
Drain until the coolant reservoir is completely empty, which was a total of five quarts for me. The intent here is to lower the level of the coolant to below the thermostat housing to avoid making a mess!
Now that this is done, remove one of the hose clamps and detach the upper radiator hose from either the radiator or the thermostat housing on top of the engine:
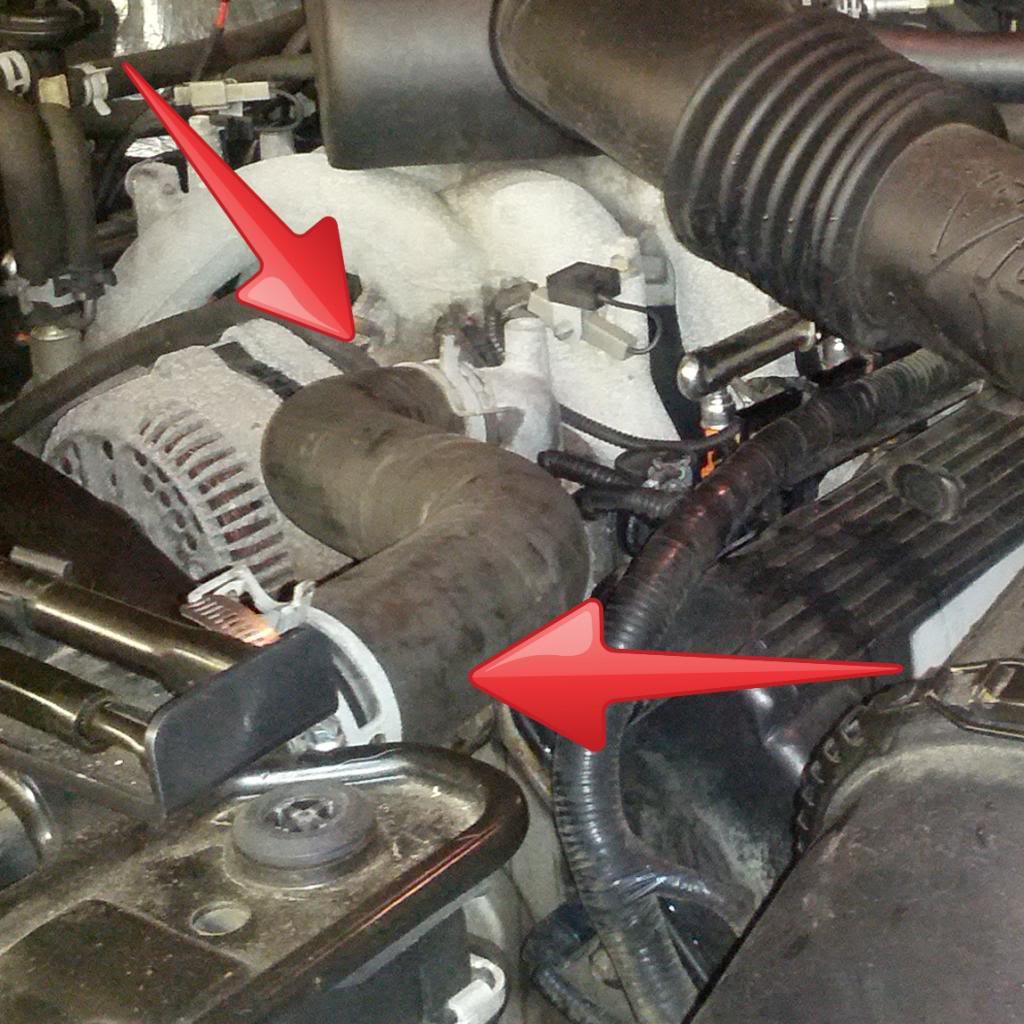
I had a hard time breaking the hose free from the aluminum water outlet, so I replaced the clamp and had a much easier time with removing the hose from the radiator.
Remove the two 10mm bolts that secure the thermostat housing to the top of the engine. The housing then pulls straight off revealing the thermostat and o-ring seal. Note that the seal is simply laying on top of the thermostat, and the beveled surface of the housing is what forces it down and against its bore.

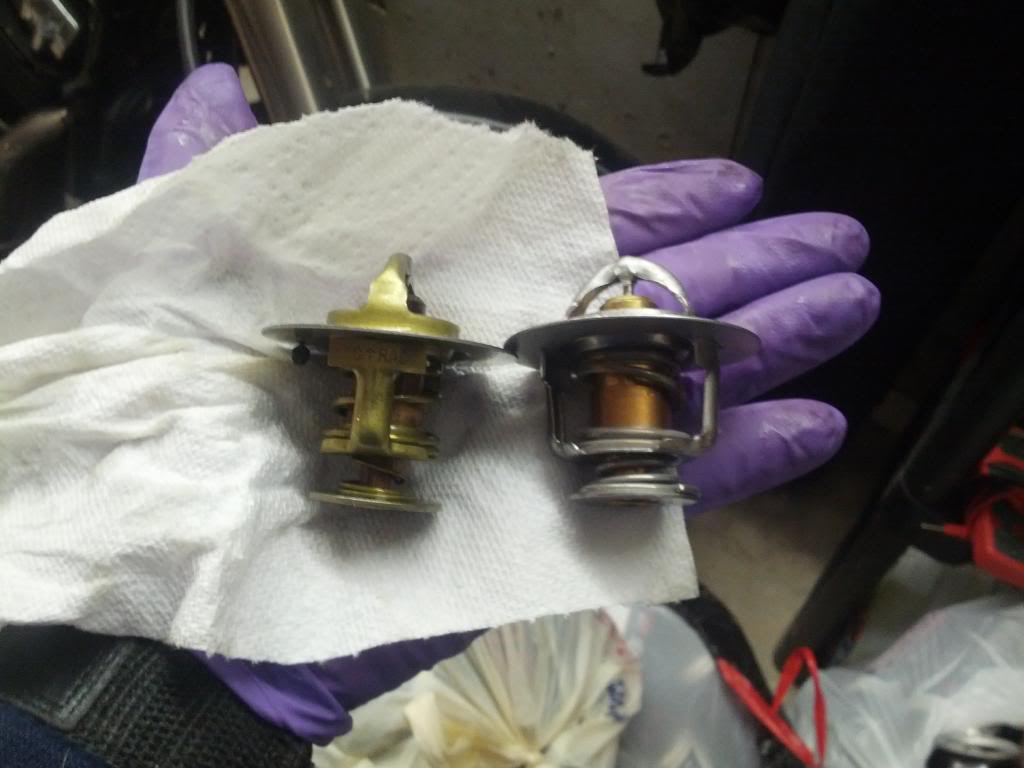
Using pliers if necessary, grab the thermostat and remove being careful not to damage the sealing surface that the O-ring is pressed against! Looks like they changed the design a bit sometime over the past twelve years:
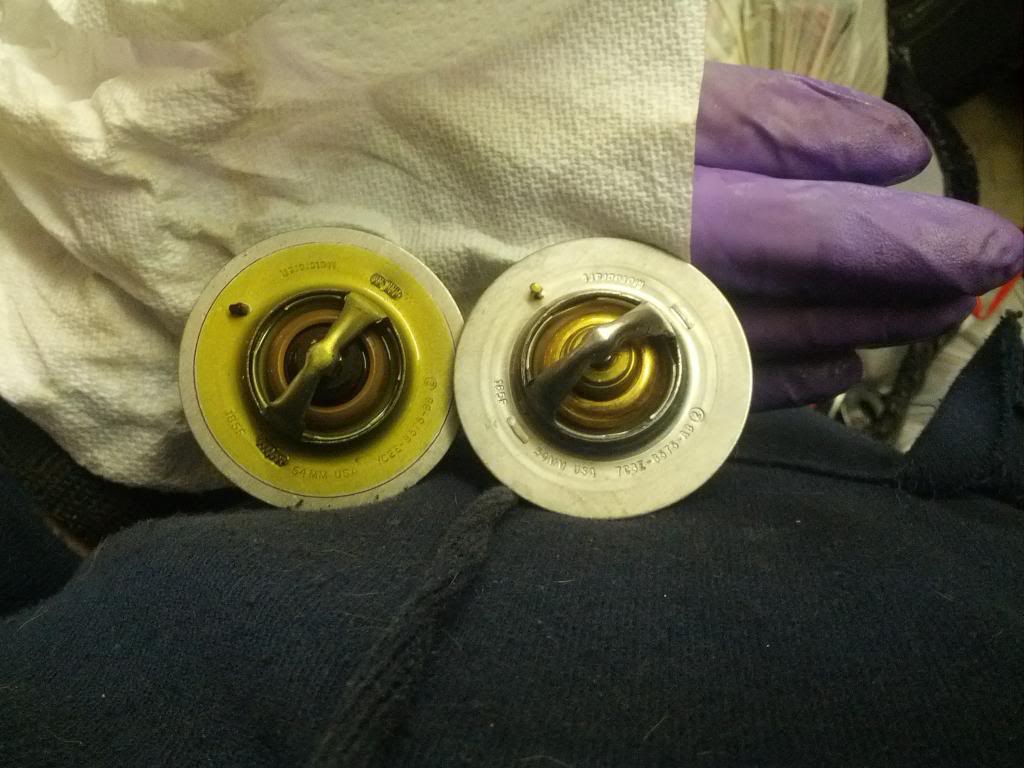
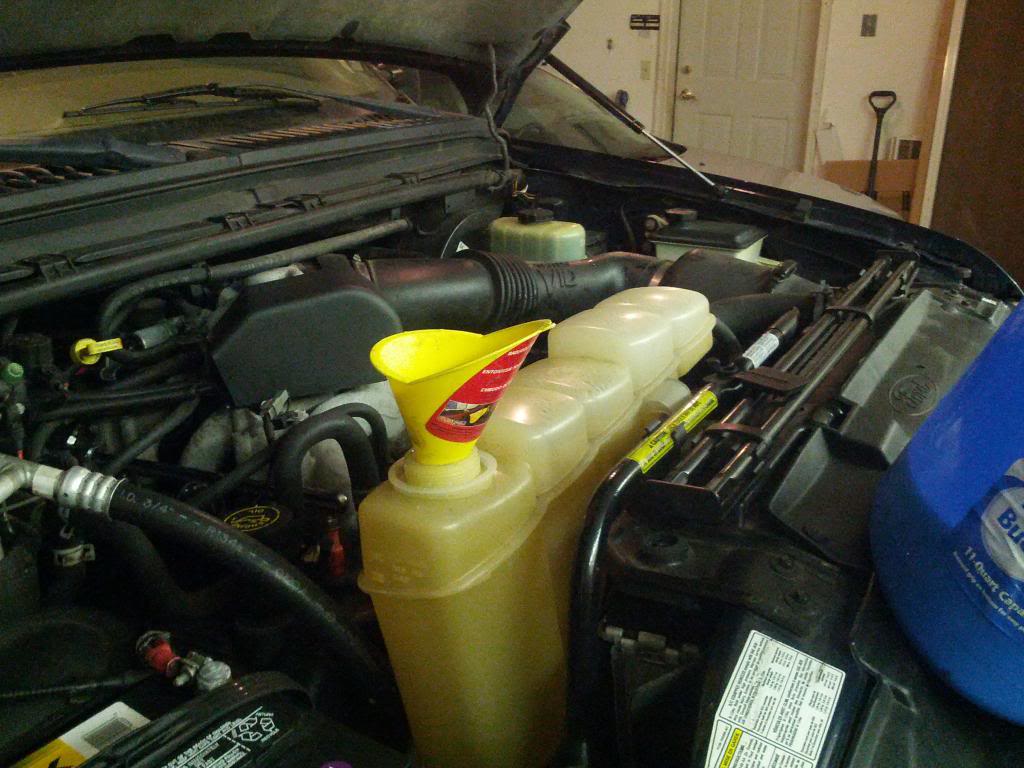
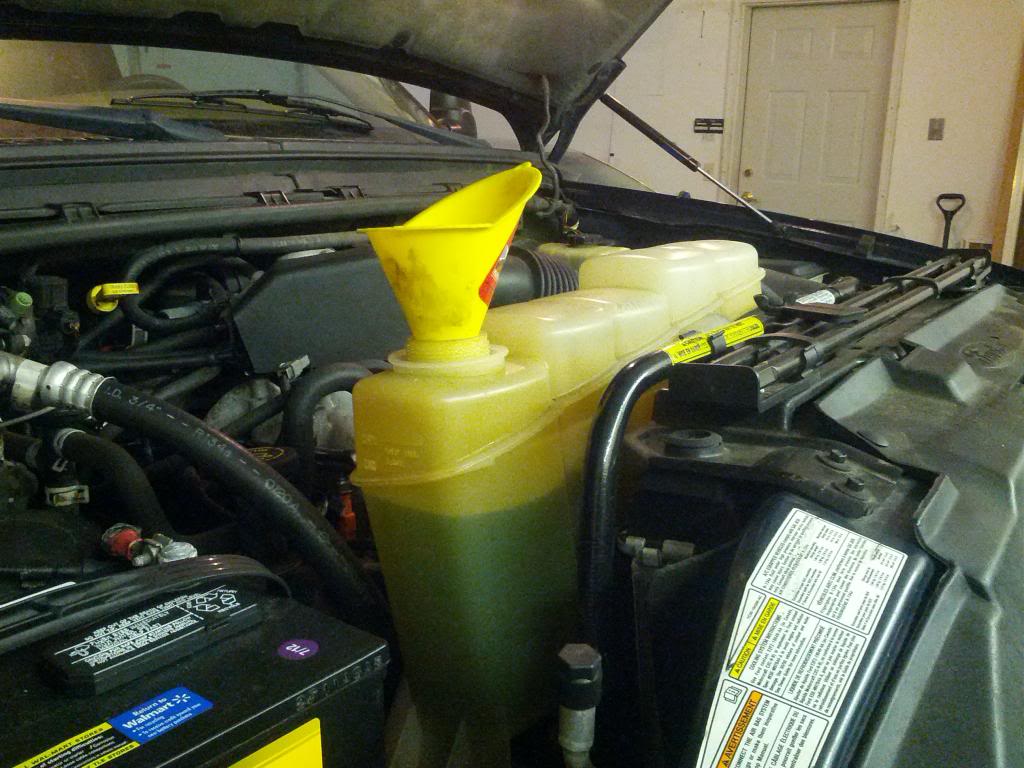
From here, place the new thermostat back into its bore in the same orientation that you removed it. Do NOT install upside down! Lay the new O-ring seal on top of the housing and reinstall the thermostat housing. The 10mm bolts should be torqued between 20-30 NM(15-22 ft-lbs). Reinstall the upper radiator hose and fill with coolant:
Start the engine, warm it up, check for leaks, and you're DONE.
Ever since my X had a COP fail I've noticed that my engine has been running cooler than usual. It always used to stay between 180-187°, but in recent weeks it's been staying about 10 degrees cooler than that, and sometimes dipping into the 160's when coasting down a hill. Time for a thermostat swap!
This is about the easiest repair that can be done, and if you can change a tire this is well within your capability.
Tools required:
Vice grips to remove factory constant-tension hose clamps
Ratchet with 10mm socket and extension
Bucket to catch coolant(CLEAN if you want to reuse your coolant)
Parts required:
Thermostat - Motorcraft RT1195
Seal - Fel Pro 35489
To start, place a bucket under your radiator drain **** and unscrew it a few turns to start draining your radiator.
Drain until the coolant reservoir is completely empty, which was a total of five quarts for me. The intent here is to lower the level of the coolant to below the thermostat housing to avoid making a mess!
Now that this is done, remove one of the hose clamps and detach the upper radiator hose from either the radiator or the thermostat housing on top of the engine:
I had a hard time breaking the hose free from the aluminum water outlet, so I replaced the clamp and had a much easier time with removing the hose from the radiator.
Remove the two 10mm bolts that secure the thermostat housing to the top of the engine. The housing then pulls straight off revealing the thermostat and o-ring seal. Note that the seal is simply laying on top of the thermostat, and the beveled surface of the housing is what forces it down and against its bore.
Using pliers if necessary, grab the thermostat and remove being careful not to damage the sealing surface that the O-ring is pressed against! Looks like they changed the design a bit sometime over the past twelve years:
From here, place the new thermostat back into its bore in the same orientation that you removed it. Do NOT install upside down! Lay the new O-ring seal on top of the housing and reinstall the thermostat housing. The 10mm bolts should be torqued between 20-30 NM(15-22 ft-lbs). Reinstall the upper radiator hose and fill with coolant:
Start the engine, warm it up, check for leaks, and you're DONE.
Last edited by Stewart_H; 04-25-2013 at 10:29 PM.
#2
03-03-2013, 09:35 PM

Fleet Mechanic

#3
03-04-2013, 10:20 AM

#4
03-04-2013, 10:46 AM
From what I can tell that little hole is a one-way valve that only allows flow in the reverse direction that the system operates in, I'm thinking this may have something to do with cooldown when the engine isn't running.

#5
03-06-2013, 12:39 PM
Senior User
Join Date: Jul 2008
Location: Minneapolis
Posts: 206
Likes: 0
Received 0 Likes
on
0 Posts
#6
03-06-2013, 12:51 PM
#7
04-24-2013, 10:33 AM
New User
Join Date: Apr 2013
Location: Denton, TX
Posts: 10
Likes: 0
Received 0 Likes
on
0 Posts
Trending Topics

#11
04-24-2013, 08:25 PM
Postmaster
#12
04-25-2013, 10:28 PM
The sister "discussion" thread about thermostats has been created as it's own stand-alone thread, cut off from this thread.
The discussion thread can be found here: https://www.ford-trucks.com/forums/1...l#post13102423
Let's try and keep this one as it was originally intended, and we can discuss (coughcougharguecoughcough) in the other thread!
Stewart
The discussion thread can be found here: https://www.ford-trucks.com/forums/1...l#post13102423
Let's try and keep this one as it was originally intended, and we can discuss (coughcougharguecoughcough) in the other thread!
Stewart
#14
03-27-2014, 11:16 AM

That should be a 195* thermo not a 185, no need to remove the top hose, and the water only needs to be 3" from the bottom of the reservoir so you only drain about a gallon, then you will need to burp it. That old thermo looks shorter which explains your cooler running. They recommend a 195 for all around efficiency and a hotter heater. (some say 190 but I think Ford changed that in later years).
My how-to;
https://www.ford-trucks.com/forums/1...l#post14031875
Don't worry, I'm already done with this thread
My how-to;
https://www.ford-trucks.com/forums/1...l#post14031875
Don't worry, I'm already done with this thread
#15
02-09-2017, 02:48 PM
Big thanks to the OP and others for the info in this thread. I was beggining to chasing what I thought were bad front and rear heater cores in my '00 V10 Excursion. After replacing the thermostat all is good with the cabin heat just in time for the first big snow storm here. Thermostat I pulled out looked extremely old and was stuck open. O-ring was rotted as well, but not leaking yet.
