
[Tutorial] 2013 SuperCab Door Panel Removal
#1
 12-09-2012, 03:08 PM


Join Date: Nov 2008
Posts: 234
Likes: 0
Received 0 Likes
on
0 Posts
[Tutorial] 2013 SuperCab Door Panel Removal
I figured I'd write up this brief description on how to remove the door panel on the Supercab F150 as I didn't really find a good description of this process. I did this on my 2013 but I imagine its similar if not the exact same for the 2009+.
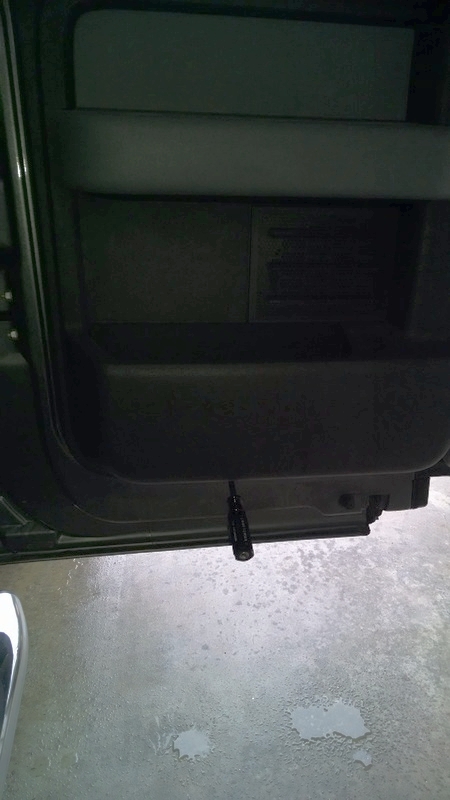
First is to remove the single screw at the bottom of the door panel.

Next, remove the two screws on the side of the door panel. You can find them on the side that opens outward.

Next, remove the power window switch.

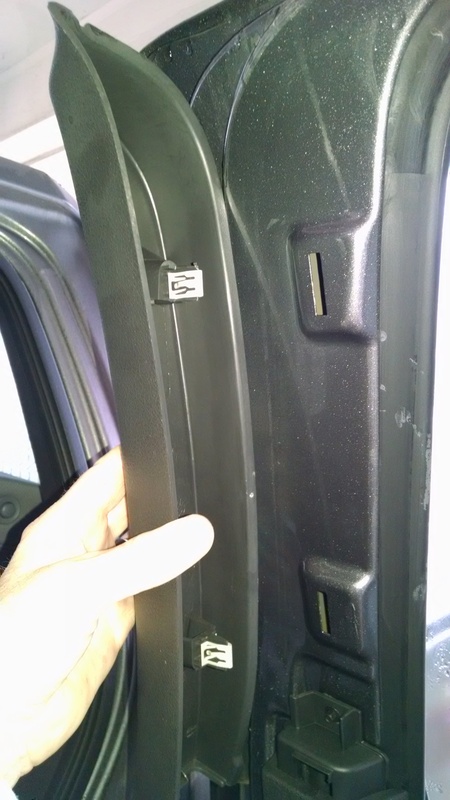
Next, remove the molding on either side of the window. It should just pop off, but I recommend using hard plastic tool sets that you can get from most hardware stores. 5 Piece Auto Trim and Molding Tool Set
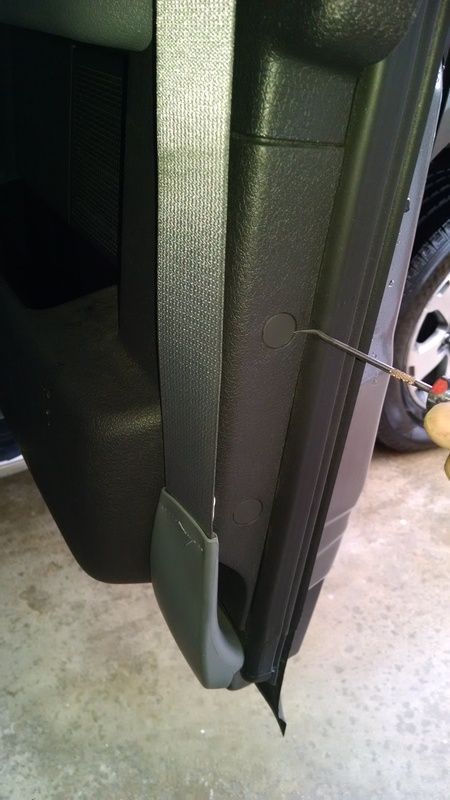
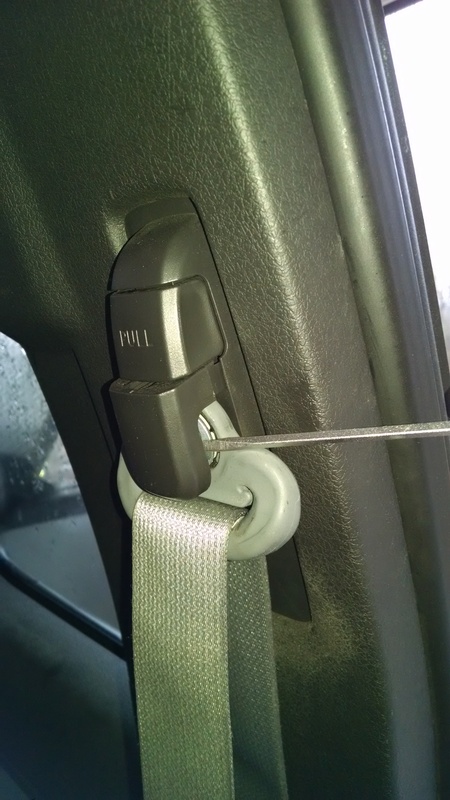
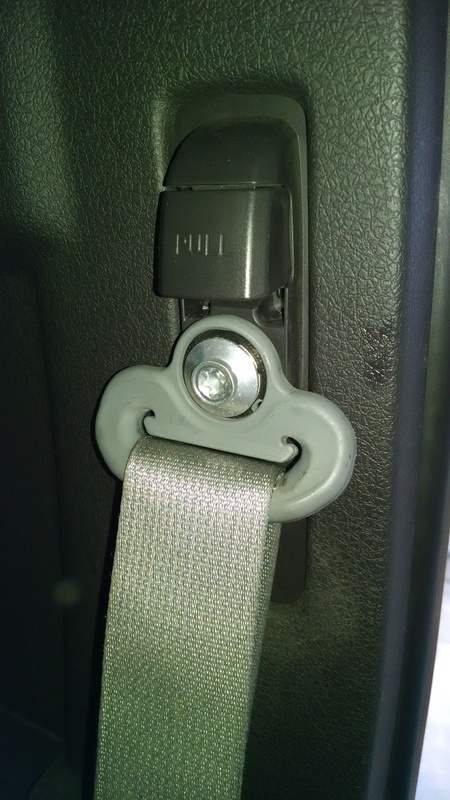
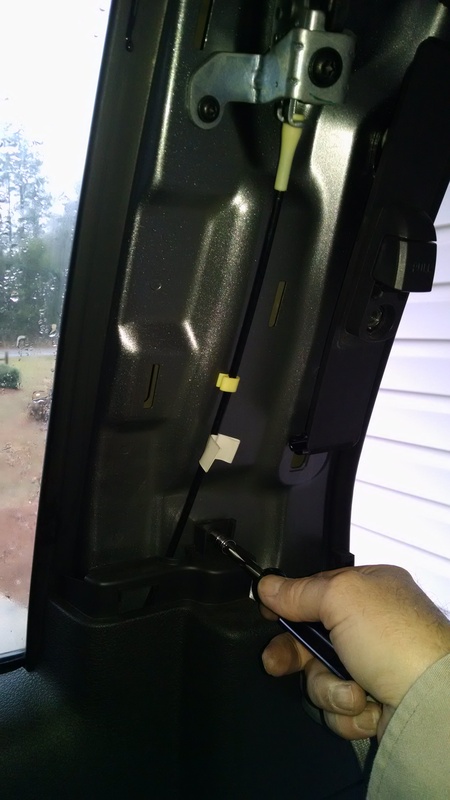
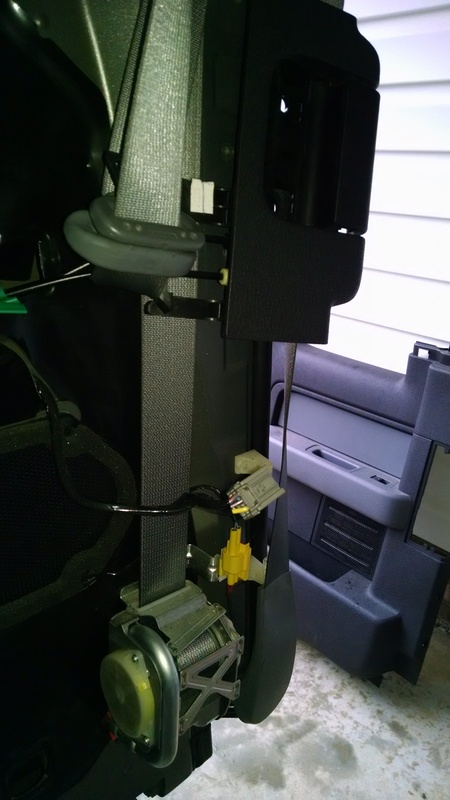
You will need to remove the seatbelt before removing the molding behind it. Just pull on the plastic piece below the piece that says "pull", the one that says "pull" is to adjust the height of the seatbelt. The one you need to remove is just below it. You will need a star bit to remove the belt.
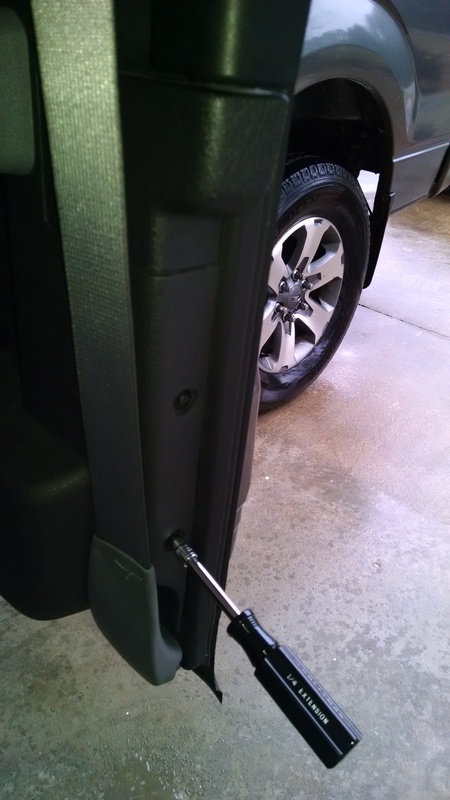
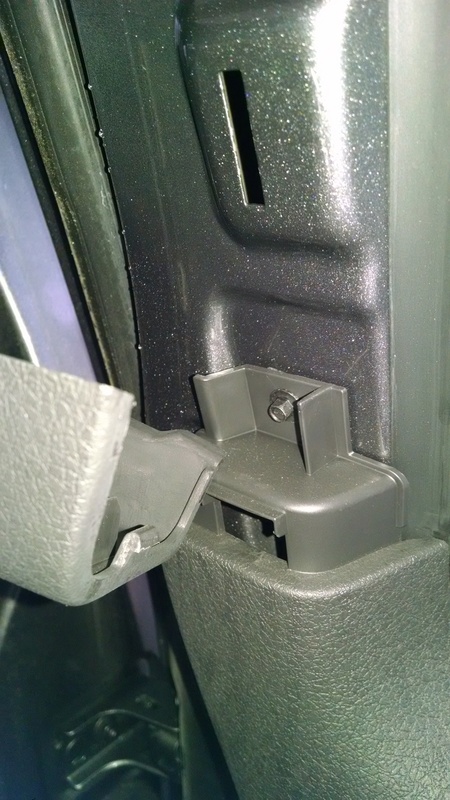
One screw on either side will need to be removed.


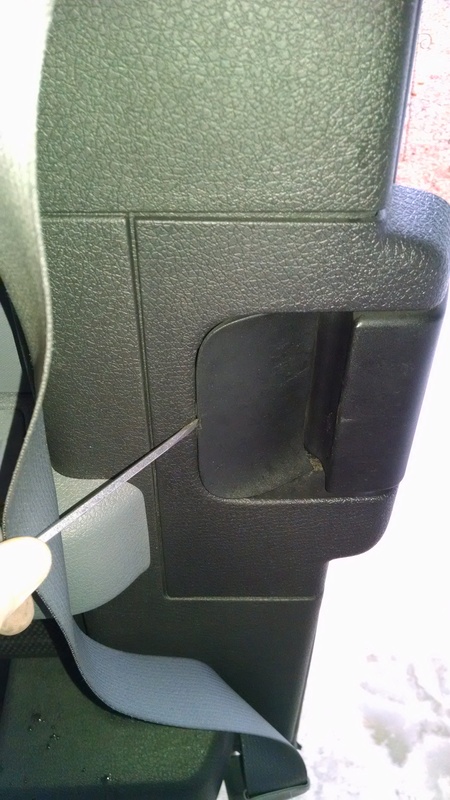
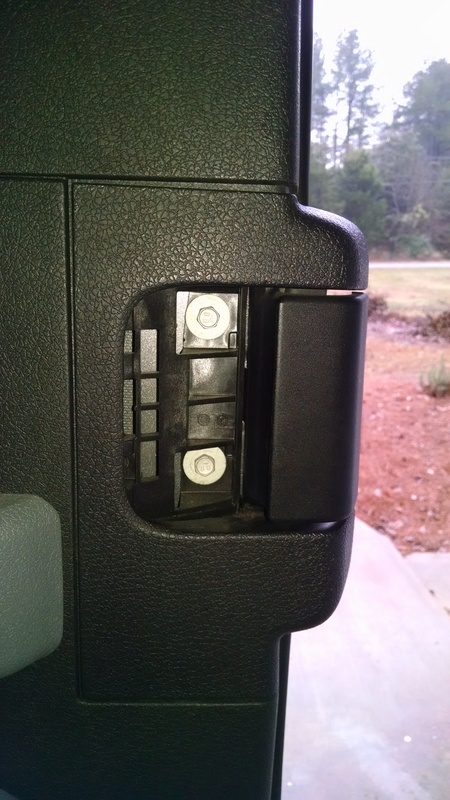
Finally, there are two screws in the door handle itself. Remove them and then remove the door handle form the door panel. You should be able to remove the door panel leaving the handle attached to the door.


First is to remove the single screw at the bottom of the door panel.
Next, remove the two screws on the side of the door panel. You can find them on the side that opens outward.
Next, remove the power window switch.
Next, remove the molding on either side of the window. It should just pop off, but I recommend using hard plastic tool sets that you can get from most hardware stores. 5 Piece Auto Trim and Molding Tool Set
You will need to remove the seatbelt before removing the molding behind it. Just pull on the plastic piece below the piece that says "pull", the one that says "pull" is to adjust the height of the seatbelt. The one you need to remove is just below it. You will need a star bit to remove the belt.
One screw on either side will need to be removed.
Finally, there are two screws in the door handle itself. Remove them and then remove the door handle form the door panel. You should be able to remove the door panel leaving the handle attached to the door.
#2
01-13-2015, 08:19 PM

#3
01-01-2017, 01:26 PM

Old post I know, but I had a horrible buzz/rattle in my 2013 rear left scab door and these were the best instructions I could find. I snapped a few pics as I stumbled along hoping to help the next guy/gal.
6mm nutdriver/socket
Under little covers. Again 6mm nutdriver/socket
I skipped this step and unplugged the switch later, when the panel was off.
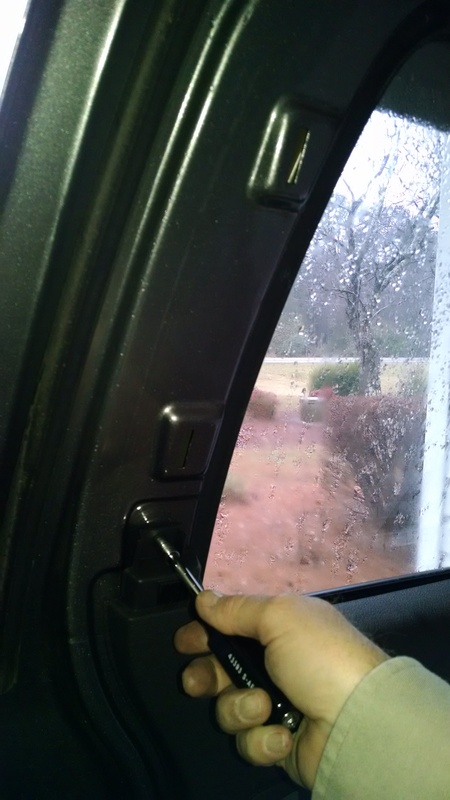
Left side first. Pulled and wiggle from the top. There's a hook/tab at the bottom you don't want to break.
Now the right side
T-50 TORX wrench.
Then pull/wiggle from the top.
6 mm nutdriver/socket.
Remove the cover, then the screws. 10mm socket.
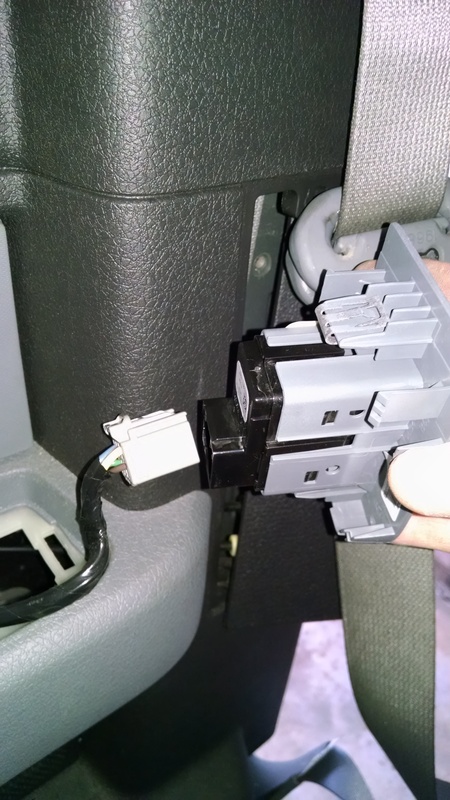
Kind of lift up on and wiggle the panel, it'll pop off towards you. It was here that I unplugged the window switch.
I popped the switch out before re-installation and fed the plug up thru the hole and snapped the switch in place afterwards.
6mm nutdriver/socket
I skipped this step and unplugged the switch later, when the panel was off.
Left side first. Pulled and wiggle from the top. There's a hook/tab at the bottom you don't want to break.
Now the right side
You will need to remove the seatbelt before removing the molding behind it. Just pull on the plastic piece below the piece that says "pull", the one that says "pull" is to adjust the height of the seatbelt. The one you need to remove is just below it. You will need a star bit to remove the belt.
Then pull/wiggle from the top.
6 mm nutdriver/socket.
Kind of lift up on and wiggle the panel, it'll pop off towards you. It was here that I unplugged the window switch.
I popped the switch out before re-installation and fed the plug up thru the hole and snapped the switch in place afterwards.
#4
01-01-2017, 01:36 PM
Now, it's been rainy here for 2 days but imagine my surprise to find a wet speaker. Speaker mount screws take a 7/32" nutdriver. 6mm is too big, 5 mm too small.
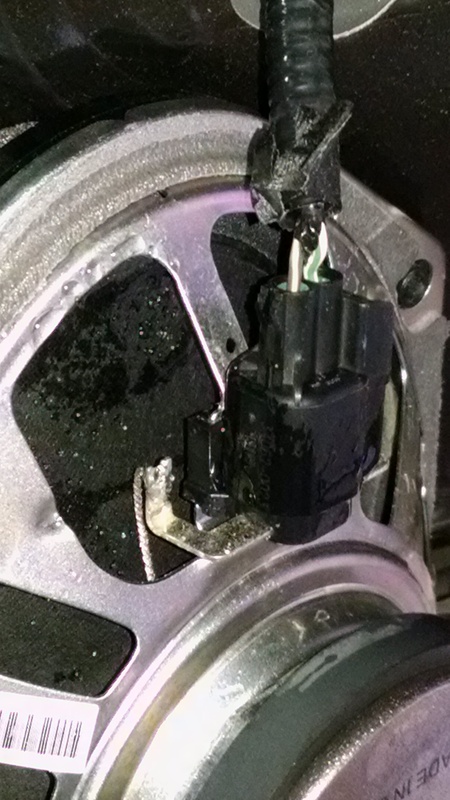
All the little pieces of foam used for rattle isolators, the speaker, latch cables- all wet. I added some soft adhesive-backed foam to the inside & outside of the speaker as well as cutting a freezer bag and putting a "poncho" over the speaker inside the door when re-mounting. There were now puddles in the door. Time I guess for new weather sealant!
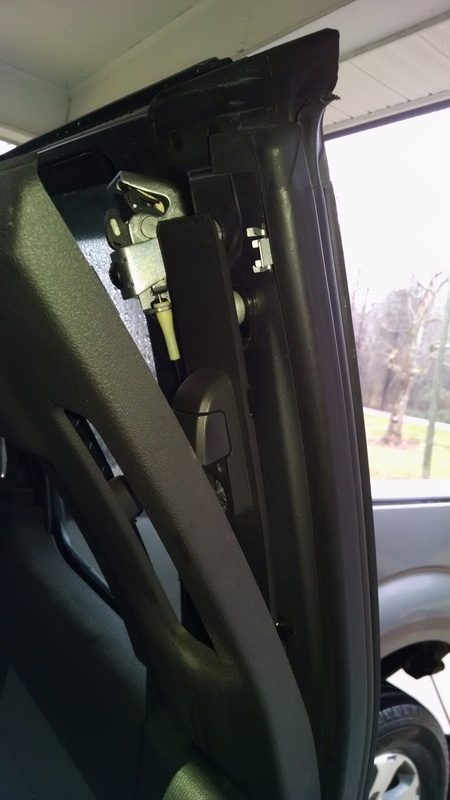
This last pic is the panel installed, you can see what I meant about "feed the window switch wire up thru". The window switch snaps back into place after plugging in.
I also noticed lots of "looseness" on the plastic panel against the door after I re-installed it. If the buzz/rattle comes back I might have to foam that too. We'll see.
Hope these pics help!
All the little pieces of foam used for rattle isolators, the speaker, latch cables- all wet. I added some soft adhesive-backed foam to the inside & outside of the speaker as well as cutting a freezer bag and putting a "poncho" over the speaker inside the door when re-mounting. There were now puddles in the door. Time I guess for new weather sealant!
This last pic is the panel installed, you can see what I meant about "feed the window switch wire up thru". The window switch snaps back into place after plugging in.
I also noticed lots of "looseness" on the plastic panel against the door after I re-installed it. If the buzz/rattle comes back I might have to foam that too. We'll see.
Hope these pics help!

Thread
Thread Starter
Forum
Replies
Last Post
Ridin'High
Audio & Video Systems, Navigation, Satellite Radio & Mobile Electronics
5
04-29-2013 11:10 AM
councillor
Lightning, Harley-Davidson F-150, Roush F-150 & Saleen F-150
13
10-27-2007 09:56 PM