Effii gets rebuilt
#1
 11-01-2012, 04:11 AM

Join Date: Mar 2007
Location: Australia
Posts: 238
Likes: 0
Received 0 Likes
on
0 Posts
Effii gets rebuilt
Effii.
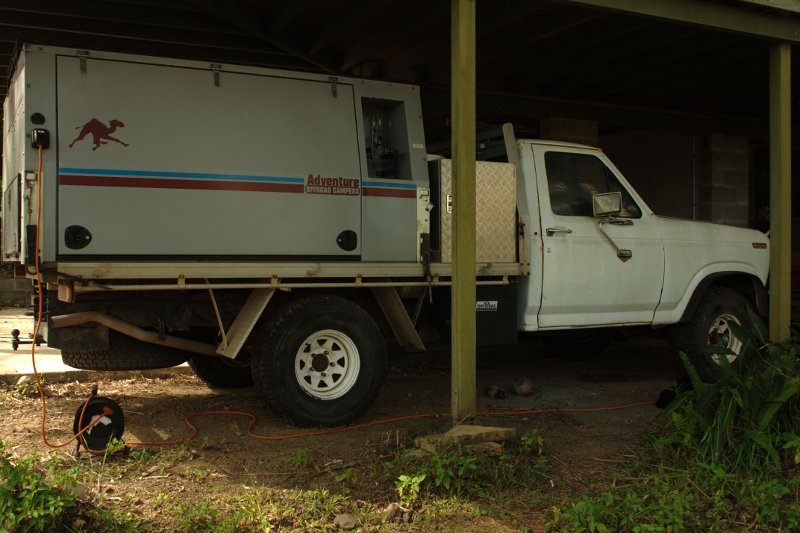
A 1986 F100 4x4 Cab chassis, 10ft tray, 351C V8 (running lpg and premium unleaded 25-30l/100k), NP435 gearbox, NP208 transfer case, 9in Detroit TruTrak rear diff 3.50:1, Dana 44 with ARB Air Locker front diff 3.54:1.
The original plan.
Replace the abused chassis in Effii.
First a short story.
We spent most of summer 2010 in Tasmania, actually Jan - mid April. Travelling where ever, when ever the day took us. Lots of 4WD and lots of other roads.
Longest travelling day was 500k, west coast back to Launceston.
Anyway we were on Bruny Island about to head to the camping area at the southern end and I could smell overheating/burning brakes. Stop to check it out but can't find anything wrong.
Head to the mechanic and put it up on the hoist, with the wheel off it's obvious that the parking brake is partly on.
Follow the cables and discover that the chassis is cracked all the way through top to bottom where the parking brake cable bracket is riveted to the chassis.
Only thing holding the chassis together is the cable bracket, don't have a photo as forgot to take one.
Anyway do a temporary weld up with bracing to get us home to north Queensland (3500k away).
End of story.
After getting home we have a really good look over the chassis and decide that the 20 years of PO abuse really does not make it worth the effort to repair this chassis, lots of salt water errosion and cracks.
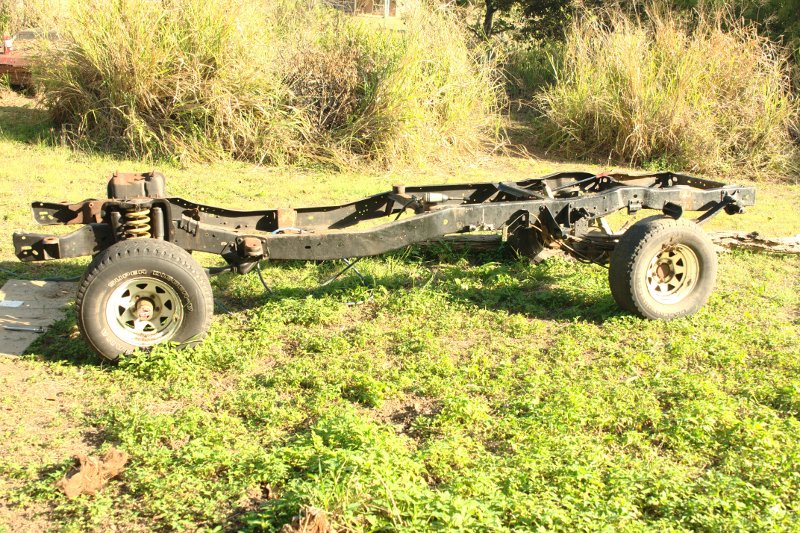
We found a 1984 4x4 chassis (complete with diffs) in Brisbane for $512 plus the cost of hiring a trailer oneway to get it here, couple of small cracks only and easily repaired.
Meanwhile 2 years pass as the company I had worked for up to 2009 offered a contract which was too good an opportunity to miss.
The chassis and Effii have sat in the garage for that time as we were on the opposite side of the country.
While over in WA we ended up buying another 4WD to get arround in and see the west coast. This is the first diesel 4WD we have owned, so got to thinking that a diesel in Effii would be great.
So now the plan becomes.
Replace the chassis, put a diesel engine in Effii, long range fuel tank (150l in the rear) plus 72l standard mid tank, a 2in suspension lift so we can run 33x12.5R15 Goodyear Wrangler MTR's (same as what is on the other 4WD) and install hydraboost system.
But which diesel.
Looked at the 6.5 chev's from Bullet Diesel and that would be nice but lots of fabrication and all up $25k with engine and gearbox.
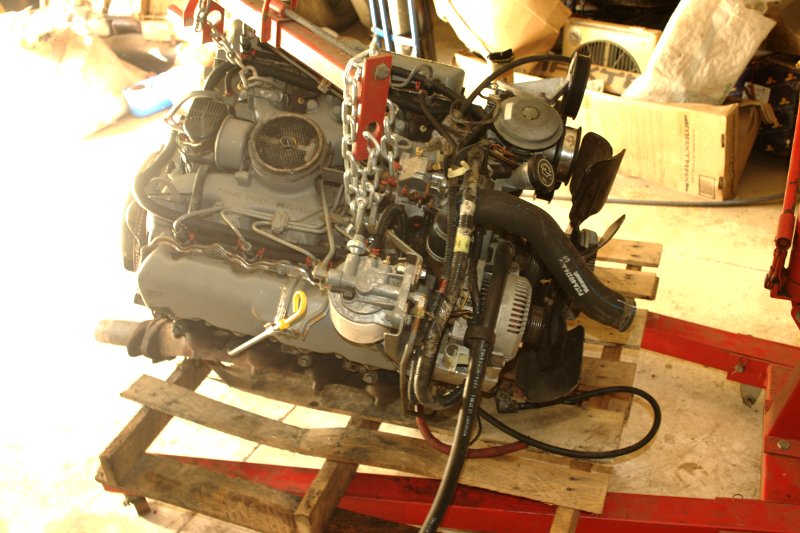
Then up comes on evil-bay a 7.3 idi with ZF 5 speed, transfer case and driveshafts $7950. It's from a 1993 F250 4x4 has 120K miles on it (should be good for at least 300K miles), no leaks, good running.
Do some research on idi swaps and thanks mainly to those on FTE find that it's basically a bolt in swap AND it's a Ford engine (well made by IH for Ford).
So now it's time to start.
Here's the parts
Effii with camper.
Chassis
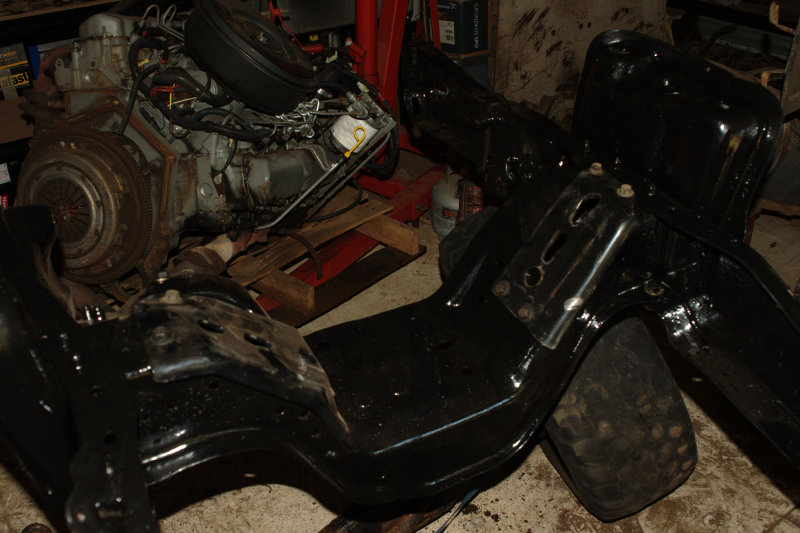
7.3 idi engine
ZF 5 speed

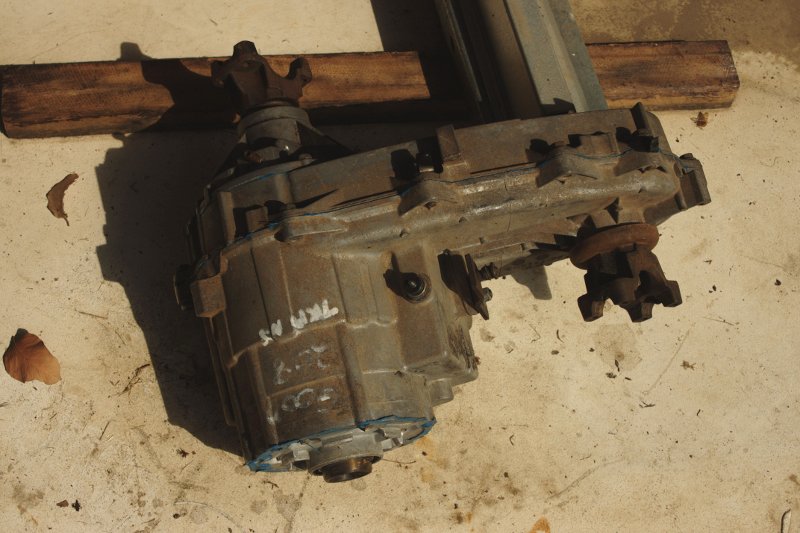
NP 208 transfer case.
Here's the stages.
1. Cleanup new chassis, including any bits that need to be replaced/repaired, holes drilled etc for the engine mounts, transfer case mount, suspension lift.
2. Paint the chassis with POR15.
3. Do the 2in suspension lift.
4. New fuel (feed and return) and brake hardlines and stainless braided flexlines.
5. Put the idi, ZF, transfer case etc in the chassis.
6. Driveshafts rebuilt for length and strength.
7. Lift off cab and tray.
8. Repaint cab and do rust repairs (fixes PO bodgy job).
9. Transfer cab and tray to the new chassis.
10. Transfer the dana 44 air locker and 9in Detroit Tru Track to the new chassis.
11. Replace vacuum brake booster with hydraboost and overhaul complete brake system.
12. Add d-gas system.
13. Pull all usable parts off old chassis.
14. Get rid of (sell?) any unused parts.
All stages have lots of little sub stages but we'll come to those over time.
So I've posted it here as there's not many rebuilds in Australian Chapter and I've not seen any 7.3idi's in AU either.
Cheers
Ross
A 1986 F100 4x4 Cab chassis, 10ft tray, 351C V8 (running lpg and premium unleaded 25-30l/100k), NP435 gearbox, NP208 transfer case, 9in Detroit TruTrak rear diff 3.50:1, Dana 44 with ARB Air Locker front diff 3.54:1.
The original plan.
Replace the abused chassis in Effii.
First a short story.
We spent most of summer 2010 in Tasmania, actually Jan - mid April. Travelling where ever, when ever the day took us. Lots of 4WD and lots of other roads.
Longest travelling day was 500k, west coast back to Launceston.
Anyway we were on Bruny Island about to head to the camping area at the southern end and I could smell overheating/burning brakes. Stop to check it out but can't find anything wrong.
Head to the mechanic and put it up on the hoist, with the wheel off it's obvious that the parking brake is partly on.
Follow the cables and discover that the chassis is cracked all the way through top to bottom where the parking brake cable bracket is riveted to the chassis.
Only thing holding the chassis together is the cable bracket, don't have a photo as forgot to take one.
Anyway do a temporary weld up with bracing to get us home to north Queensland (3500k away).
End of story.
After getting home we have a really good look over the chassis and decide that the 20 years of PO abuse really does not make it worth the effort to repair this chassis, lots of salt water errosion and cracks.
We found a 1984 4x4 chassis (complete with diffs) in Brisbane for $512 plus the cost of hiring a trailer oneway to get it here, couple of small cracks only and easily repaired.
Meanwhile 2 years pass as the company I had worked for up to 2009 offered a contract which was too good an opportunity to miss.
The chassis and Effii have sat in the garage for that time as we were on the opposite side of the country.
While over in WA we ended up buying another 4WD to get arround in and see the west coast. This is the first diesel 4WD we have owned, so got to thinking that a diesel in Effii would be great.
So now the plan becomes.
Replace the chassis, put a diesel engine in Effii, long range fuel tank (150l in the rear) plus 72l standard mid tank, a 2in suspension lift so we can run 33x12.5R15 Goodyear Wrangler MTR's (same as what is on the other 4WD) and install hydraboost system.
But which diesel.
Looked at the 6.5 chev's from Bullet Diesel and that would be nice but lots of fabrication and all up $25k with engine and gearbox.
Then up comes on evil-bay a 7.3 idi with ZF 5 speed, transfer case and driveshafts $7950. It's from a 1993 F250 4x4 has 120K miles on it (should be good for at least 300K miles), no leaks, good running.
Do some research on idi swaps and thanks mainly to those on FTE find that it's basically a bolt in swap AND it's a Ford engine (well made by IH for Ford).
So now it's time to start.
Here's the parts
Effii with camper.
Chassis
7.3 idi engine
ZF 5 speed
NP 208 transfer case.
Here's the stages.
1. Cleanup new chassis, including any bits that need to be replaced/repaired, holes drilled etc for the engine mounts, transfer case mount, suspension lift.
2. Paint the chassis with POR15.
3. Do the 2in suspension lift.
4. New fuel (feed and return) and brake hardlines and stainless braided flexlines.
5. Put the idi, ZF, transfer case etc in the chassis.
6. Driveshafts rebuilt for length and strength.
7. Lift off cab and tray.
8. Repaint cab and do rust repairs (fixes PO bodgy job).
9. Transfer cab and tray to the new chassis.
10. Transfer the dana 44 air locker and 9in Detroit Tru Track to the new chassis.
11. Replace vacuum brake booster with hydraboost and overhaul complete brake system.
12. Add d-gas system.
13. Pull all usable parts off old chassis.
14. Get rid of (sell?) any unused parts.
All stages have lots of little sub stages but we'll come to those over time.
So I've posted it here as there's not many rebuilds in Australian Chapter and I've not seen any 7.3idi's in AU either.
Cheers
Ross
Last edited by 4x4falcon; 11-07-2012 at 01:59 AM. Reason: Image of zf gearbox added
#2
11-01-2012, 05:44 AM

Posting Guru
Join Date: Apr 2010
Location: Canberra Australia
Posts: 1,164
Likes: 0
Received 0 Likes
on
0 Posts
#3
11-01-2012, 06:28 PM
Join Date: Mar 2007
Location: Australia
Posts: 238
Likes: 0
Received 0 Likes
on
0 Posts
I'm using the Tuff Country Performance lift kit and the only difference between the 2" and 4" is the pivot brackets on the front. Radius arms and drop boxes are the same.
Also theres the issue of the camper, particularly the kitchen side as with a 2" lift it is only just above normal kitchen bench height. Any higher and my partner will have difficulty using it.
Cheers
Ross
#4
11-02-2012, 06:52 AM
Posting Guru
Join Date: Apr 2010
Location: Canberra Australia
Posts: 1,164
Likes: 0
Received 0 Likes
on
0 Posts

#5
11-02-2012, 08:13 AM
Join Date: Mar 2007
Location: Australia
Posts: 238
Likes: 0
Received 0 Likes
on
0 Posts
#6
11-09-2012, 02:39 AM
Join Date: Mar 2007
Location: Australia
Posts: 238
Likes: 0
Received 0 Likes
on
0 Posts
Week begining Monday 5 November 2012
A good week, mind you it's been getting pretty hot >33deg C, so tends to be 2 hours work in the morning and 3 hours late afternoon with 6 hour siesta or doing something that can be done sitting around the pool during the rest of the day.
Removed
crossmember 2 bolted - using new one from 1993 truck
crossmember 4 riveted - using one from 1986 truck
crossmember 5 bolted - reusing just easier to clean/strip for painting
radiator support mounting brackets - to be replaced
old body mount rubbers - to be replaced with poly blocks
old shock absorbers - rears from 1986 truck 4 new front ones to be added not sure yet but probably ranchos
old overload spring brackets - for sale not reusing airbags to be fitted instead
old fuel, brakelines and retaining clips - new lines to be fabricated
brake warning switch - use one from 1986 truck
engine mounts - to be replaced with diesel mounts from 1993 truck
any other bolt or bracket not required, old exhaust brackets etc.
Issue 3 bolt power steering box mount
Solution 3 holes appear to be same location as 4 hole take extra mount from old chassis and weld to new chassis.
Issue Crossmember 4 rusted
Solution Use crossmember 4 from old chassis which has only minor surface rust
Issue Radiator support brackets rusted
Solution New from lmc
Issue Body mount rubbers shot
Solution Replace with new polyurethane blocks, sleeves (from lmc) and bolts
Issue Cracks near rear front spring mounts
Solution Remove mounts, drill crack ends, weld cracks, make backing plates for inside of chassis and new bolts.
Other stuff done.
Drilled holes for new engine chassis plates, radiator support brackets, scalloped crossmember one for engine mount bolts rhs made plate to cover oil filter hole lhs where extra support needed for engine chassis plate
Cleaned/stripped some of the chassis ready for painting.
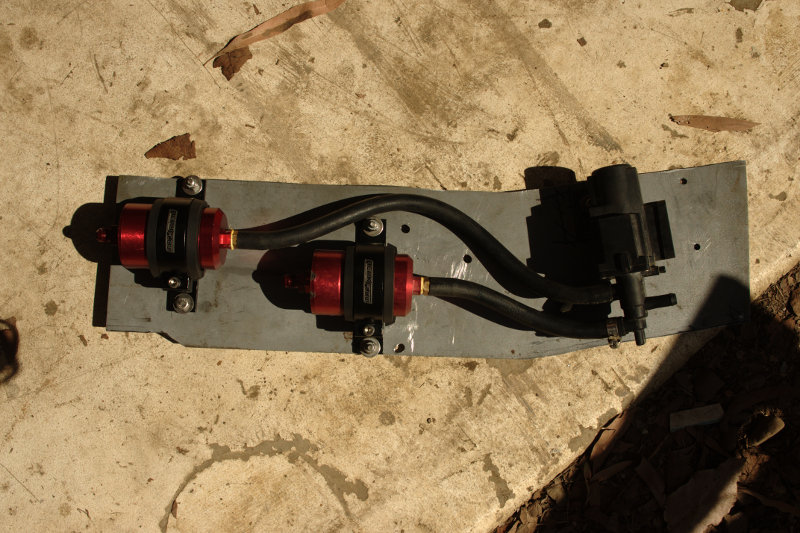
Made mounting plate for fuel filters, selector and electric lift pump.
Made wiring loom to interface diesel engine to petrol chassis.
Parts Ordered
Tuff Country Lift kit
Hydraboost brake booster and mc (thanks Jim for all the assistance in sorting out for Right Hand Drive setup)
Parts received
New radiator support brackets from LMC
New body mount retainers upper and lower from LMC
Parts sourced yet to order
Inner boot and Shift Stub (Straight) for ZF gearbox
Removed
crossmember 2 bolted - using new one from 1993 truck
crossmember 4 riveted - using one from 1986 truck
crossmember 5 bolted - reusing just easier to clean/strip for painting
radiator support mounting brackets - to be replaced
old body mount rubbers - to be replaced with poly blocks
old shock absorbers - rears from 1986 truck 4 new front ones to be added not sure yet but probably ranchos
old overload spring brackets - for sale not reusing airbags to be fitted instead
old fuel, brakelines and retaining clips - new lines to be fabricated
brake warning switch - use one from 1986 truck
engine mounts - to be replaced with diesel mounts from 1993 truck
any other bolt or bracket not required, old exhaust brackets etc.
Issue 3 bolt power steering box mount
Solution 3 holes appear to be same location as 4 hole take extra mount from old chassis and weld to new chassis.
Issue Crossmember 4 rusted
Solution Use crossmember 4 from old chassis which has only minor surface rust
Issue Radiator support brackets rusted
Solution New from lmc
Issue Body mount rubbers shot
Solution Replace with new polyurethane blocks, sleeves (from lmc) and bolts
Issue Cracks near rear front spring mounts
Solution Remove mounts, drill crack ends, weld cracks, make backing plates for inside of chassis and new bolts.
Other stuff done.
Drilled holes for new engine chassis plates, radiator support brackets, scalloped crossmember one for engine mount bolts rhs made plate to cover oil filter hole lhs where extra support needed for engine chassis plate
Cleaned/stripped some of the chassis ready for painting.
Made mounting plate for fuel filters, selector and electric lift pump.
Made wiring loom to interface diesel engine to petrol chassis.
Parts Ordered
Tuff Country Lift kit
Hydraboost brake booster and mc (thanks Jim for all the assistance in sorting out for Right Hand Drive setup)
Parts received
New radiator support brackets from LMC
New body mount retainers upper and lower from LMC
Parts sourced yet to order
Inner boot and Shift Stub (Straight) for ZF gearbox
#7
11-09-2012, 03:26 PM

Join Date: Apr 2009
Location: Man Cave
Posts: 2,135
Likes: 0
Received 0 Likes
on
0 Posts
Trending Topics
#8
11-18-2012, 01:58 AM
Join Date: Mar 2007
Location: Australia
Posts: 238
Likes: 0
Received 0 Likes
on
0 Posts
Week begining Monday 12th November 2012
Bit of an up and down week. Did not get done what I had planned, unusual things (Ergon turns the power of for a whole day) slowing it down.
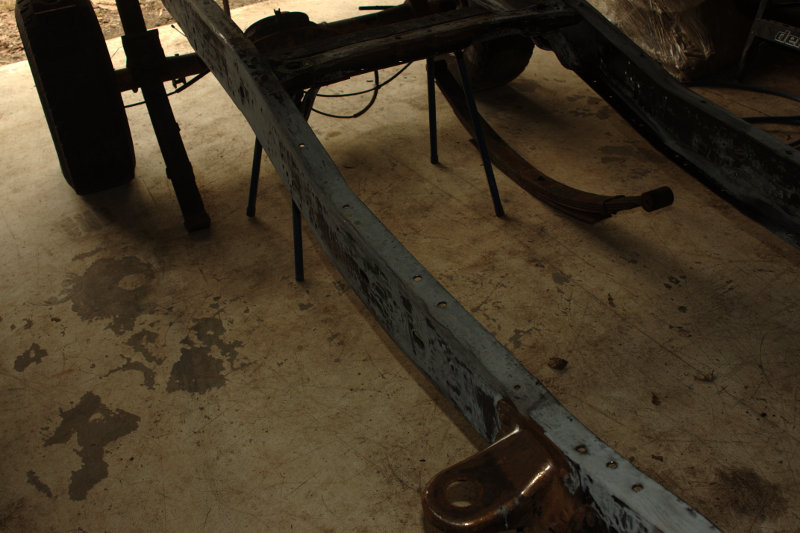
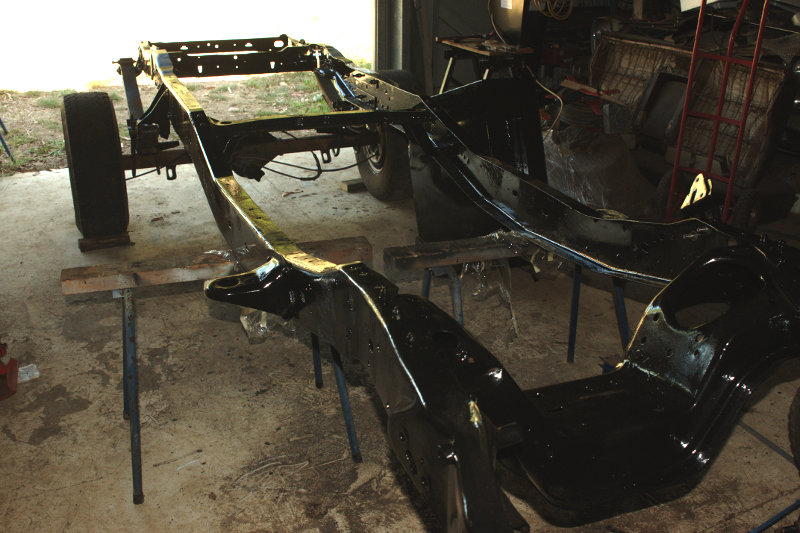
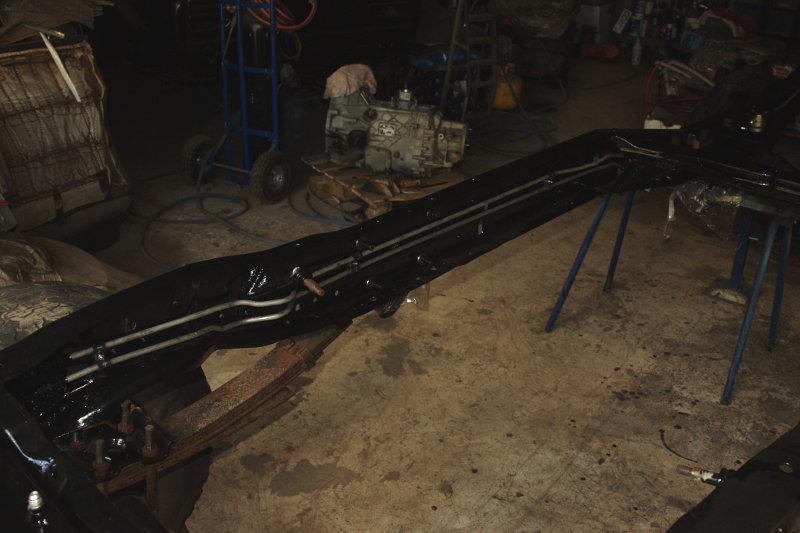
Effii gets naked....
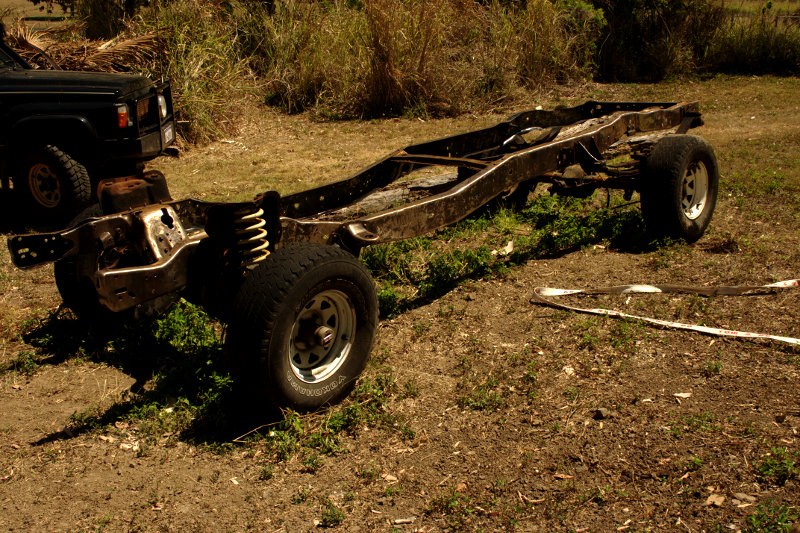
and kicks up her heels....

Well the new chassis does anyway.
Spent a three days cleaning up all the surface rust and removing the old paint.
Basically three steps, paint stripper and pressure washer to clean off as much of the old paint as possible.
Flap wheel in the angle grinder for all the flatish areas.
Wire brush in the angle grinder for all the edges, around rivets, inside corners, etc.
Removed the rivets from the rear spring front hangers to start fixing the cracks there.
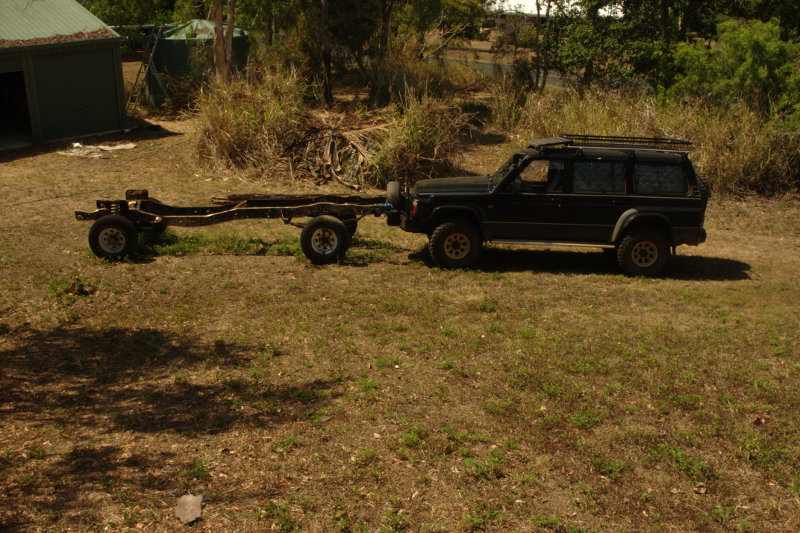
Moved the chassis into the shed (no more working out in the sun).
Parts ordered
Inner boot and Shift Stub (straight) for ZF gearbox, do I hate postage from the USA. $16 for the boot and $42 for postage.
Parts sourced
Air conditioning compressor (fortunately this is in AU), engine did not have one and as we tend to do alot of summer driving it's nice to have ac.
Cheers
Ross
Bit of an up and down week. Did not get done what I had planned, unusual things (Ergon turns the power of for a whole day) slowing it down.
Effii gets naked....
and kicks up her heels....
Well the new chassis does anyway.
Spent a three days cleaning up all the surface rust and removing the old paint.
Basically three steps, paint stripper and pressure washer to clean off as much of the old paint as possible.
Flap wheel in the angle grinder for all the flatish areas.
Wire brush in the angle grinder for all the edges, around rivets, inside corners, etc.
Removed the rivets from the rear spring front hangers to start fixing the cracks there.
Moved the chassis into the shed (no more working out in the sun).
Parts ordered
Inner boot and Shift Stub (straight) for ZF gearbox, do I hate postage from the USA. $16 for the boot and $42 for postage.
Parts sourced
Air conditioning compressor (fortunately this is in AU), engine did not have one and as we tend to do alot of summer driving it's nice to have ac.
Cheers
Ross
#9
11-25-2012, 02:36 AM
Join Date: Mar 2007
Location: Australia
Posts: 238
Likes: 0
Received 0 Likes
on
0 Posts
Week begining Monday 19th November 2012
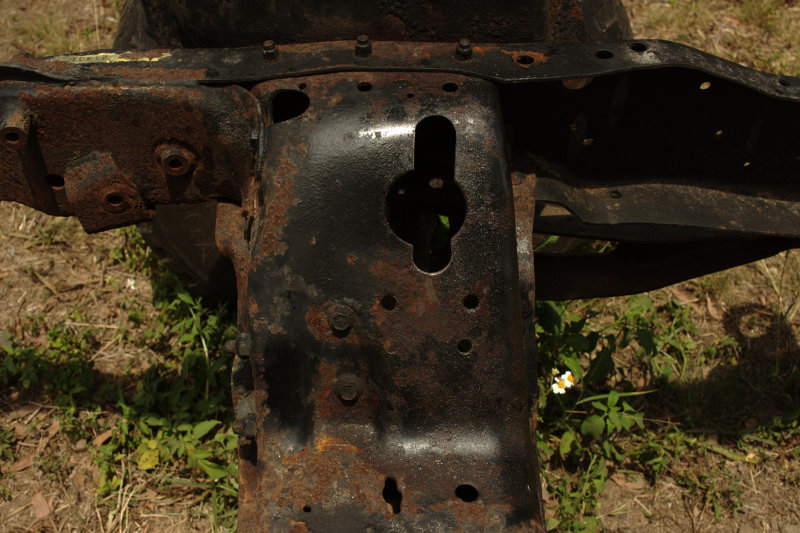
Repaired the cracks near the rear front spring hanger.
Cracks from the inside

Cracks
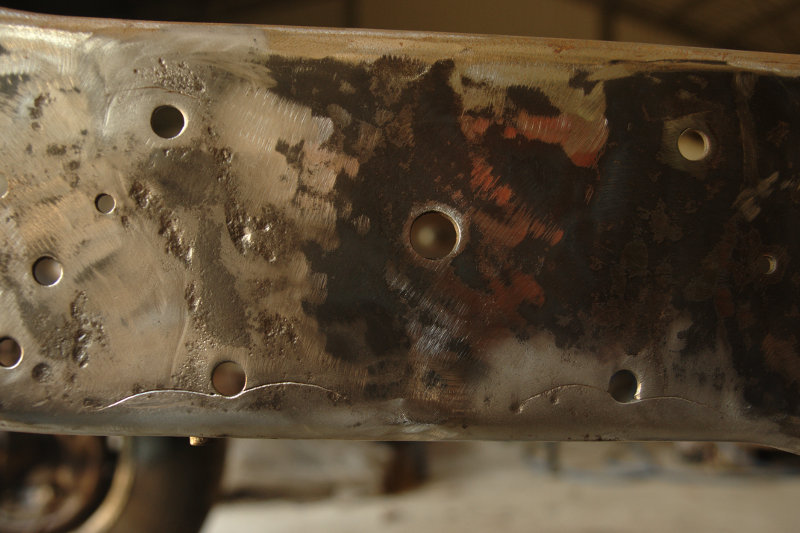
End drilled
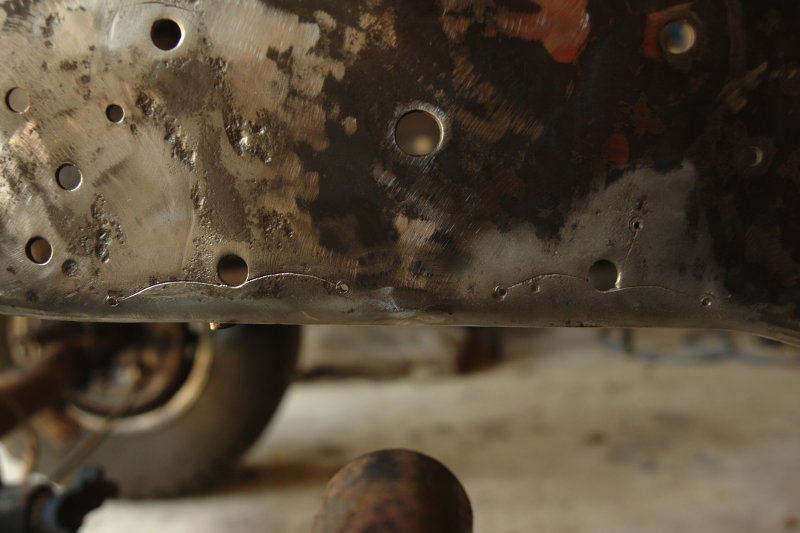
Welded on inside looking at the outside
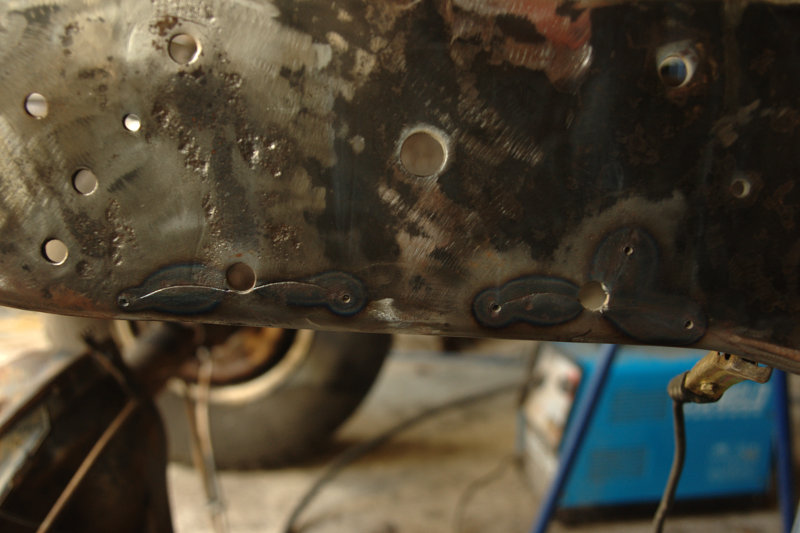
New backing plates

Coated chassis with Metal Ready in preparation for painting with POR15.
Painted rear two thirds of chassis so that I don't have to redo the prep later, just sand back the junction line.
Still have some more work to do on the front before painting that section. Waiting for the lift kit which was supposed to be here monday.
Can't find my air bags that I bought about 3 years ago which are somewhere in the shed, so spent some time cleaning up and still can't find them. Leave them for now as they will probably turn up and I'll fit them then.
Started on new fuel lines and brake hardlines.
Found the airbags, behind the old tools box, behind the tool boxes. Really need to spend some time cleaning up.
Repaired the cracks near the rear front spring hanger.
Cracks from the inside
Cracks
End drilled
Welded on inside looking at the outside
New backing plates
Coated chassis with Metal Ready in preparation for painting with POR15.
Painted rear two thirds of chassis so that I don't have to redo the prep later, just sand back the junction line.
Still have some more work to do on the front before painting that section. Waiting for the lift kit which was supposed to be here monday.
Can't find my air bags that I bought about 3 years ago which are somewhere in the shed, so spent some time cleaning up and still can't find them. Leave them for now as they will probably turn up and I'll fit them then.
Started on new fuel lines and brake hardlines.
Found the airbags, behind the old tools box, behind the tool boxes. Really need to spend some time cleaning up.
#10
11-27-2012, 05:54 AM
Join Date: Jun 2010
Location: tasmania Australia
Posts: 308
Likes: 0
Received 0 Likes
on
0 Posts
hey mate awesome job your doing!! i just have one question, why didnt you buy a f250 or f350 chassis since your going this far? I had a f150 with a 460 once and was most unreliable thing ever because of weight on f150 chassis cracked it everywhere and the d44s where definatly not up to the task of extra weight and torque. Last truck i had was a 7.3 idi and they are a heavy engine, so i would worry about a 150 chassis. I mean its this far down now, why not beef it up from here?
#11
11-27-2012, 05:37 PM
Join Date: Mar 2007
Location: Australia
Posts: 238
Likes: 0
Received 0 Likes
on
0 Posts
Thanks.
Well for starters it's a F100 not a F150  .
.
I looked into this when I bought the chassis, F250 ($2500) beside the F100 ($512). The F100 chassis was also in considerably better condition.
The rails of the chassis at this vintage are all the same, only difference is in the number of crossmembers (one more in the F350) and the layout of the crossmember under the engine, no mounts for the TTB on the F350.
So given that the only difference between F100, F250 and F350 (at this vintage) is the diff's there was no point in trying to find a F250 or F350 chassis and paying exorbitantly for the diffs with it. ($512 for the one I bought as opposed to $2500 for F250/F350 at the time).
ARB air locker D44 centers are good for 1000hp/1000 ftlb, axles maybe not but I've got six of each side, and if I need to replace I'll go with chrome moly.
The 9in rear Detroit TruTrac is more than capable of the output from the idi, likewise the 31 spline axles.
And I'd still be limited to the GVM of the F100 as that's what's it's registered as.
Cheers
Ross
i just have one question, why didnt you buy a f250 or f350 chassis since your going this far? I had a f150 with a 460 once and was most unreliable thing ever because of weight on f150 chassis cracked it everywhere and the d44s where definatly not up to the task of extra weight and torque. Last truck i had was a 7.3 idi and they are a heavy engine, so i would worry about a 150 chassis. I mean its this far down now, why not beef it up from here?
.I looked into this when I bought the chassis, F250 ($2500) beside the F100 ($512). The F100 chassis was also in considerably better condition.
The rails of the chassis at this vintage are all the same, only difference is in the number of crossmembers (one more in the F350) and the layout of the crossmember under the engine, no mounts for the TTB on the F350.
So given that the only difference between F100, F250 and F350 (at this vintage) is the diff's there was no point in trying to find a F250 or F350 chassis and paying exorbitantly for the diffs with it. ($512 for the one I bought as opposed to $2500 for F250/F350 at the time).
ARB air locker D44 centers are good for 1000hp/1000 ftlb, axles maybe not but I've got six of each side, and if I need to replace I'll go with chrome moly.
The 9in rear Detroit TruTrac is more than capable of the output from the idi, likewise the 31 spline axles.
And I'd still be limited to the GVM of the F100 as that's what's it's registered as.
Cheers
Ross
#12
11-28-2012, 05:55 AM
Join Date: Jun 2010
Location: tasmania Australia
Posts: 308
Likes: 0
Received 0 Likes
on
0 Posts
#13
12-01-2012, 04:18 PM
Join Date: Apr 2009
Location: Man Cave
Posts: 2,135
Likes: 0
Received 0 Likes
on
0 Posts
#14
12-02-2012, 05:55 AM
Join Date: Mar 2007
Location: Australia
Posts: 238
Likes: 0
Received 0 Likes
on
0 Posts
Week begining Monday 26th November 2012
A short week, had to drive to the next town (125kms away) to see about getting the brake flexlines made up and go to the bolt shop to get new spring hangar bolts and a few others (that's the problem of living in a town of less than 2000 people there's just not the demand for specialist products). We also had to drop my partners artwork at the gallery there.
Ergon also had the power off again for a whole day.
Cleaned up the 165lt rear fuel tank and painted it.

Cleaned and painted all bolt on brackets on chassis.
Finally got the shock mounts off the front and started cleaning up the front end of the chassis. Most of the rivets that hold these on are 3/8" and easy to remove but the rearmost one under the chassis is 9/16" and a real bugger to get out.
Drilled mounting holes for airbag mounts so they can be just be bolted in later on.
Still waiting on lift kit.
BUT the hydraboost arrived.
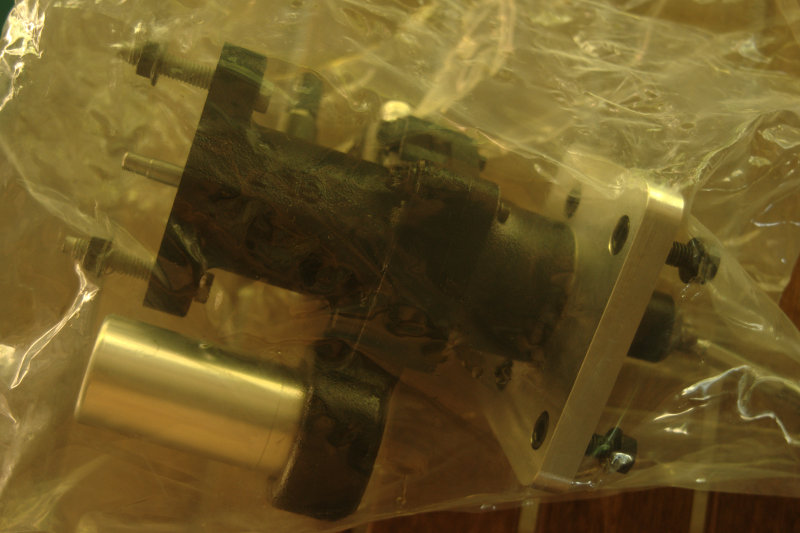
Unfortunately that's going to have to wait on the shelf until I swap over the cab.
A short week, had to drive to the next town (125kms away) to see about getting the brake flexlines made up and go to the bolt shop to get new spring hangar bolts and a few others (that's the problem of living in a town of less than 2000 people there's just not the demand for specialist products). We also had to drop my partners artwork at the gallery there.
Ergon also had the power off again for a whole day.
Cleaned up the 165lt rear fuel tank and painted it.
Cleaned and painted all bolt on brackets on chassis.
Finally got the shock mounts off the front and started cleaning up the front end of the chassis. Most of the rivets that hold these on are 3/8" and easy to remove but the rearmost one under the chassis is 9/16" and a real bugger to get out.
Drilled mounting holes for airbag mounts so they can be just be bolted in later on.
Still waiting on lift kit.
BUT the hydraboost arrived.
Unfortunately that's going to have to wait on the shelf until I swap over the cab.
#15
12-09-2012, 07:25 PM
Join Date: Mar 2007
Location: Australia
Posts: 238
Likes: 0
Received 0 Likes
on
0 Posts
Week begining Monday 3rd December 2012
Finished painting the chassis.
All the brackets are painted and bolted back on to the chassis except transmission crossmember which I'll have to drill new holes for.
Fitted the rear fuel tank.
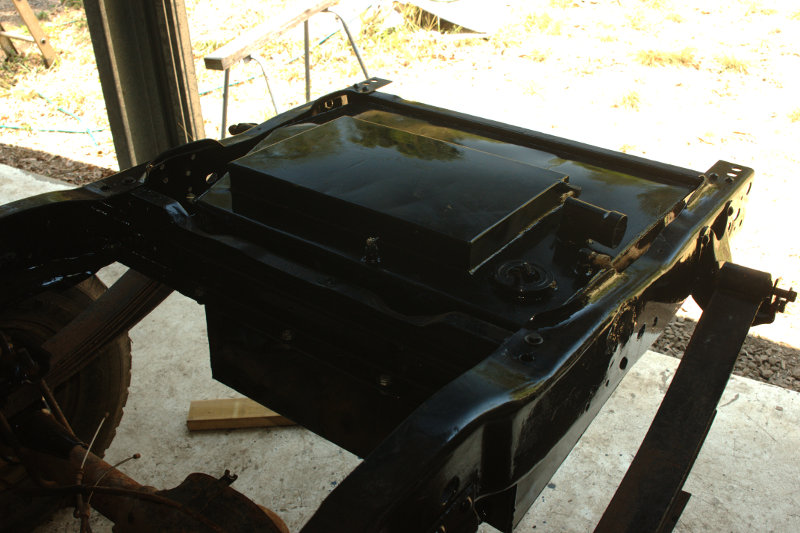
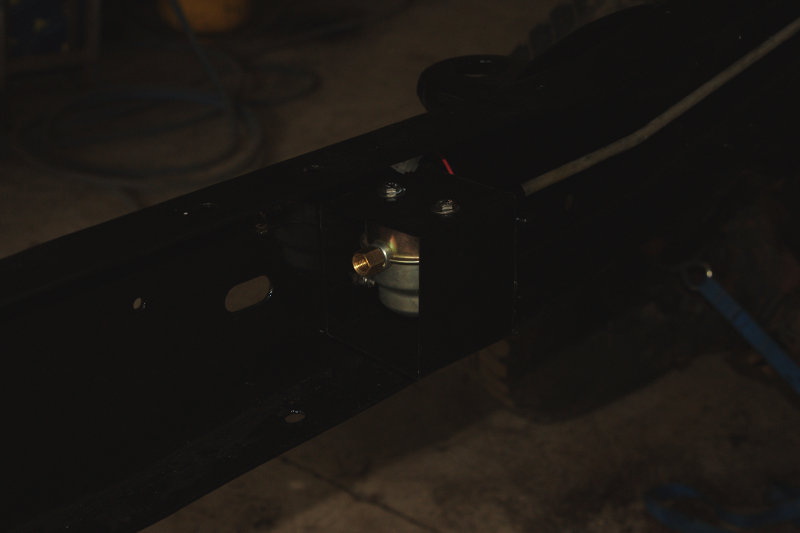
Fitted the fuel selector and filters. Still have to fit all the flex lines.

Fitted the electric fuel pump.
Fitted all the fuel hardlines.

Still waiting on the lift kit, hopefully it will be here this week.
Finished painting the chassis.
All the brackets are painted and bolted back on to the chassis except transmission crossmember which I'll have to drill new holes for.
Fitted the rear fuel tank.
Fitted the fuel selector and filters. Still have to fit all the flex lines.
Fitted the electric fuel pump.
Fitted all the fuel hardlines.
Still waiting on the lift kit, hopefully it will be here this week.