
How to: Rear window wiper motor test and replacement
#1
 09-26-2012, 10:33 PM

How to: Rear window wiper motor test and replacement
Is it just me or does the rear wiper motor seize and go out on every vehicle? It is just inevitable…it is like a starter or an alternator, just know eventually it is going to go.
Before you dive in and replace the wiper motor, it doesn’t hurt to do a couple checks first just to be sure it isn’t anything else.
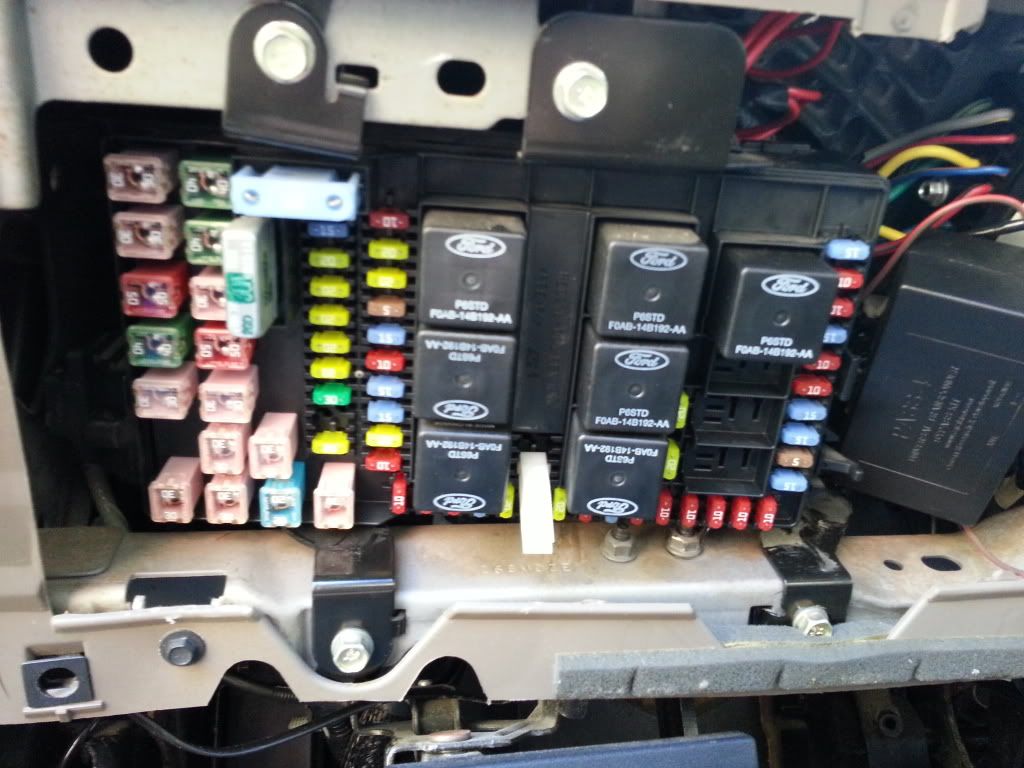
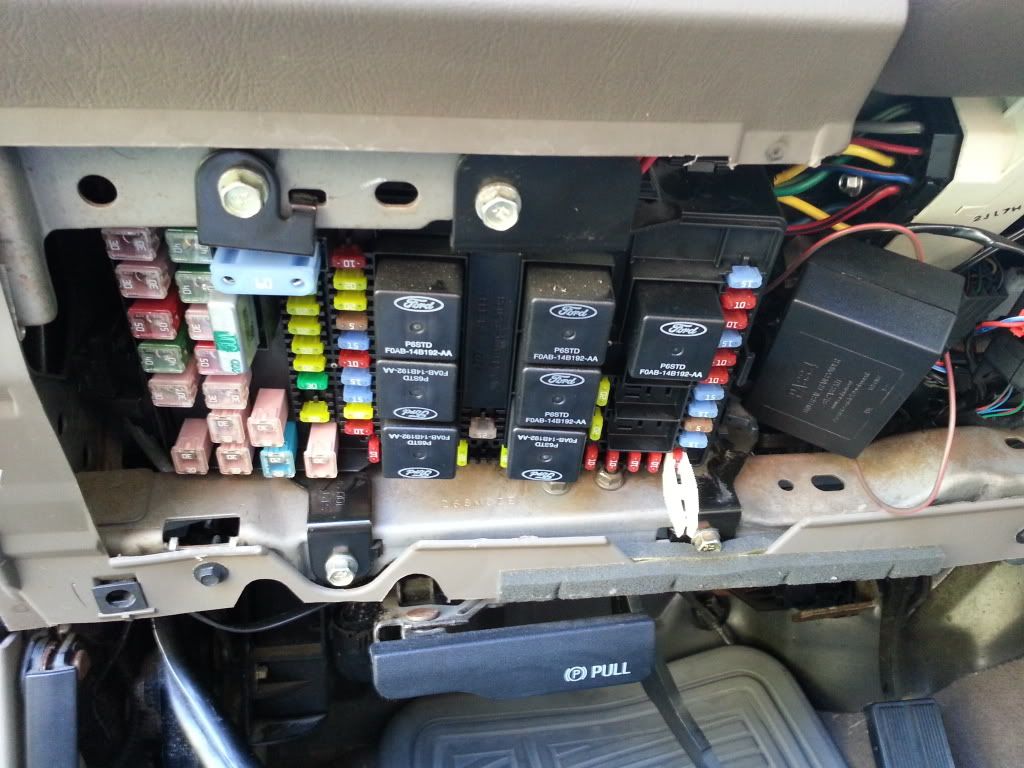
To start with remove your fuse panel and check fuses number 21 and 48. The fuse clip is on the fuses to check in the pictures

Assuming your fuses are good, next you want to make sure there isn’t a wiring issue by checking the wires at the motor.
Remove the handle off of the inside of the rear hatch using a T30 torx socket.
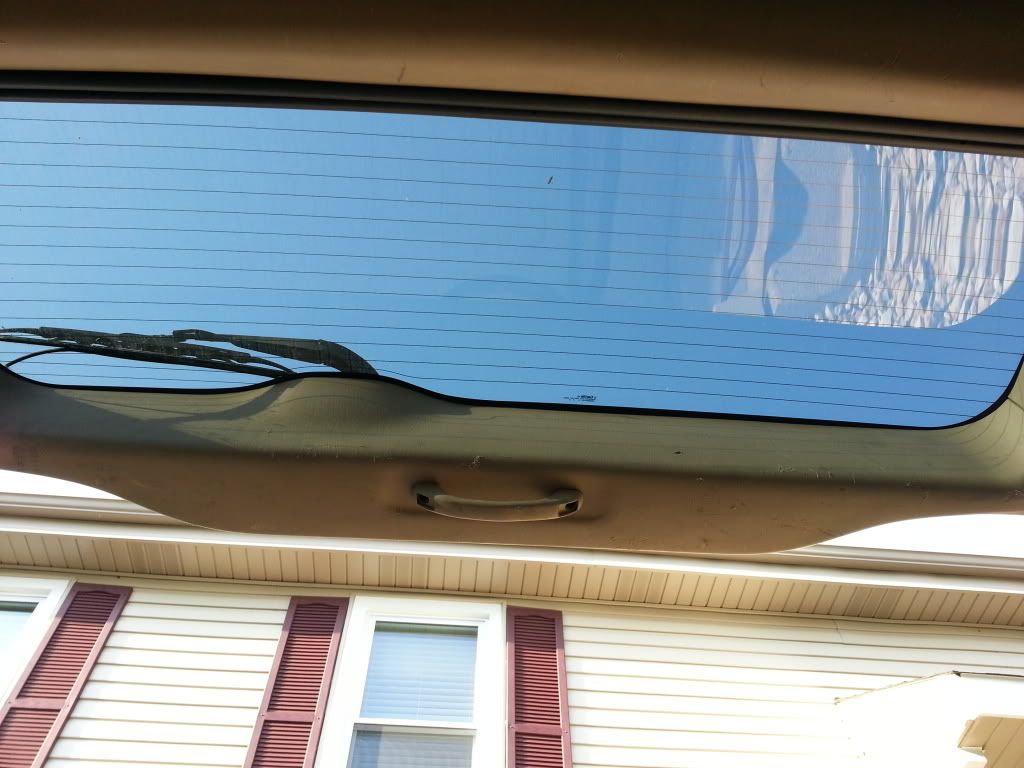

Remove the plastic shroud on the bottom of the hatch by pulling straight off
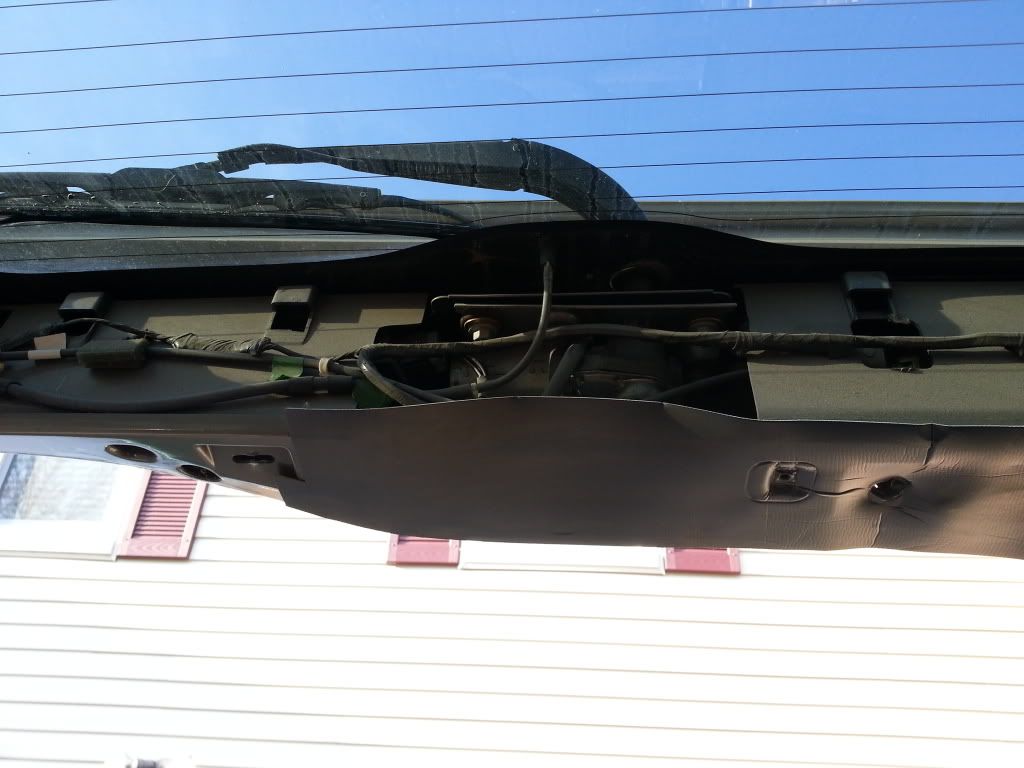
Unplug the gray connector from the wiper motor relay box
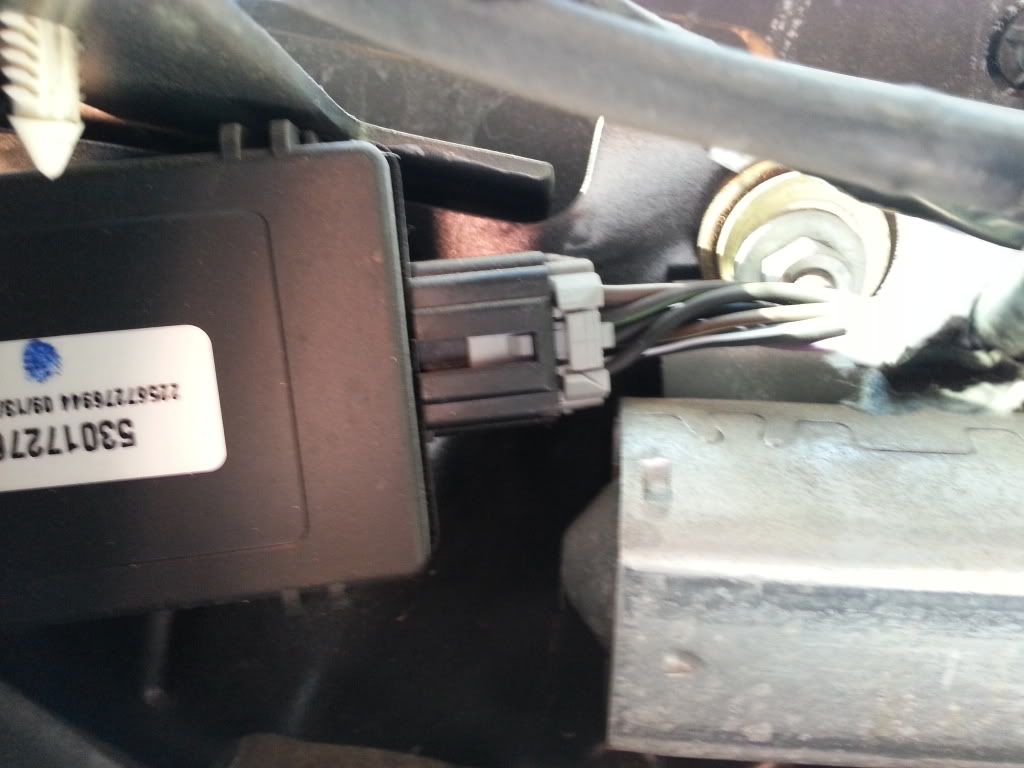
Next you want to check for power to the brown w/ white stripe wire and the black w/ green stripe wire. (the bottom left two wires in the pick)
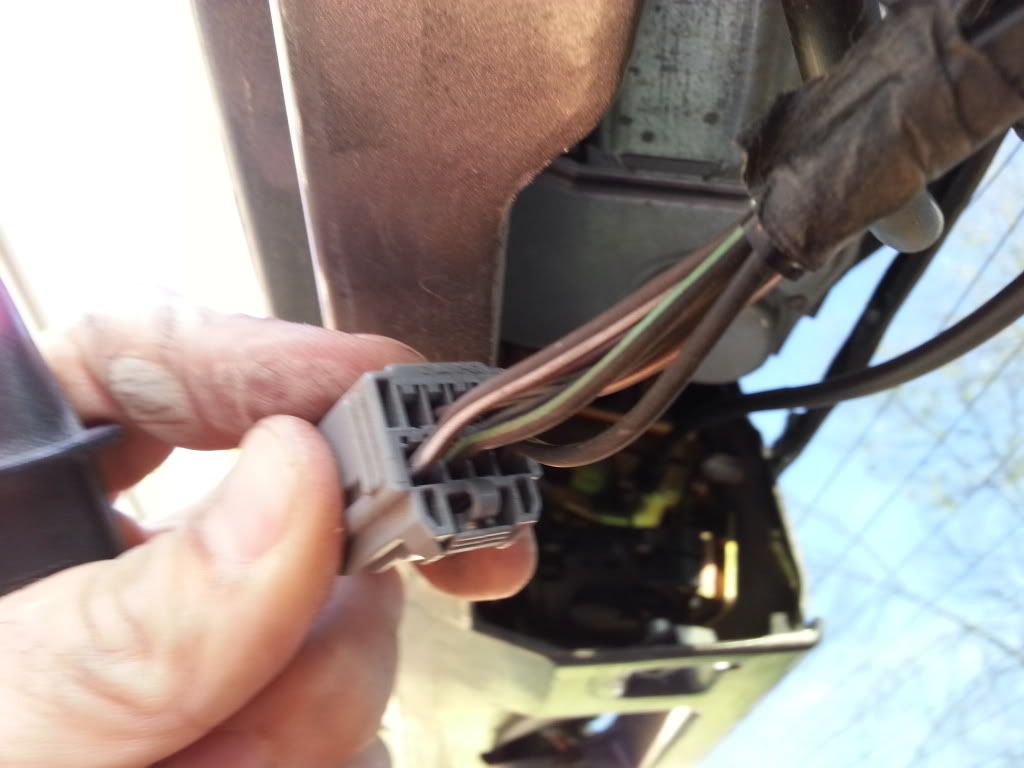
To test the wires turn the key to the on position and use a test light. Stick one end of the test light into the pin connector on the harness and the other end of the test light to a good ground on the vehicle. Do this with each of the above wires. You should show power on each, if you do not then you have a wiring issue.
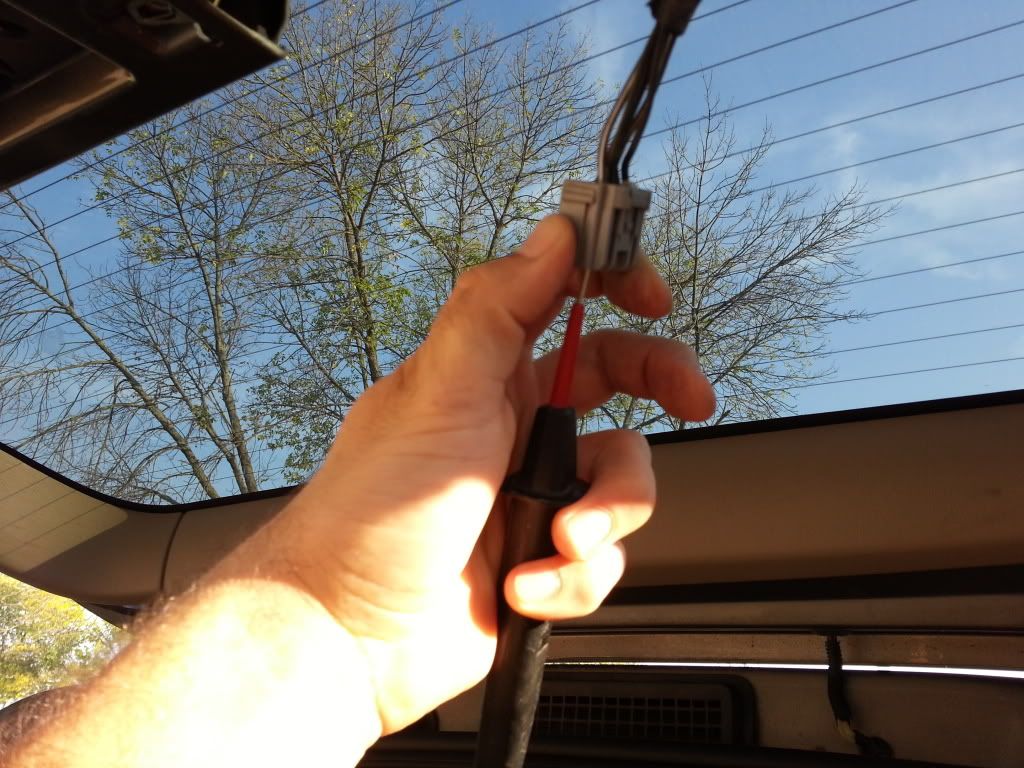

After you have confirmed power to these wires use the test light to check the grounds in the harness. There are two all black wires in the harness. Pick one of the power wires you tested above and plug one end of the test light into it. Plug the other end of the test light into the connector for one of the grounds. After showing voltage here check the other ground.

All that checked ok?? What a surprise…. You need a wiper motor!
I have found that this is the cheapest place to get a wiper motor.
http://www.ebay.com/ctg/Cardone-Indu...otor-/74961894
Cardone is the same one they sell at every auto part store but here you buy it direct for less money and no core! Only $52.34 shipped!
Start by rotating the plastic cover up on the wiper arm bolt.

Just pull straight off and the cover will come off pretty easily.
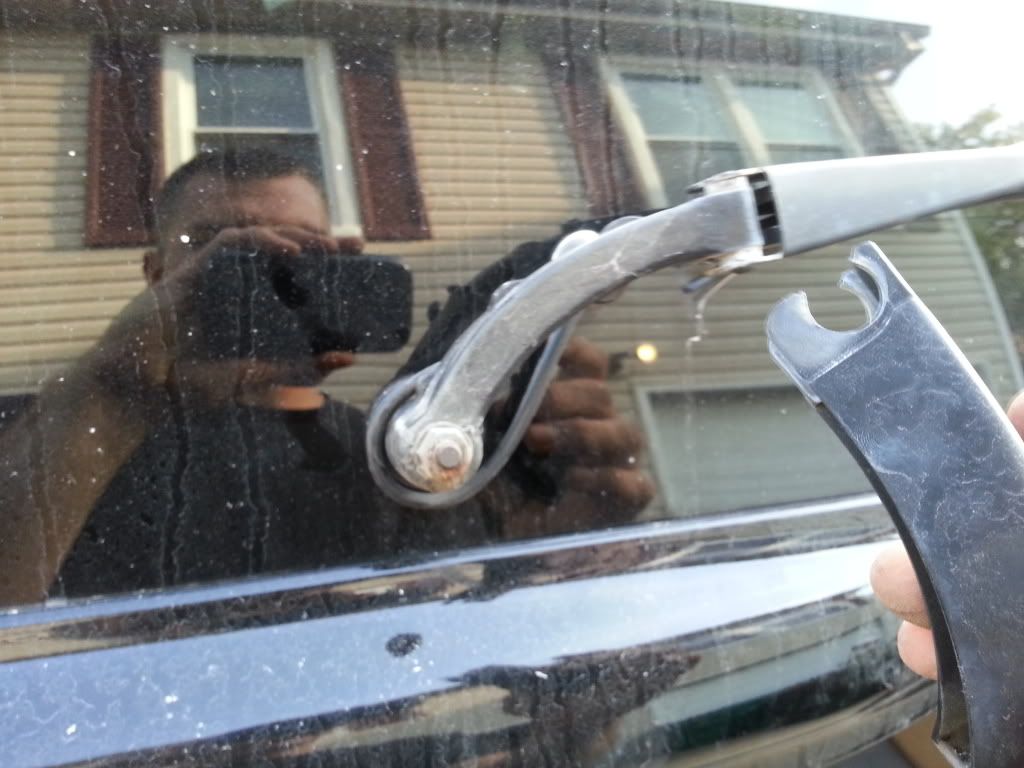
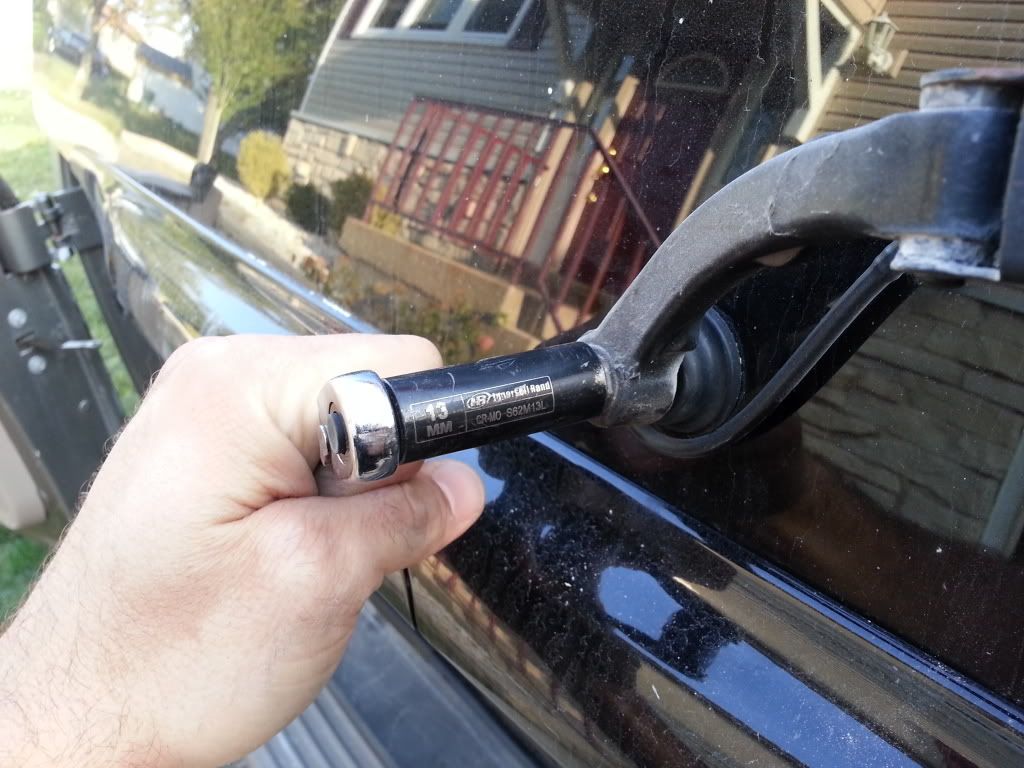
Using a 13mm socket, hold the wiper arm and remove the wiper arm retaining nut.
Pull the washer fluid line out of the window grommet.

Now for pulling the wiper arm off of the motor. It is probably loaded with corrosion which is one of the reasons why it seized in the first place. It will take some wiggling to get off. I find it easiest to tap on the head of the bolt to jar loose some of the corrosion. It may take some negotiation, but it will come off.

There are three 11mm nuts that need to be taken off to remove the motor.


The wiper motor relay box comes out by just pulling it straight down. It has two plastic push screws tabs that hold it in.

Now put in your new motor in just the reverse… put the relay box in and bolt in the motor.
Before you put the wiper arm back on make sure you clean out all of the corrosion, don’t need to start the motor failure process already.

Now put the wiper arm back on and plug the washer hose back into the glass.

Now check the operation of the wiper motor and make sure that you are satisfied with the sweep of the wiper. If not then adjust accordingly.

Hope this helps someone out.
Thanks everyone

Before you dive in and replace the wiper motor, it doesn’t hurt to do a couple checks first just to be sure it isn’t anything else.
To start with remove your fuse panel and check fuses number 21 and 48. The fuse clip is on the fuses to check in the pictures
Assuming your fuses are good, next you want to make sure there isn’t a wiring issue by checking the wires at the motor.
Remove the handle off of the inside of the rear hatch using a T30 torx socket.
Remove the plastic shroud on the bottom of the hatch by pulling straight off
Unplug the gray connector from the wiper motor relay box
Next you want to check for power to the brown w/ white stripe wire and the black w/ green stripe wire. (the bottom left two wires in the pick)
To test the wires turn the key to the on position and use a test light. Stick one end of the test light into the pin connector on the harness and the other end of the test light to a good ground on the vehicle. Do this with each of the above wires. You should show power on each, if you do not then you have a wiring issue.
After you have confirmed power to these wires use the test light to check the grounds in the harness. There are two all black wires in the harness. Pick one of the power wires you tested above and plug one end of the test light into it. Plug the other end of the test light into the connector for one of the grounds. After showing voltage here check the other ground.
All that checked ok?? What a surprise…. You need a wiper motor!
I have found that this is the cheapest place to get a wiper motor.
http://www.ebay.com/ctg/Cardone-Indu...otor-/74961894
Cardone is the same one they sell at every auto part store but here you buy it direct for less money and no core! Only $52.34 shipped!
Start by rotating the plastic cover up on the wiper arm bolt.
Just pull straight off and the cover will come off pretty easily.
Using a 13mm socket, hold the wiper arm and remove the wiper arm retaining nut.
Pull the washer fluid line out of the window grommet.
Now for pulling the wiper arm off of the motor. It is probably loaded with corrosion which is one of the reasons why it seized in the first place. It will take some wiggling to get off. I find it easiest to tap on the head of the bolt to jar loose some of the corrosion. It may take some negotiation, but it will come off.
There are three 11mm nuts that need to be taken off to remove the motor.
The wiper motor relay box comes out by just pulling it straight down. It has two plastic push screws tabs that hold it in.
Now put in your new motor in just the reverse… put the relay box in and bolt in the motor.
Before you put the wiper arm back on make sure you clean out all of the corrosion, don’t need to start the motor failure process already.
Now put the wiper arm back on and plug the washer hose back into the glass.
Now check the operation of the wiper motor and make sure that you are satisfied with the sweep of the wiper. If not then adjust accordingly.
Hope this helps someone out.
Thanks everyone
The following users liked this post:
#2
01-21-2020, 05:20 PM

More Turbo
#3
02-15-2020, 12:56 PM
My 2002 has just started having the rear wiper act up. I switch it on and it will go and stop half way back or stop in other random positions on regular wiper interval, if on number two wiper interval it is the same situation. I can get it to return to resting position after a few off/ons of the multi-function switch. I tested the power at the harness after disconnecting the motor and I have power at all the proper pins with the switch in the one and two positions. When nicer weather rolls around I will be working on that as well.
#4
06-05-2021, 06:43 AM

#5
07-29-2021, 06:41 PM

Need advise
Hello thank you for your post this is really helpful. one question I have is if you can post the part number for that relay box you referring to in your post I just bought an excursion 2004 and it seems I am missing that box in the rear liftgate because I have mismatched connectors and they are disconnected.


Thread
Thread Starter
Forum
Replies
Last Post
Walston
1957 - 1960 F100 & Larger F-Series Trucks
6
11-03-2018 02:04 PM
PapaBearYuma
1973 - 1979 F-100 & Larger F-Series Trucks
17
01-15-2017 07:31 PM
Wayne Waldrep
1948 - 1956 F1, F100 & Larger F-Series Trucks
3
12-21-2012 02:06 PM