1957 F100 build thread
#1
 09-01-2012, 01:47 PM

1957 F100 build thread
I am not too sure how long this journey will be, last one was 2 years
(1964 Comet Wagon 1964 Comet 404 V8, C4 wagon - Station Wagon Forums)
I thought I may take my time but I am getting excited whenever i think of the things I am going to do and want i want to do....here we go
It all started when i saw an abandoned 1957 Ford F100 project on Craigslist. I t actually was a truck that was running and the owner took it apart to cherry it out and never got to it. So i bought it as a project with some nice upgrades already installed (suspension mostly). So i pulled the trigger, the truck had been apart and sitting out side for over a year so there was/is some surface rust on the frame and suspension parts. Cab was off of the truck as was the entire front clip and bed, basically a rolling chassis with parts lol. Since the truck was in pieces I bought another truck, fully assembled and not running for 1K, I bought this truck as a go-bye, lol.
Here is the truck I bought for 1K

I dont really have a pic of the project truck, in its pieces n parts, lol.
I am currently working with the former owner who is a fabricator making some changes and improvements to the truck, a lot of them were ideas he had for the truck and some ideas I wanted.
Some of the specifics and mods on the truck are:
1957 Ford F100 short bed
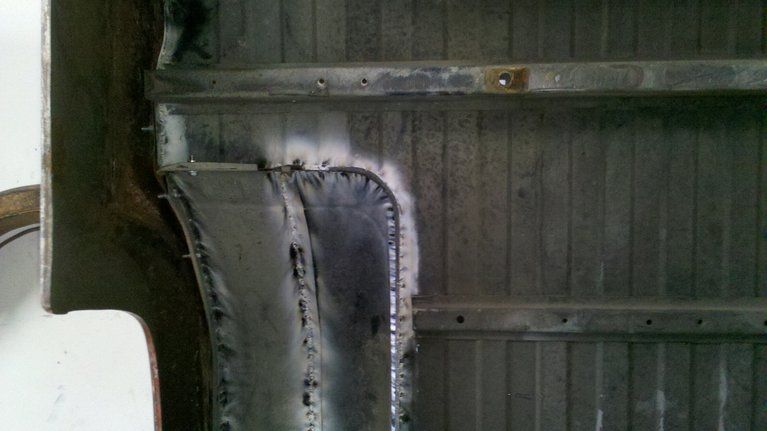
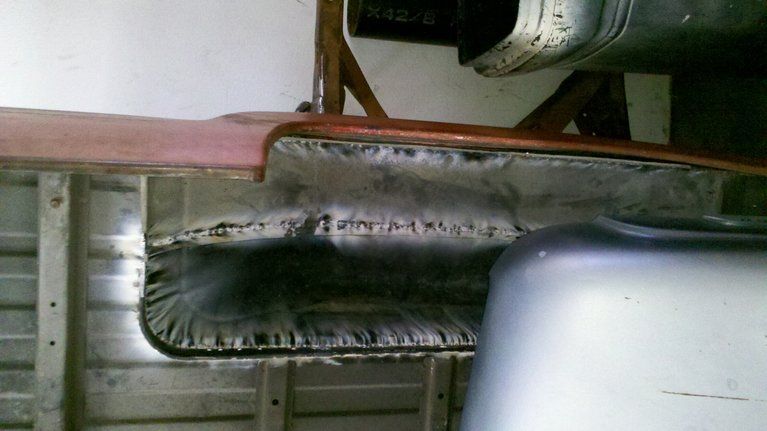
a big rear window replacement section has been welded in
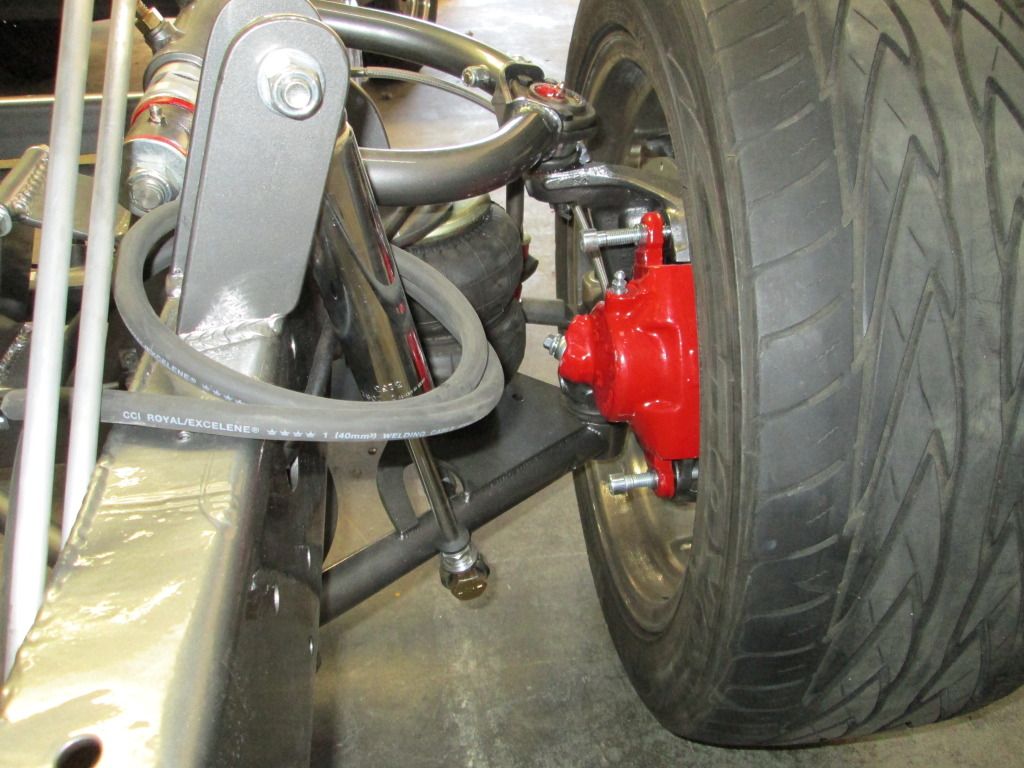
The front suspension is an A arm Air bag set up from No Limit Engineering
Power rack and pinion mounted (Front small c notch in frame for that)
Rear C notch in the frame
The rear is a No Limit 4 Link with a pan hard and some mods to the kit (basic beefing up)
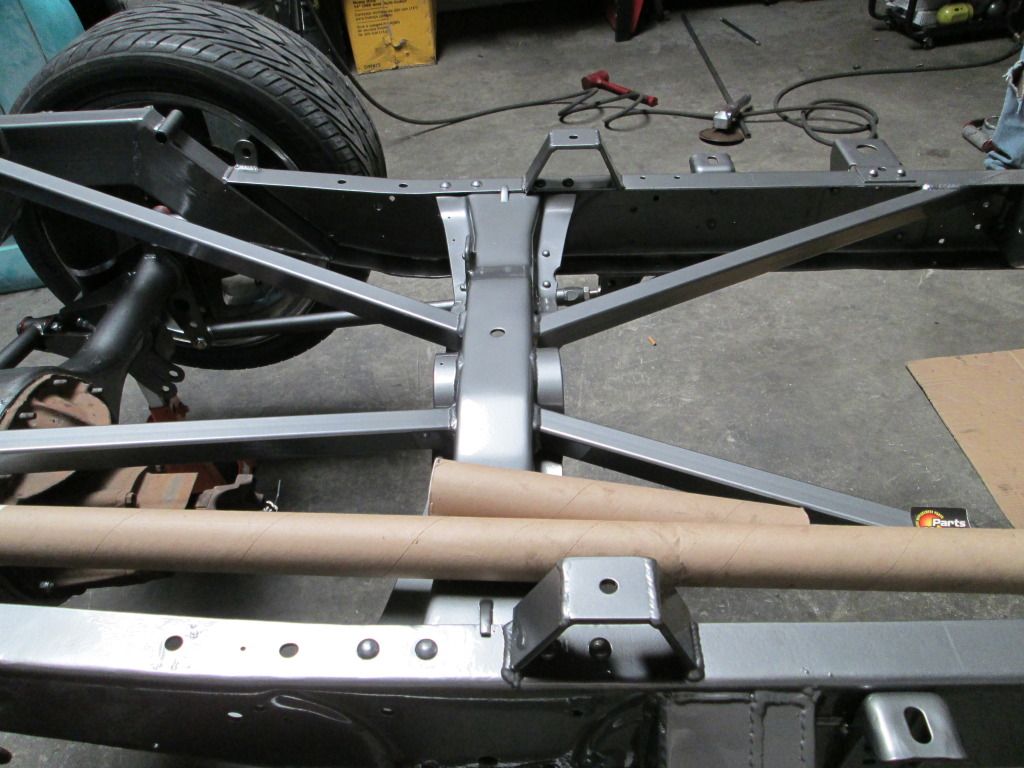
Tubular cross bracing inside the stock frame
The bed floor has been raised 4 inches
The rear wheel wells have been tubbed, (using two fender wells to make one on each side)
Frame has been beefed up at rear for trailer hitch
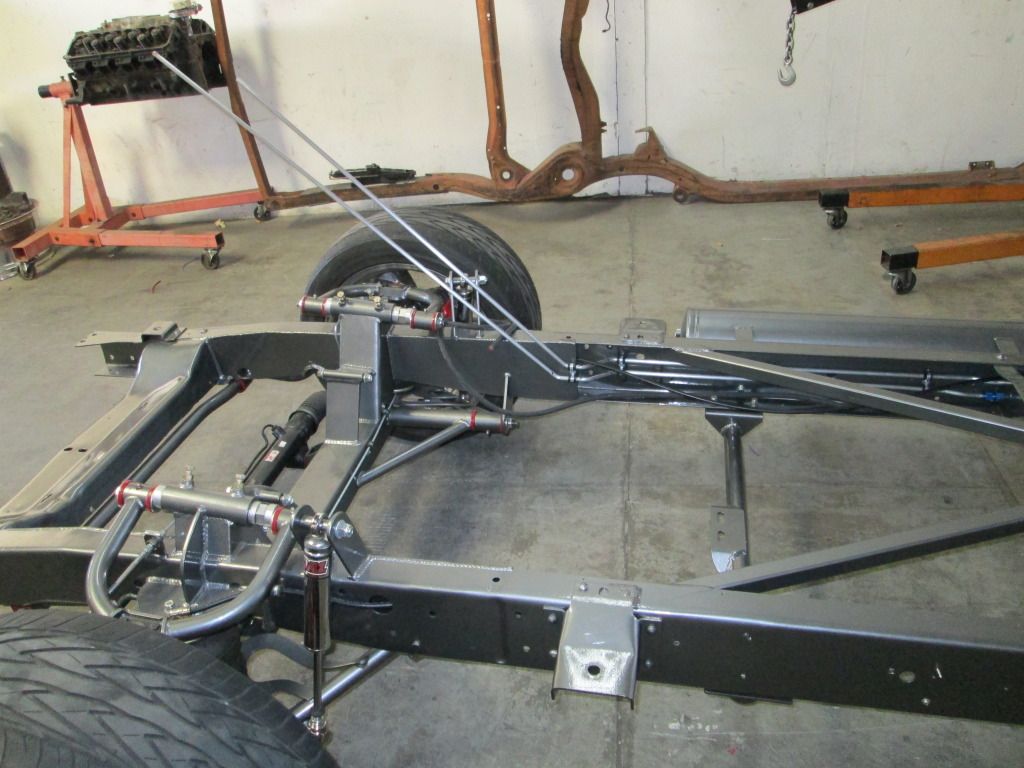
What we are currently working on is front shock mounts for small bodied QA1 shocks on the front suspension, to clear the big front tires


I am no welder so the former owner is handling the welding
Here are a couple if pics of the things I described:
Rear fender wheel and raised bed floor
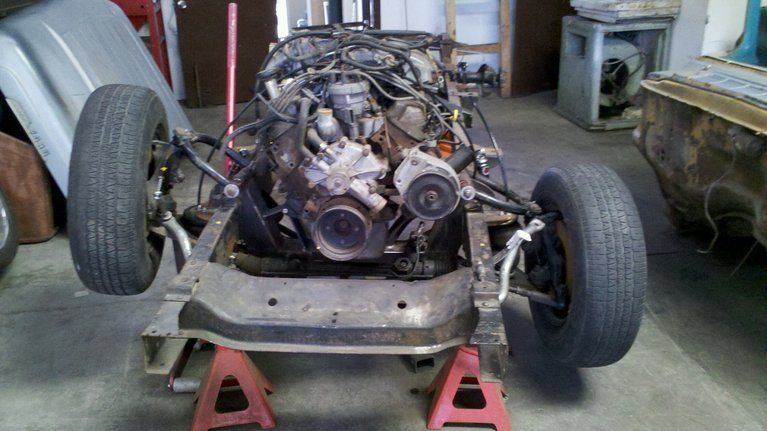
One side all the way up one side all the way down, the motor was just for mock up, 408 will be in there eventually
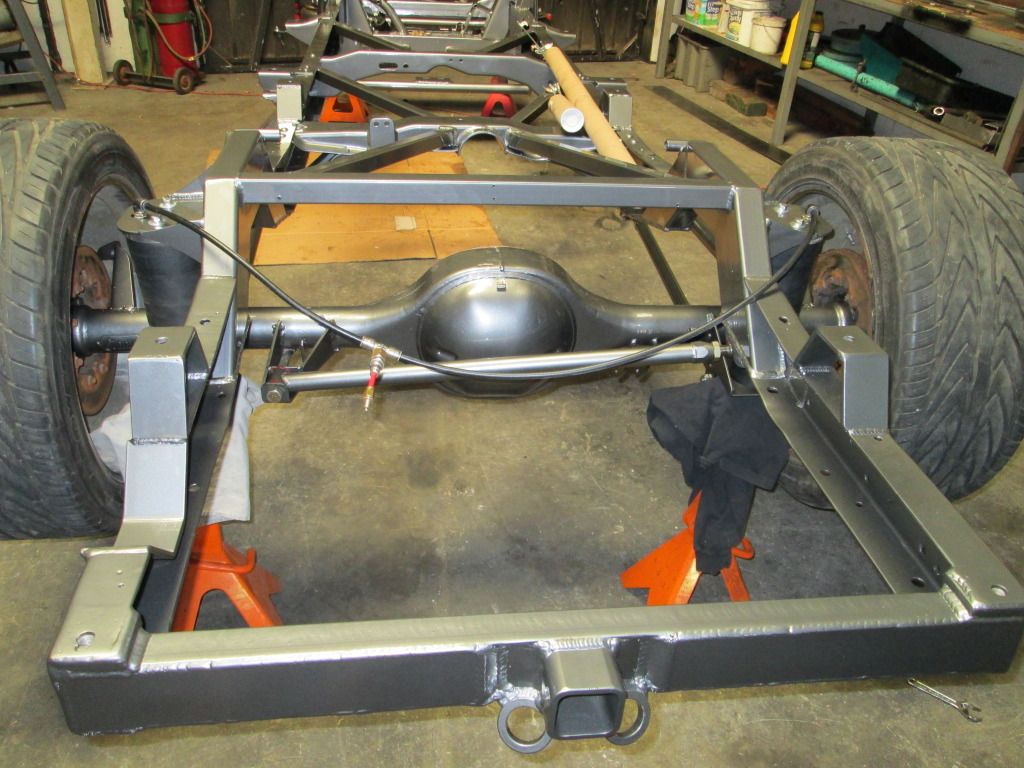
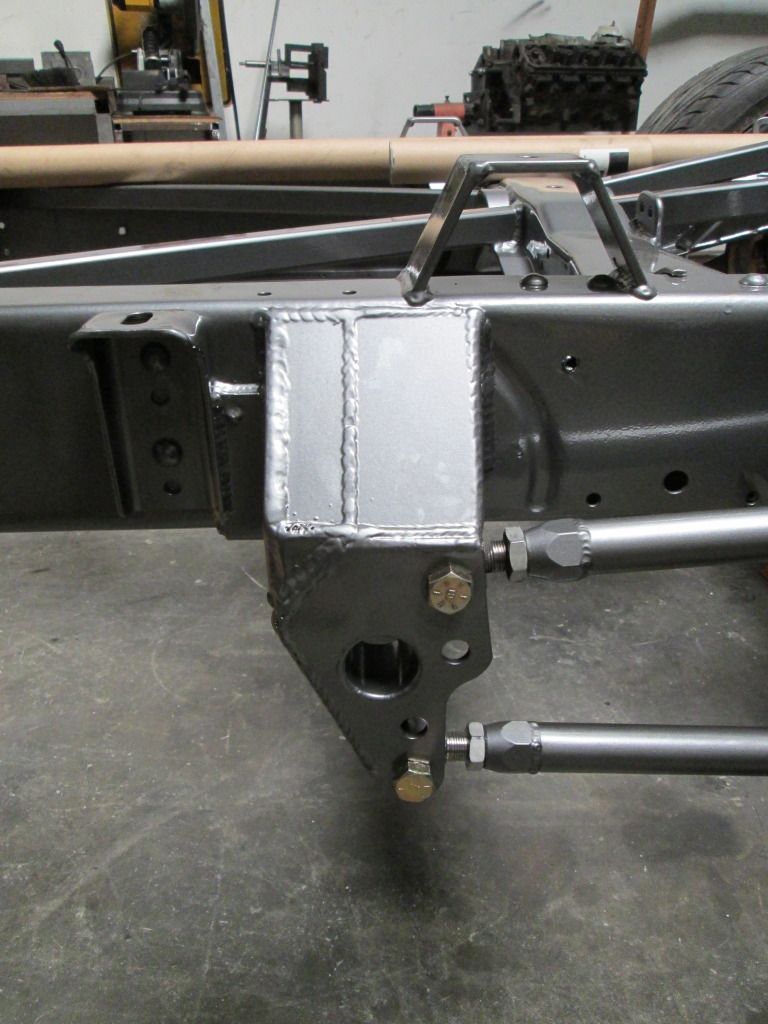
Rear of frame for hitch

Some of the cross bracing, its not all done
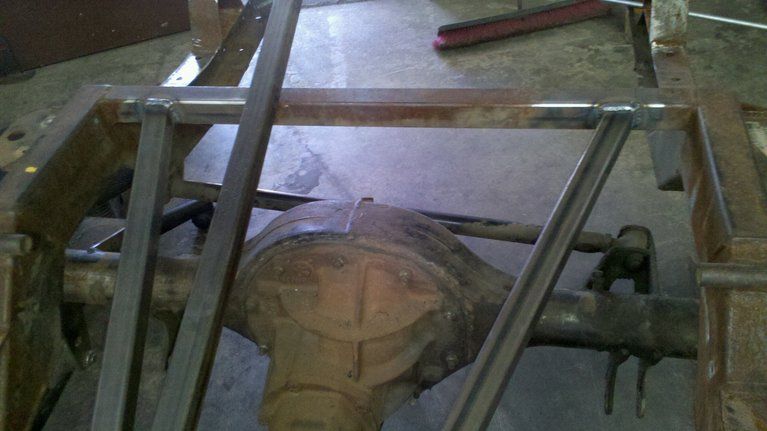
Four link and 9 inch

Rear C notch

Cab

Well that all I have for now, I usually only get one to 4 days a month to work on her so, it may take a while, I am taking and advantage of the Holiday and will take all the chassis and suspension parts in to powder coating on Monday
Stay tuned
Ryan
(1964 Comet Wagon 1964 Comet 404 V8, C4 wagon - Station Wagon Forums)
I thought I may take my time but I am getting excited whenever i think of the things I am going to do and want i want to do....here we go
It all started when i saw an abandoned 1957 Ford F100 project on Craigslist. I t actually was a truck that was running and the owner took it apart to cherry it out and never got to it. So i bought it as a project with some nice upgrades already installed (suspension mostly). So i pulled the trigger, the truck had been apart and sitting out side for over a year so there was/is some surface rust on the frame and suspension parts. Cab was off of the truck as was the entire front clip and bed, basically a rolling chassis with parts lol. Since the truck was in pieces I bought another truck, fully assembled and not running for 1K, I bought this truck as a go-bye, lol.
Here is the truck I bought for 1K
I dont really have a pic of the project truck, in its pieces n parts, lol.
I am currently working with the former owner who is a fabricator making some changes and improvements to the truck, a lot of them were ideas he had for the truck and some ideas I wanted.
Some of the specifics and mods on the truck are:
1957 Ford F100 short bed
a big rear window replacement section has been welded in
The front suspension is an A arm Air bag set up from No Limit Engineering
Power rack and pinion mounted (Front small c notch in frame for that)
Rear C notch in the frame
The rear is a No Limit 4 Link with a pan hard and some mods to the kit (basic beefing up)
Tubular cross bracing inside the stock frame
The bed floor has been raised 4 inches
The rear wheel wells have been tubbed, (using two fender wells to make one on each side)
Frame has been beefed up at rear for trailer hitch
What we are currently working on is front shock mounts for small bodied QA1 shocks on the front suspension, to clear the big front tires
I am no welder so the former owner is handling the welding
Here are a couple if pics of the things I described:
Rear fender wheel and raised bed floor
One side all the way up one side all the way down, the motor was just for mock up, 408 will be in there eventually
Rear of frame for hitch
Some of the cross bracing, its not all done
Four link and 9 inch
Rear C notch
Cab
Well that all I have for now, I usually only get one to 4 days a month to work on her so, it may take a while, I am taking and advantage of the Holiday and will take all the chassis and suspension parts in to powder coating on Monday
Stay tuned
Ryan
#2
09-01-2012, 05:16 PM

I AM staying tuned. I have a friend who's 82 years old and drives a '40 ford 1/2 ton as a daily driver all in and around Seattle for over 20 years. He once tried to sell me a '36 truck that was ENTIRELY dissassembled. I didn't have the vision to buy it. I thought that a truck should RUN in order to buy it and test drive etc. What he explained was that with it APART the buyer can see the inner lips of the fenders, the box sides, the cab floor, the inner front fenders........ you get the point. Most guys tear em down for a rebuild, and with something all apart, you actually know JUST what you are getting. I now know at 59 yeras young, that the way you did it is actually ahead of the game. Welcome and good luck. I'm a darksider too, but with an entirely different set of motives. (F350 with a 210 cu in diesel).
#3
09-02-2012, 06:45 PM

Senior User
Join Date: Nov 2008
Location: Lake Havasu City, AZ
Posts: 297
Likes: 0
Received 0 Likes
on
0 Posts
Looks to me like you got one heck of a good start on your project. I understand about lack of time to spend on it; I've certainly been there myself. When I was still a working man I became impatient with my project and took it to a shop so I could see some progress. Now that I'm retired I have more time for projects but less ducketts. Such is life.
Steve
Steve
#4
09-02-2012, 07:29 PM
Love this stuff
looking forward to retirement myself, I am eligible in 6 years but my wife says no way, There is not enough days in the week!! I am not sure how I would act if I could go to my buddys shop and work on projects all day.....then again two of his former customers do that exactly that now, they work for him 4 days a week, maybe that will be me.
This will be my first project where I get to pick/have built,,,the drive train, all others had something existing that I just built upon, looking forward, and looking forward to hangin with more trucks at the shows!!!!
Ryan
This will be my first project where I get to pick/have built,,,the drive train, all others had something existing that I just built upon, looking forward, and looking forward to hangin with more trucks at the shows!!!!
Ryan
#5
09-02-2012, 08:18 PM
Senior User
Join Date: Nov 2008
Location: Lake Havasu City, AZ
Posts: 297
Likes: 0
Received 0 Likes
on
0 Posts

I found a low mileage '95 Lincoln MkVIII to use in my '57 project.

#6
09-10-2012, 09:57 PM
little progress
Got all the running gear off and delivered to powder coater, (Anthrycite Silver) prob didnt spell that right???
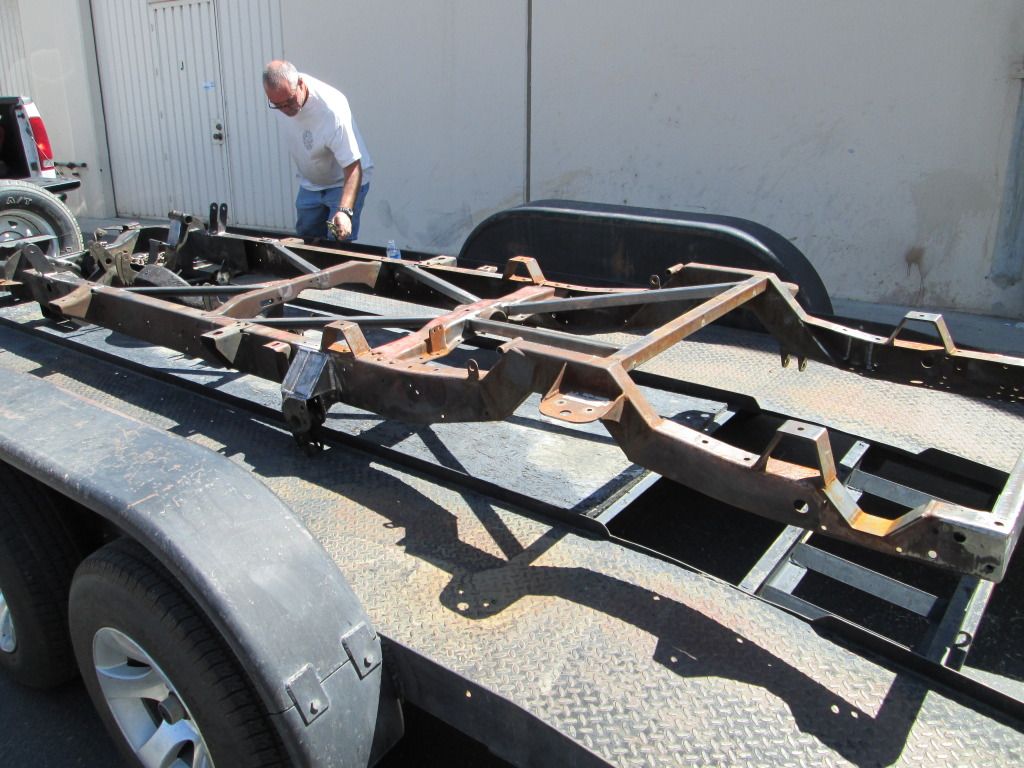
Here are a few pics of the frame, hopefully with everything welded to it we need LOL.
Boring but progress
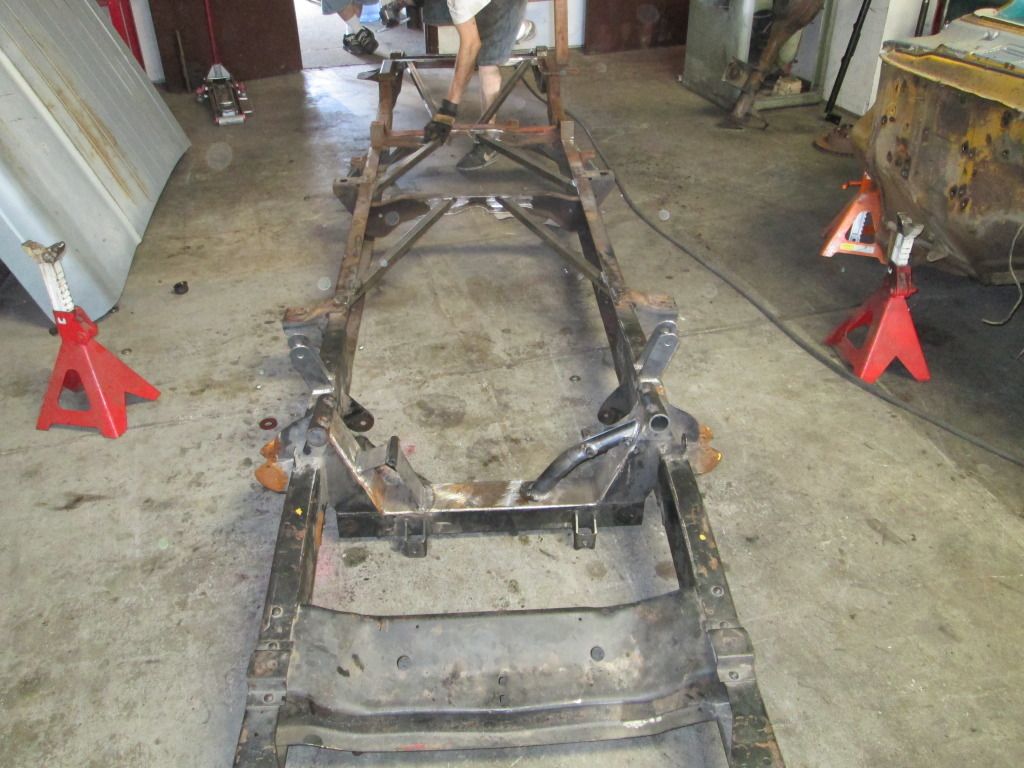

Next pics may be more FANCY??? with powder coat. Going to get it back to roller with all new bushings, new flaming river rack and old rear end for now cuz I am not sure what gearing yet.
Oh yeah the cab, bed n hood went to sandblasting as well but I dont have pics, had to go to a special place with plastic/walnut media
Stay tuned
Here are a few pics of the frame, hopefully with everything welded to it we need LOL.
Boring but progress
Next pics may be more FANCY??? with powder coat. Going to get it back to roller with all new bushings, new flaming river rack and old rear end for now cuz I am not sure what gearing yet.
Oh yeah the cab, bed n hood went to sandblasting as well but I dont have pics, had to go to a special place with plastic/walnut media
Stay tuned
#7
10-03-2012, 07:08 PM
Lil progress
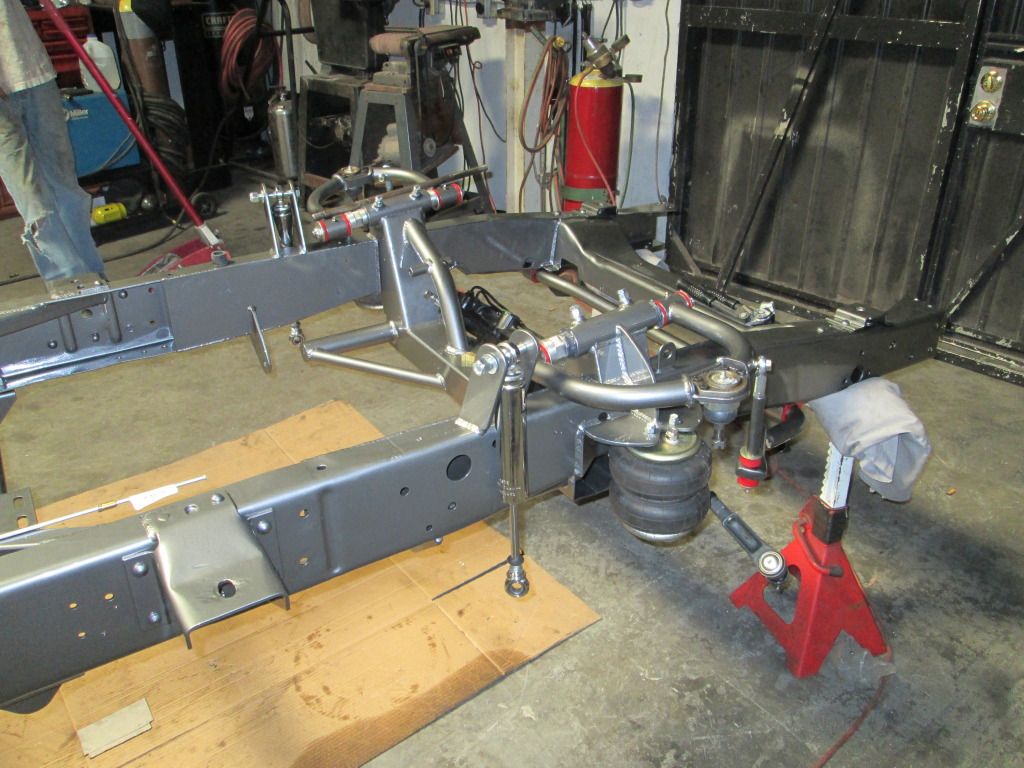
Well finally a little progress, got the parts n pieces back from the Powder Coat, then started to slap her together, of course I needed several new parts where the old parts just wouldnt do, LOL. Mostly just ball joints n nuts n bolts, n a few bushings. Lower A arms are not on yet had to have the ball joints pressed in, still at NO LIMIT.
Here are a few pics:
Next on the list is fab up brake and gas lines, and decide where to mount the valves as well as the air tank, stay tuned....So far so good, LOL
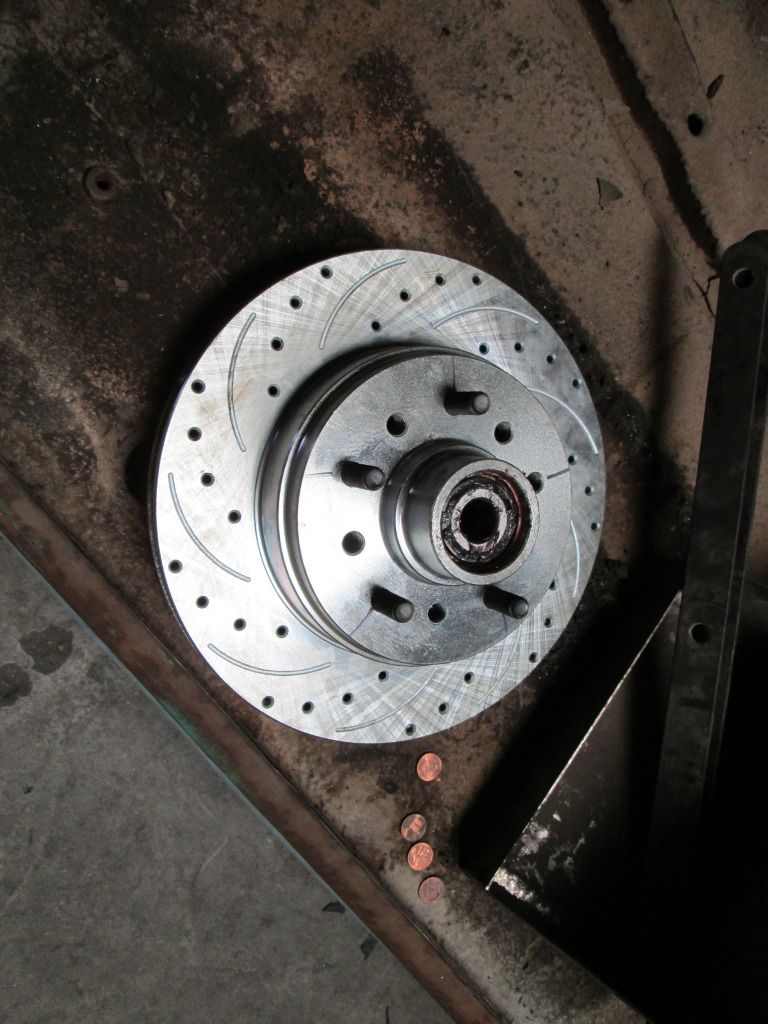
New rotors for the front
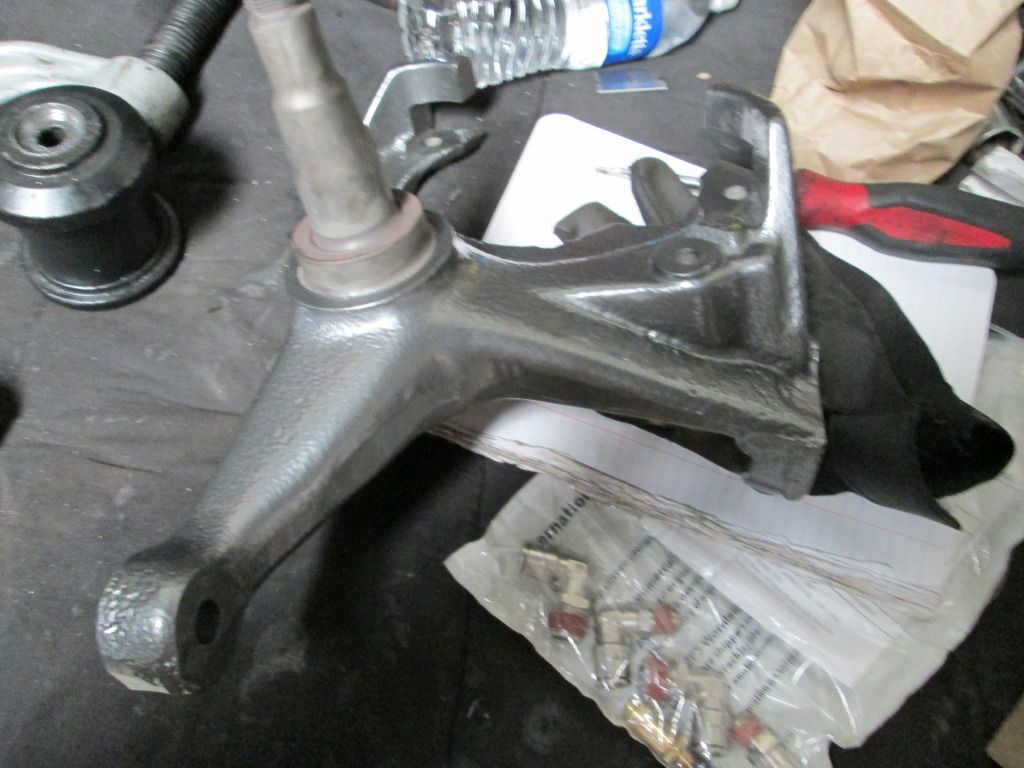
Spindles Powder coated
Few shots of front suspension minus lowers
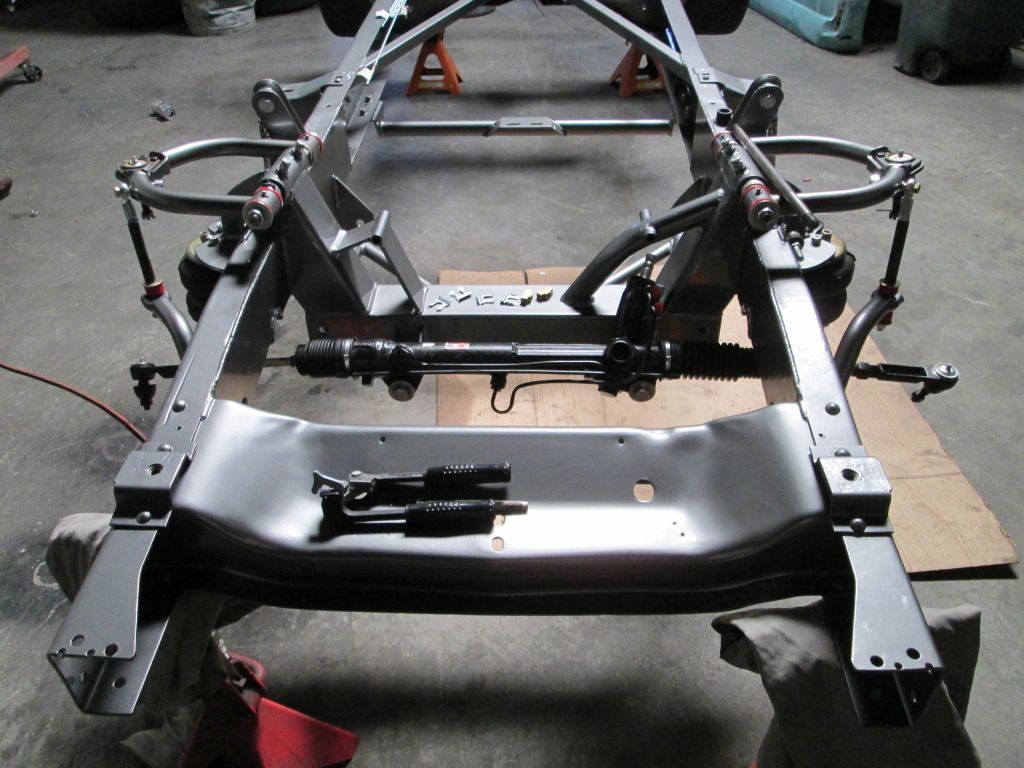
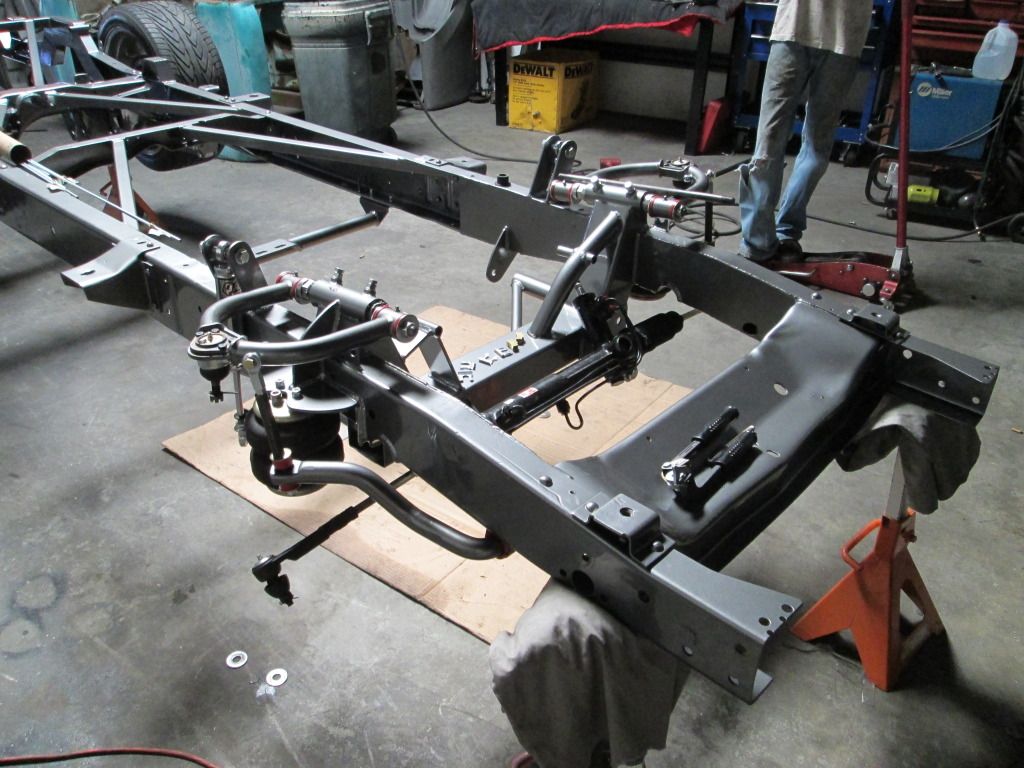


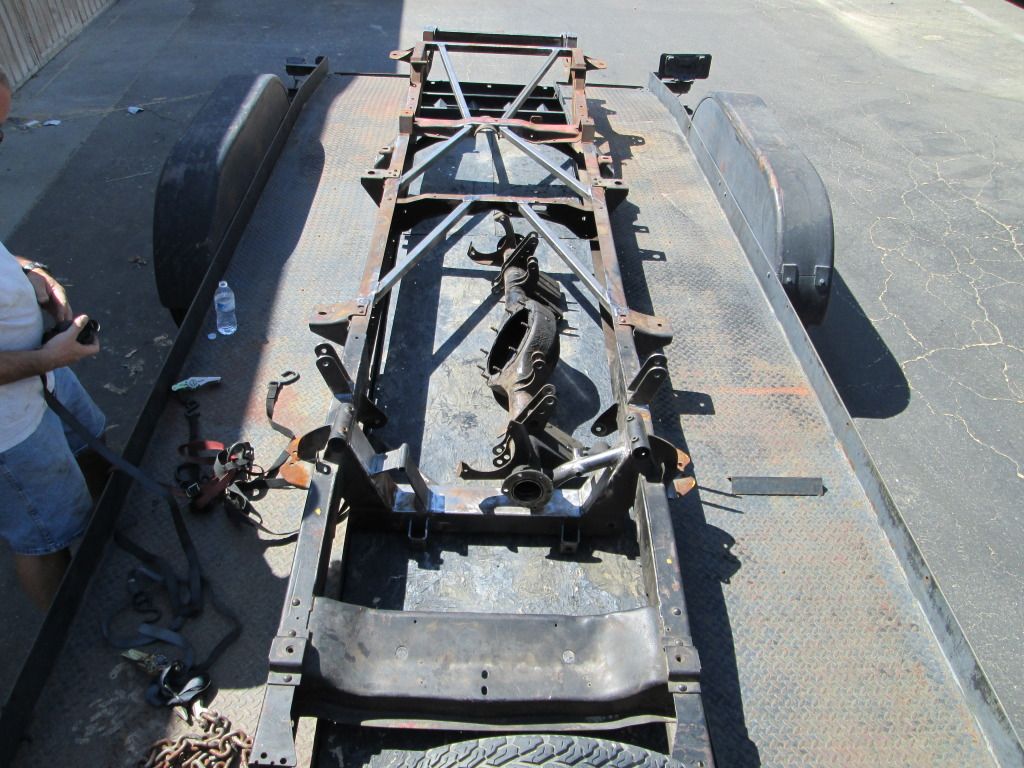
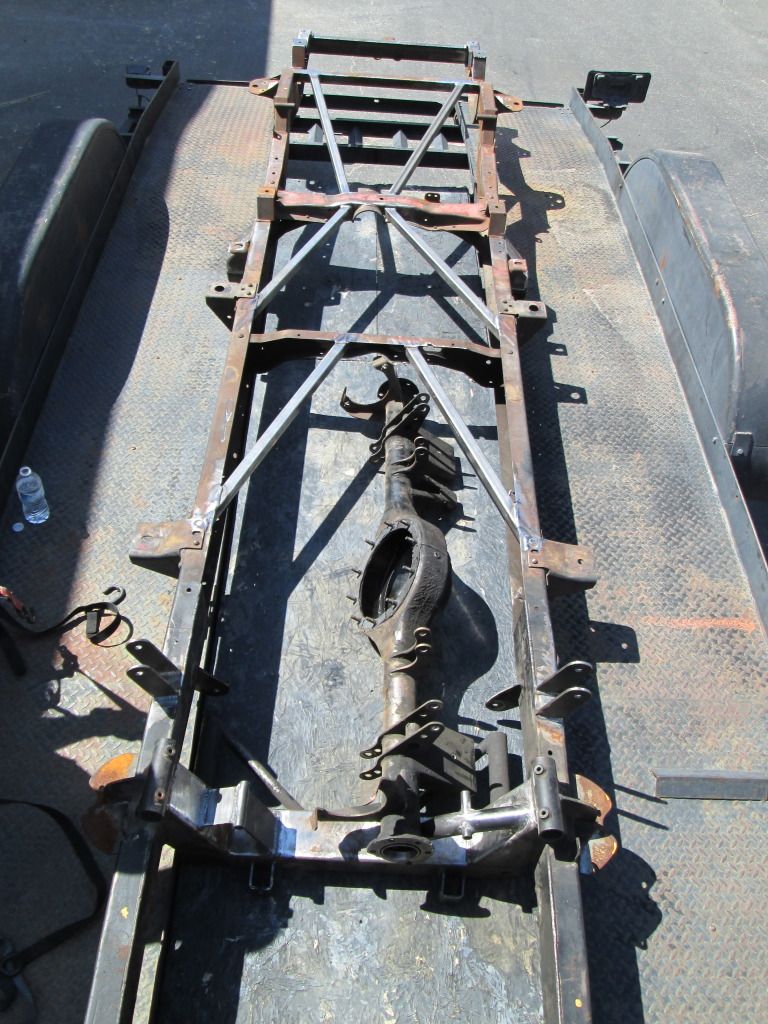
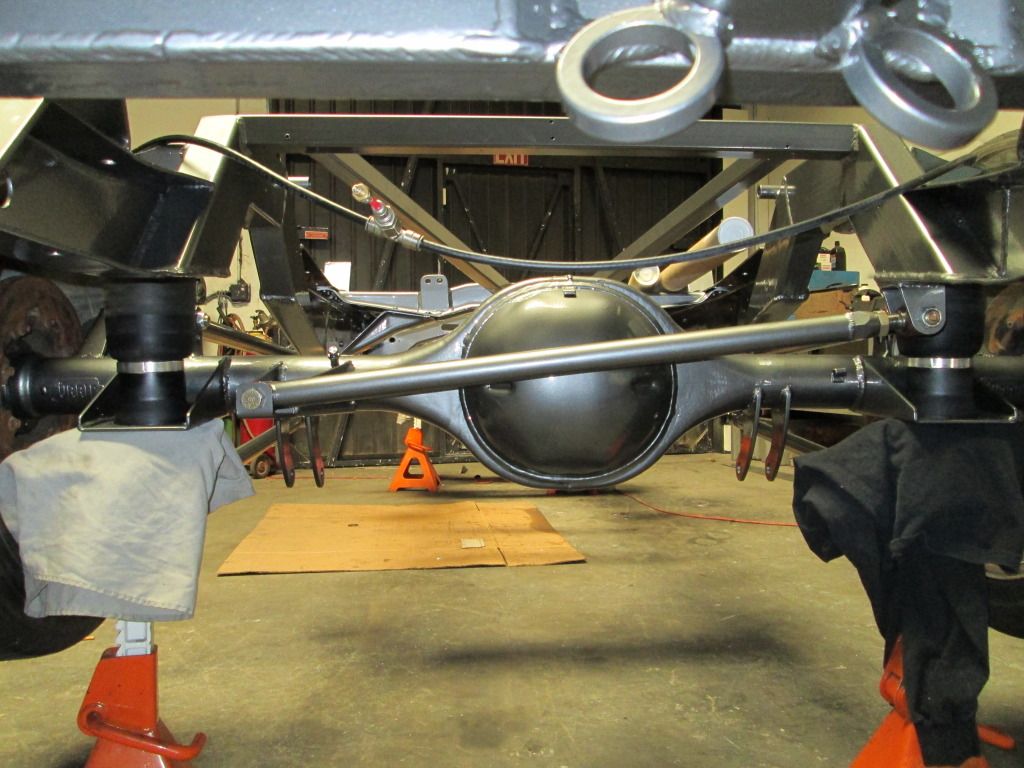
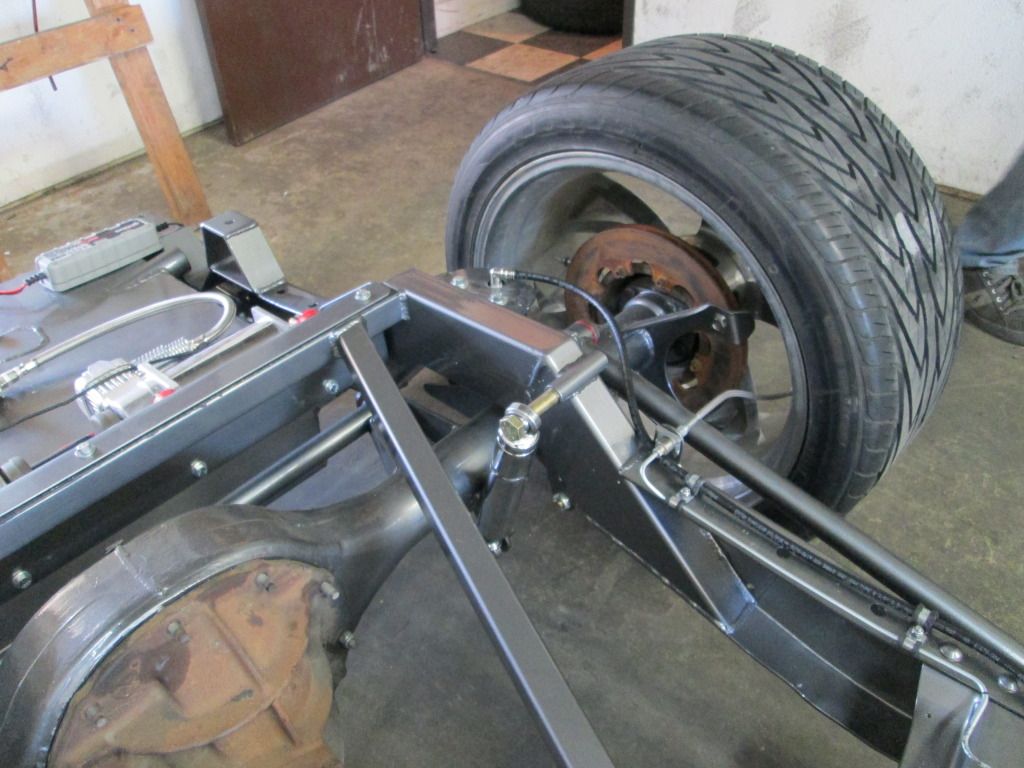
And some rear suspension pics
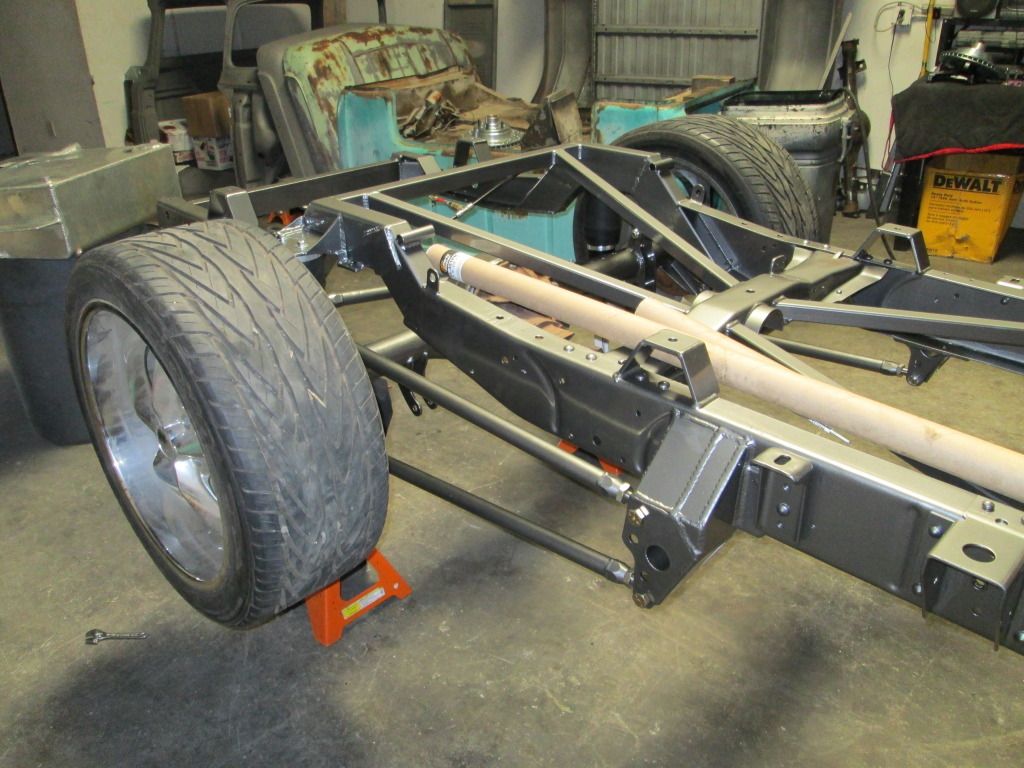
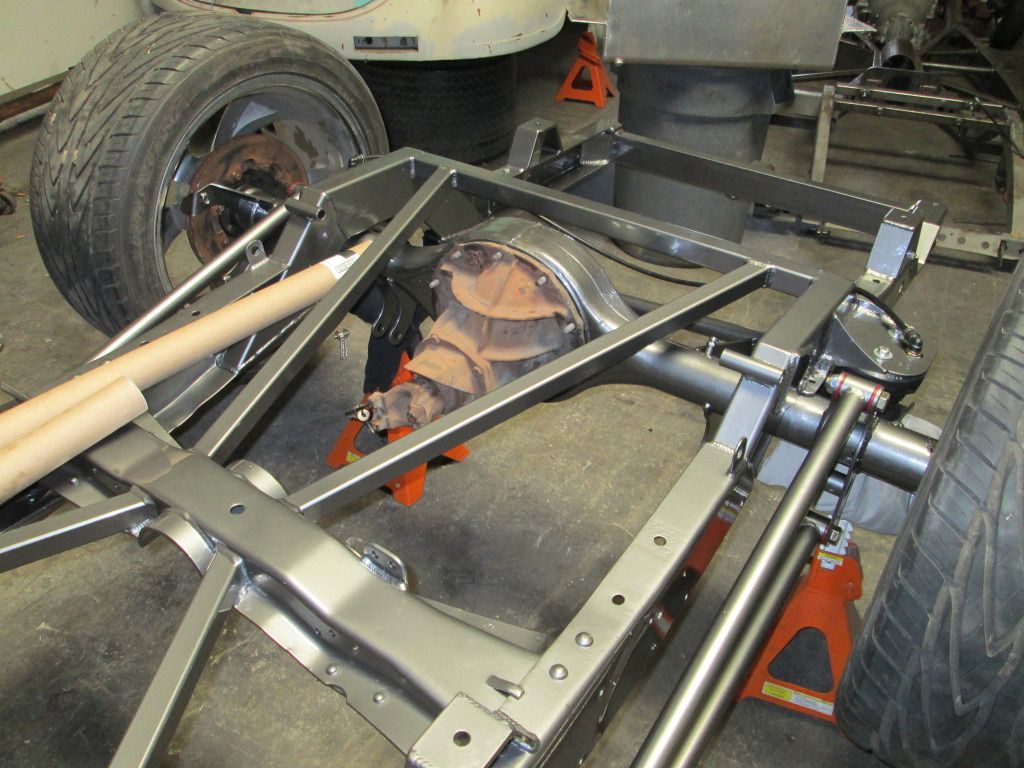

And a few of the frame in general, cross braces etc
Hope to get some more done this weekend, stay tuned
Ryan
Here are a few pics:
Next on the list is fab up brake and gas lines, and decide where to mount the valves as well as the air tank, stay tuned....So far so good, LOL
New rotors for the front
Spindles Powder coated
Few shots of front suspension minus lowers
And some rear suspension pics
And a few of the frame in general, cross braces etc
Hope to get some more done this weekend, stay tuned
Ryan
Trending Topics
#8
10-30-2012, 07:31 AM
LITTLE PROGRESS
Well been working on the truck after work and when I can, doesnt seem like a lot of progress but a lot of work. I went ahead and had a few more pieces powder coated before we put them on. I powdercoated the aluminum tank (It was pretty scratched up) and also the battery box, it too was pretty rough.
We made a tray to mount the compressors and it was powder coated too.
Made a mounting bracket for the valves and it was powder coated too.
Finally got the rear shocks from speedway (QA1) just need to make some spacers
Mounted the battery box and did a temp wire job so the suspension would cycle up and down for fab of inner fenders, wheel fitment etc. Here are some pics of the stuff I listed
FRONT BRAKES AND BRAKE LINES MOUNTED (FROM EARLS)
OH YEAH I POWDER COATED THE AIR TANK TOO, AND IT NOW IN ITS NEW HOME ON PASSENGER SIDE FRAME RAIL
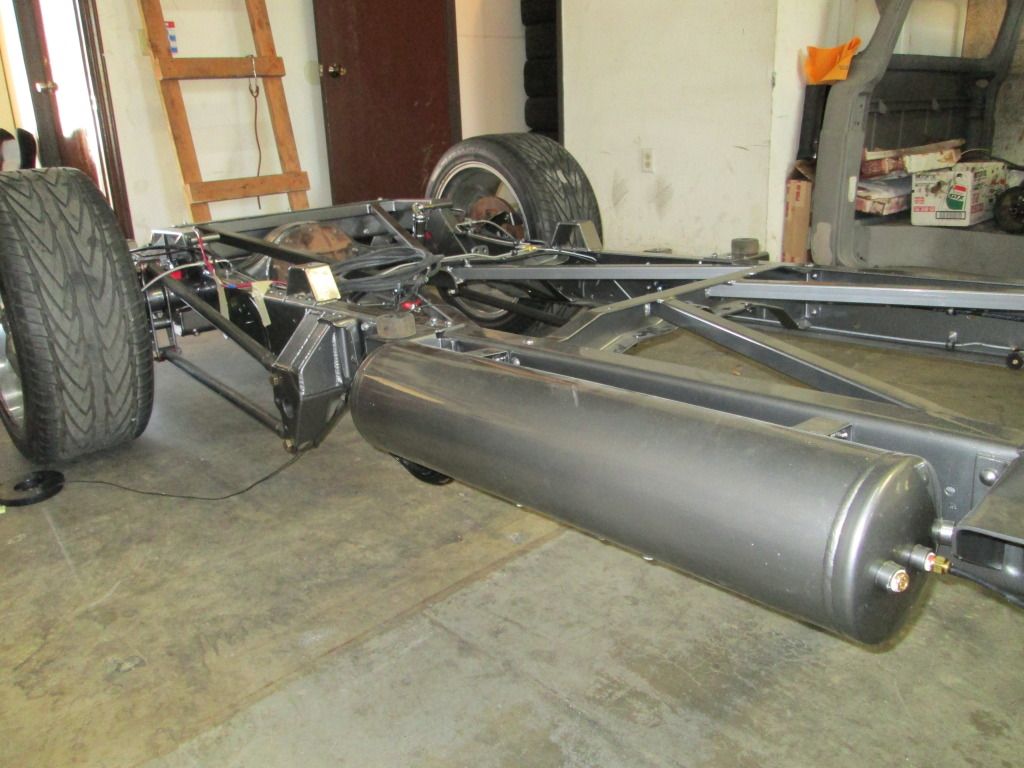
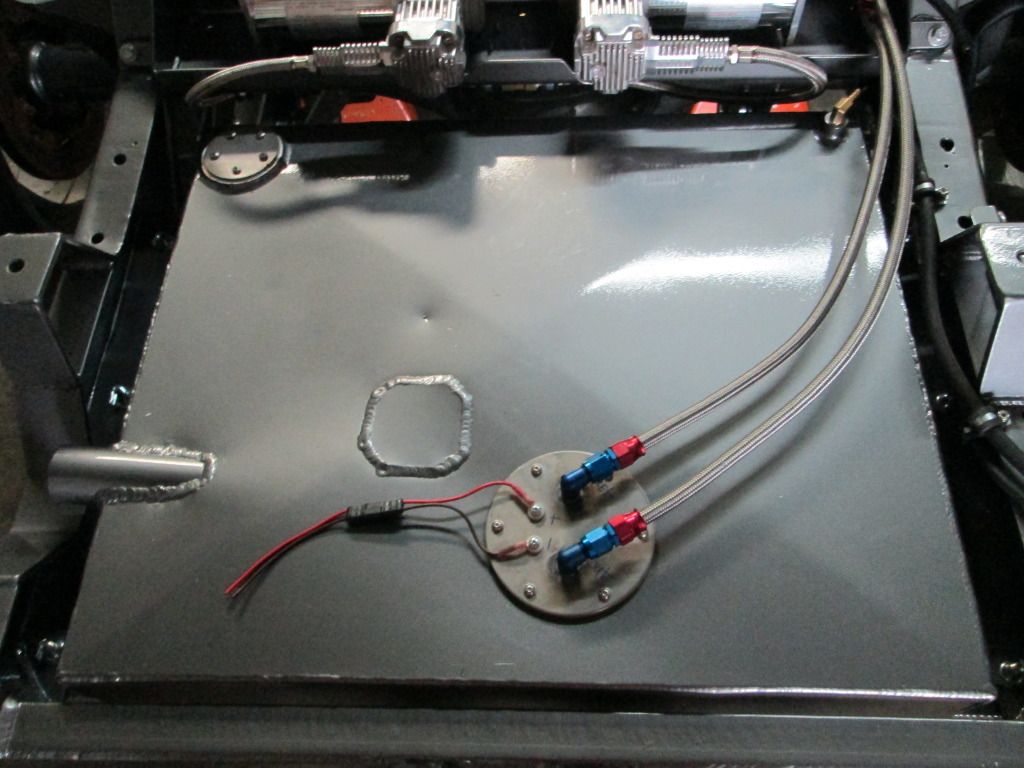
A COUPLE OF SHOTS OF THE TANK AND THE WIRE/AIR LINE NIGHTMARE I NEED TO CLEAN UP
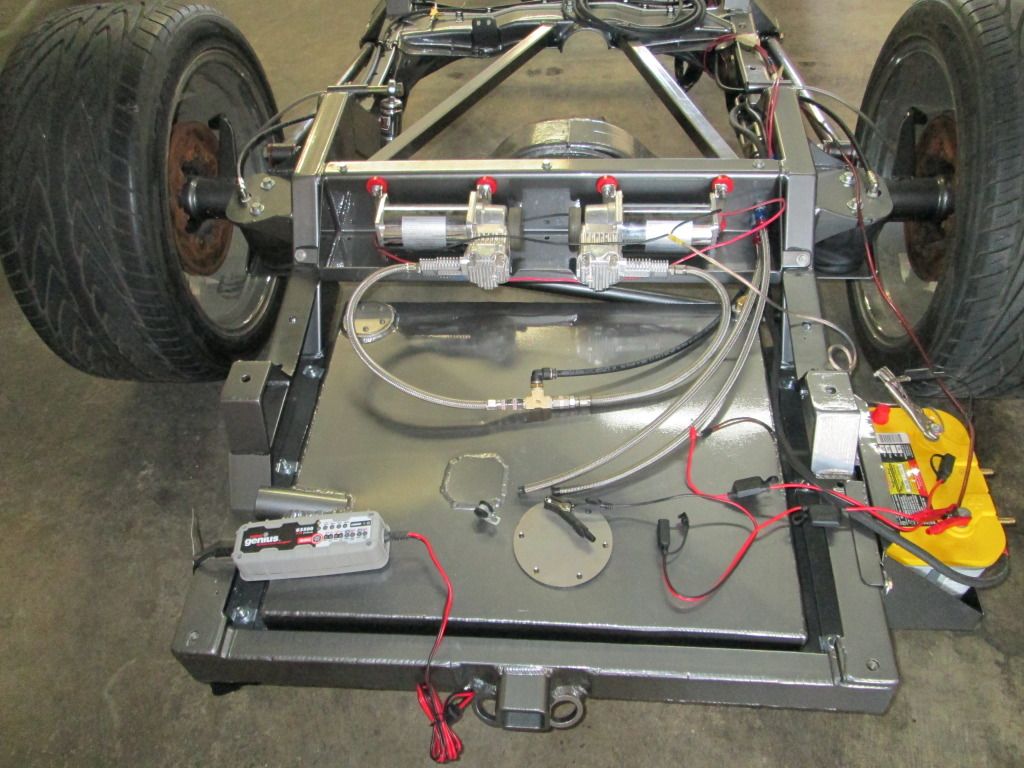
BATTERY BOX MOUNTED TO FRAME AND NEW OPTIMA BATTERY
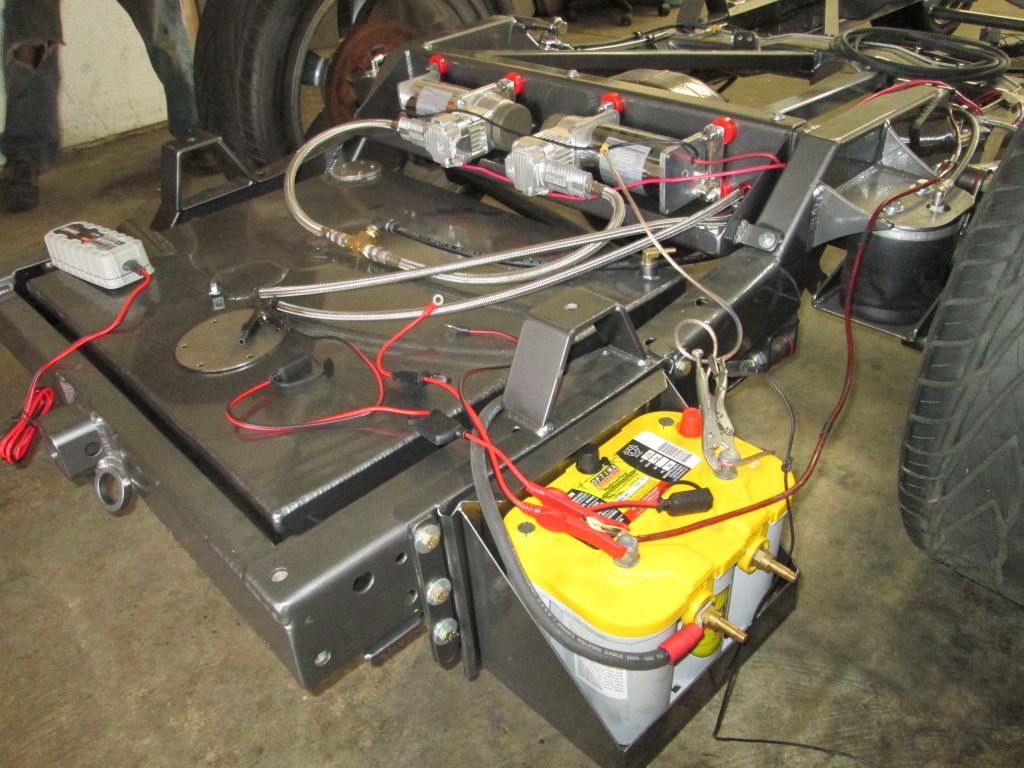
hERE ARE THE VALVES MOUNTED TO A C CHANNEL BRACKET TO ALLOW THE FUEL AND BATTERY LINES TO RUN BEHIND IT

BOTH FUEL LINES INTO A BULK HEAD ON THE FRAME BEFORE A FLEXIBLE LINE GOES TO TANK (STILL NEED TO GET THE FUEL PUMP)
aND THEN BOTH LINE TO THE REGULATOR, THE BEND IS RIGHT AT THE FIREWALL, NOT SURE WHERE THE REGULATOR WILL BE LOL
REAR SHOCK MOUNTED, HARD TO SEE IN THE PIC
HOPE TO HAVE THE ROLLER READY TO ACCEPT THE DRIVE TRAIN SOON, THEN START MOCKING EVERYTHING UP IN THE CAB
STAY TUNED
RYAN
We made a tray to mount the compressors and it was powder coated too.
Made a mounting bracket for the valves and it was powder coated too.
Finally got the rear shocks from speedway (QA1) just need to make some spacers
Mounted the battery box and did a temp wire job so the suspension would cycle up and down for fab of inner fenders, wheel fitment etc. Here are some pics of the stuff I listed
FRONT BRAKES AND BRAKE LINES MOUNTED (FROM EARLS)
OH YEAH I POWDER COATED THE AIR TANK TOO, AND IT NOW IN ITS NEW HOME ON PASSENGER SIDE FRAME RAIL
A COUPLE OF SHOTS OF THE TANK AND THE WIRE/AIR LINE NIGHTMARE I NEED TO CLEAN UP
BATTERY BOX MOUNTED TO FRAME AND NEW OPTIMA BATTERY
hERE ARE THE VALVES MOUNTED TO A C CHANNEL BRACKET TO ALLOW THE FUEL AND BATTERY LINES TO RUN BEHIND IT
BOTH FUEL LINES INTO A BULK HEAD ON THE FRAME BEFORE A FLEXIBLE LINE GOES TO TANK (STILL NEED TO GET THE FUEL PUMP)
aND THEN BOTH LINE TO THE REGULATOR, THE BEND IS RIGHT AT THE FIREWALL, NOT SURE WHERE THE REGULATOR WILL BE LOL
REAR SHOCK MOUNTED, HARD TO SEE IN THE PIC
HOPE TO HAVE THE ROLLER READY TO ACCEPT THE DRIVE TRAIN SOON, THEN START MOCKING EVERYTHING UP IN THE CAB
STAY TUNED
RYAN
#9
10-30-2012, 08:02 AM
#10
10-30-2012, 03:05 PM
#11
11-07-2012, 08:59 PM

#12
11-09-2012, 06:53 PM
Welll not a ton of stuff done today, ordered weather pack style plugs fr the air compressors and didnt order the rubber seals, thought they came together???
Ended up setting the donor cab (top chopped off to make it lighter) onto the frame for mock up of the end of the brake (hard) lines as well as the fuel and return fuel lines.
Also set the rusty ol core support on the pretty powder coat so that we could mock up the inner fender well with the new bag set up, will prob have to trim quite a bit off of the inner fenders........
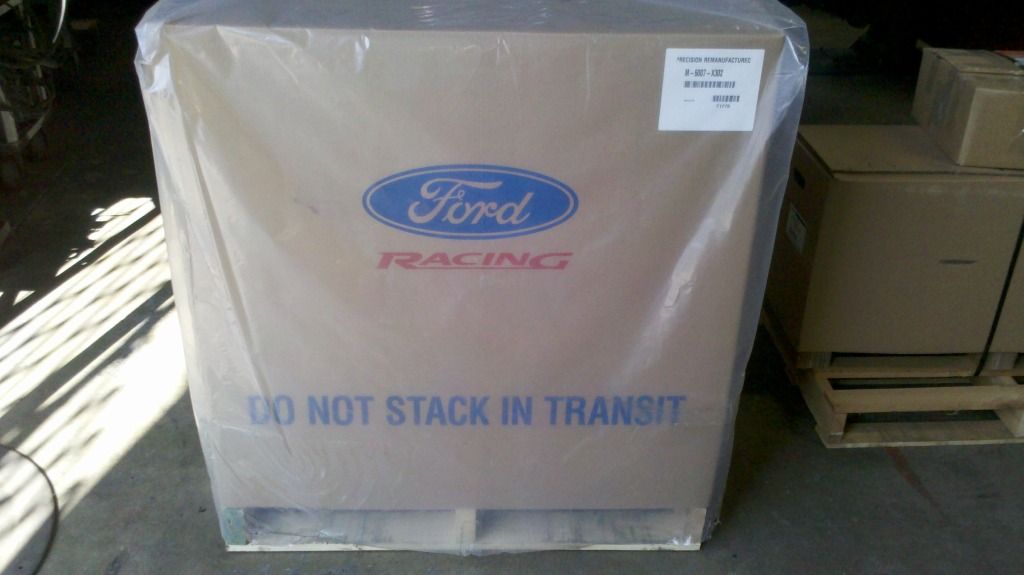
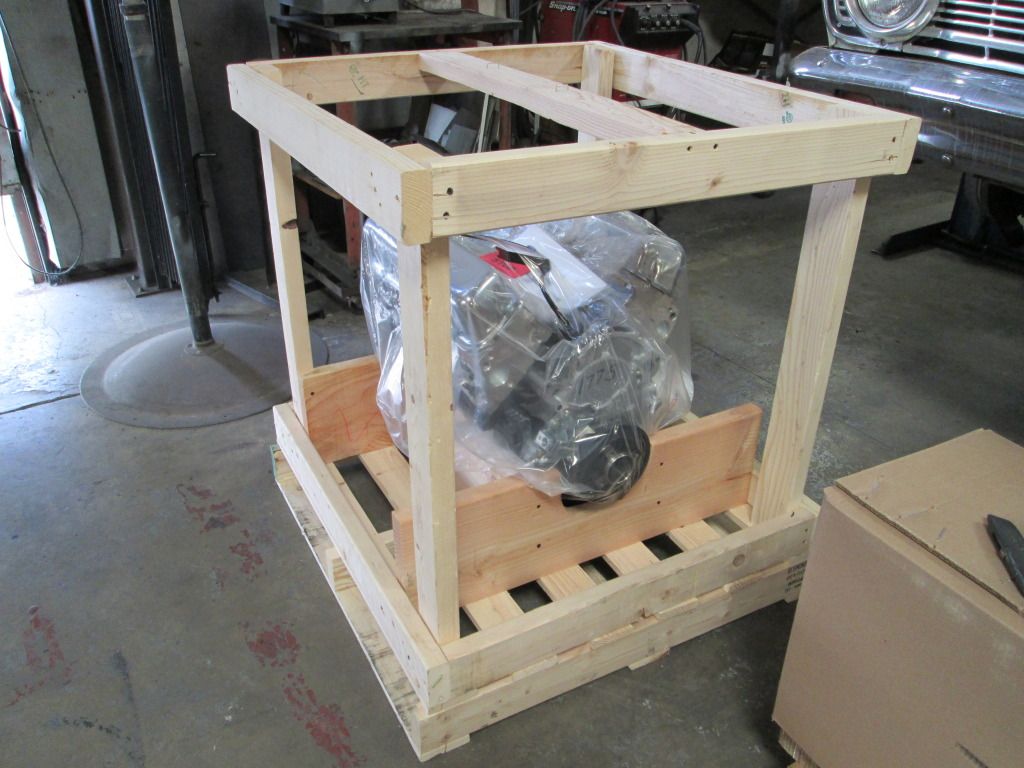
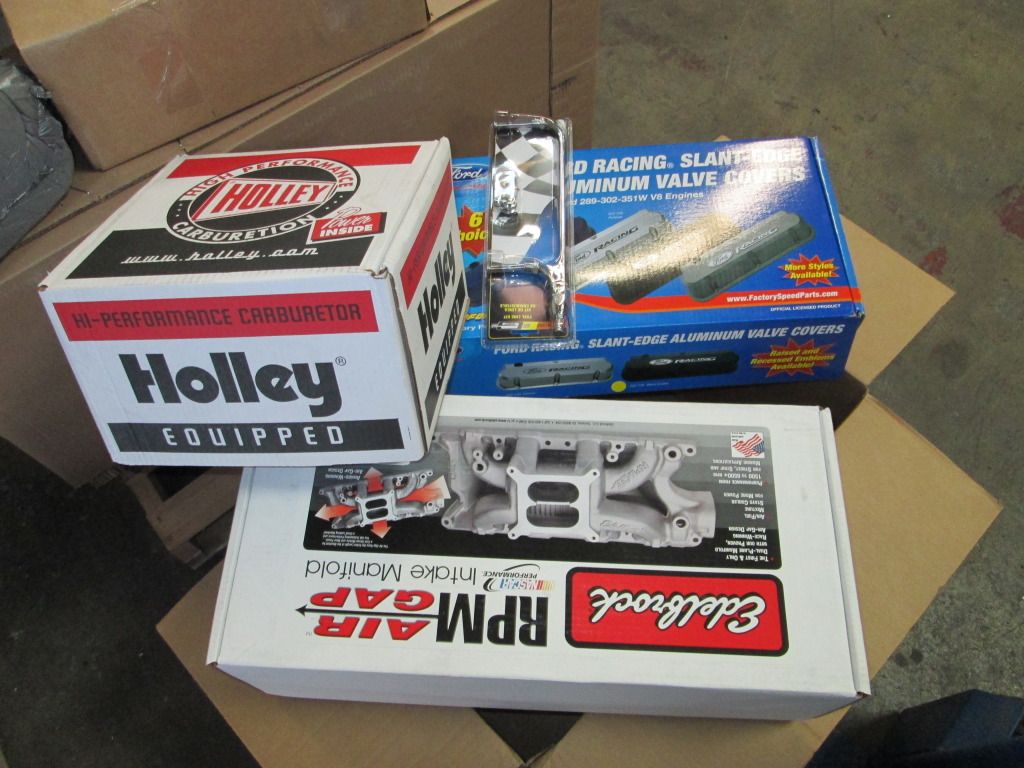
THEN SANTA CAME!!! Actually he has been coming all week, we cracked open the crate motor and unpacked it and put it on an engine stand, then I unpacked Santa's delivery for today which was an intake, carb and valve covers....
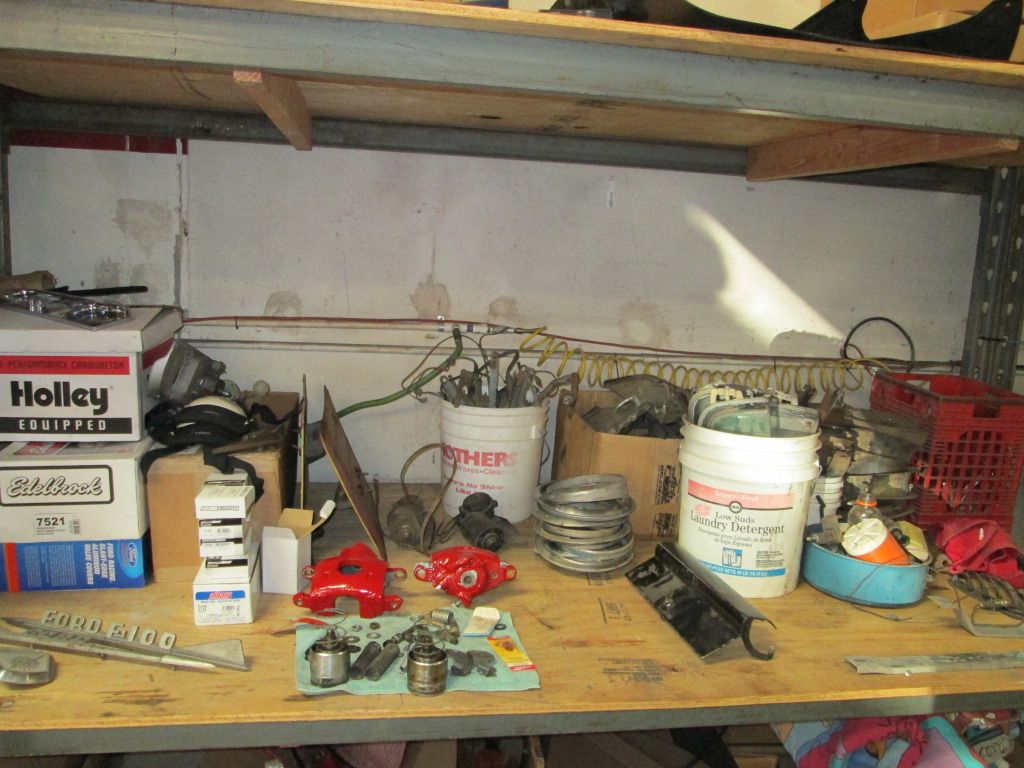
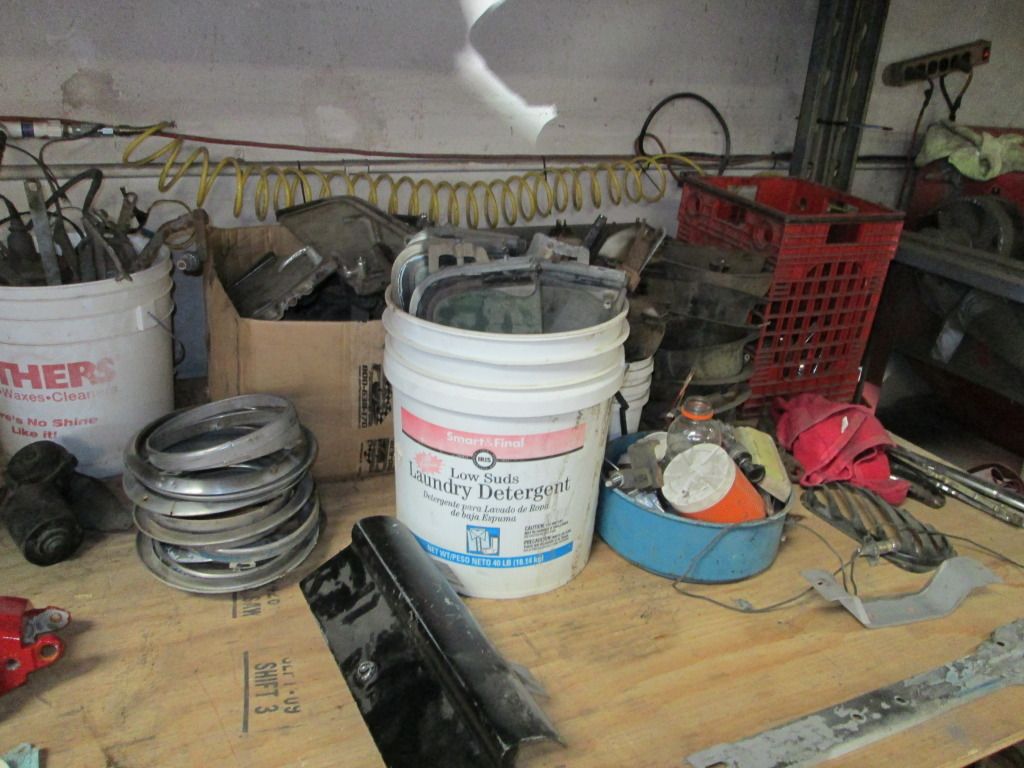
THen spent the rest of the day going through all of the EXTRA parts that came with the truck
Here are some photos for your enjoyment
Oh yeah fuel pump is in and the wiring is cleaned up a bit more
And the pumps are all squared away just need the weather pack plugs in case the tray they are in needs to be dropped

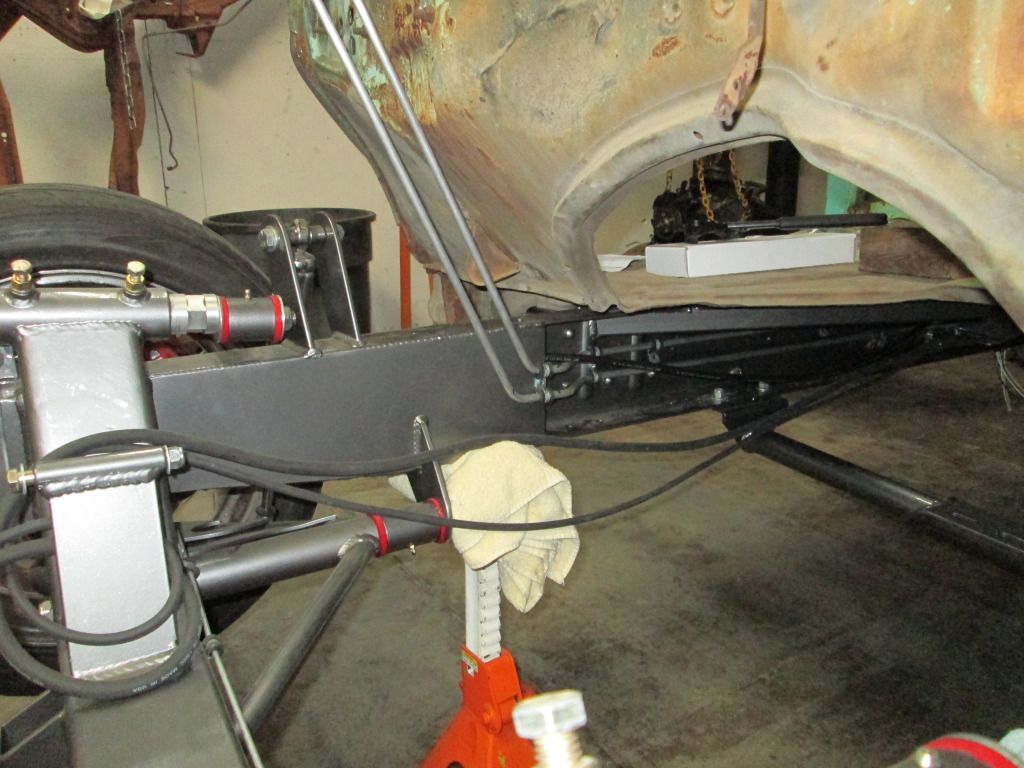
Donor cab on the frame for mock up

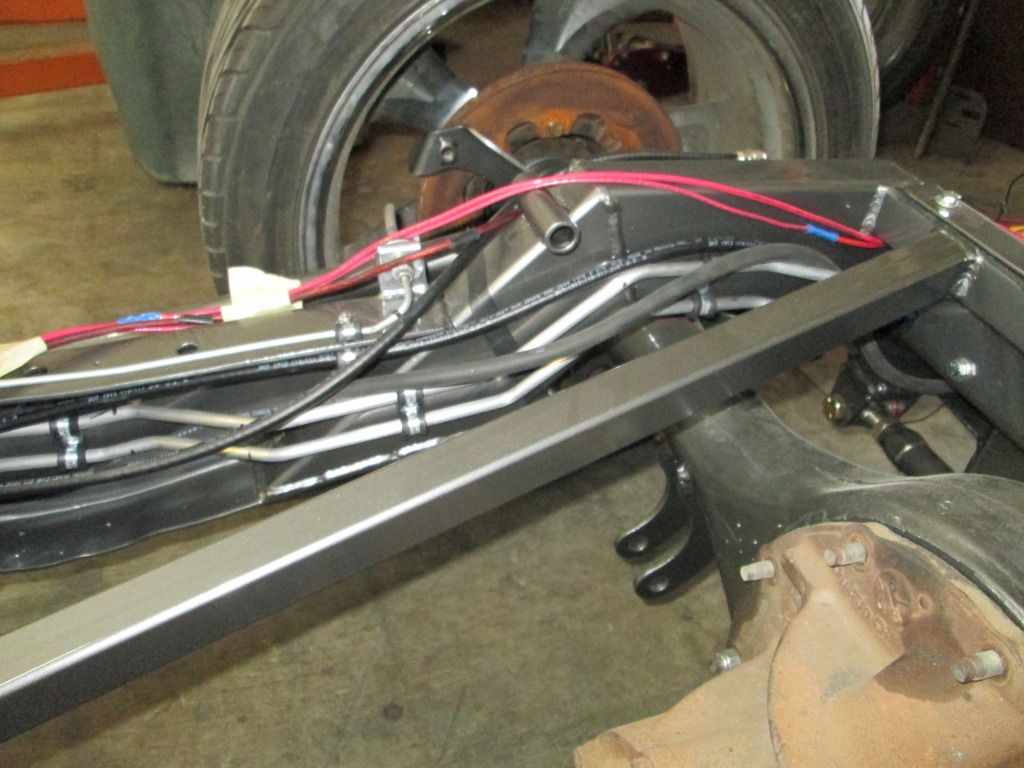
Hard to tell but this is where the hard brake lines end, they will then pass thru the frame into these fittings which will then have either a nice braided line to the master which may be inside the cab or out havent decided the set up yet

And the other side as well this is the fuel line(s). They will kick up along the toe board and either be hidden behind the inner fender well or huge the firewall and a regulator will mount on the firewall
Crate motor
Santa's delivery for the day, lol
All my parts at the shop, I get one shelf per my buddy who owns the store
Here are a few cars at the shop we are working on besides my beauty
The mustangs are going to the auctions in Arizona in January
Falcon


Ended up setting the donor cab (top chopped off to make it lighter) onto the frame for mock up of the end of the brake (hard) lines as well as the fuel and return fuel lines.
Also set the rusty ol core support on the pretty powder coat so that we could mock up the inner fender well with the new bag set up, will prob have to trim quite a bit off of the inner fenders........
THEN SANTA CAME!!! Actually he has been coming all week, we cracked open the crate motor and unpacked it and put it on an engine stand, then I unpacked Santa's delivery for today which was an intake, carb and valve covers....
THen spent the rest of the day going through all of the EXTRA parts that came with the truck
Here are some photos for your enjoyment
Oh yeah fuel pump is in and the wiring is cleaned up a bit more
And the pumps are all squared away just need the weather pack plugs in case the tray they are in needs to be dropped
Donor cab on the frame for mock up
Hard to tell but this is where the hard brake lines end, they will then pass thru the frame into these fittings which will then have either a nice braided line to the master which may be inside the cab or out havent decided the set up yet
And the other side as well this is the fuel line(s). They will kick up along the toe board and either be hidden behind the inner fender well or huge the firewall and a regulator will mount on the firewall
Crate motor
Santa's delivery for the day, lol
All my parts at the shop, I get one shelf per my buddy who owns the store
Here are a few cars at the shop we are working on besides my beauty
The mustangs are going to the auctions in Arizona in January
Falcon
#13
11-09-2012, 07:10 PM
#14
11-10-2012, 10:30 AM
#15
11-13-2012, 07:43 PM
Extra day
Well I had a three day weekend (thanks veterans of all services, including my son!)
So I took the opportunity to work on the beast again
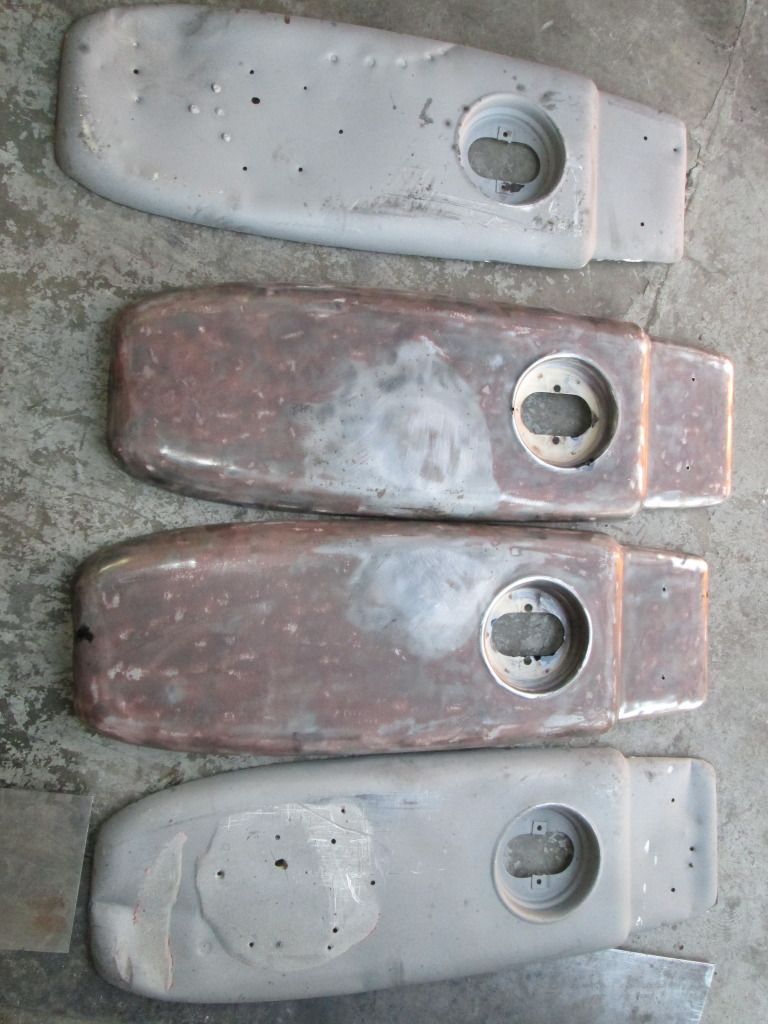
The tail panel sections were going to need to be replaced, or at least heavily repaired so.........we ( I am not the welder, lol) cut off the old tail panels that hold the tail lights on and bought some really good ones from the junk yard.
I had to grind off the welds on the junk yard pieces and then drill out the spot welds on the existing bed pieces after I chopped em off.
Here are a couple of pics from Monday
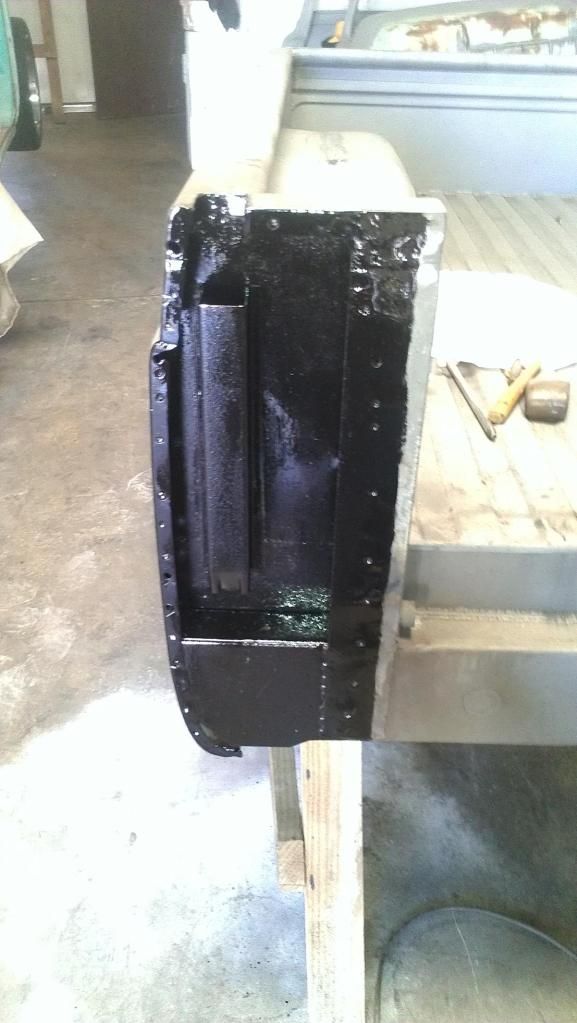
Here are the dented pieces I cut off, and the new ones, which I cleaned prepped and POR 15, as they will never see the light of day again lol

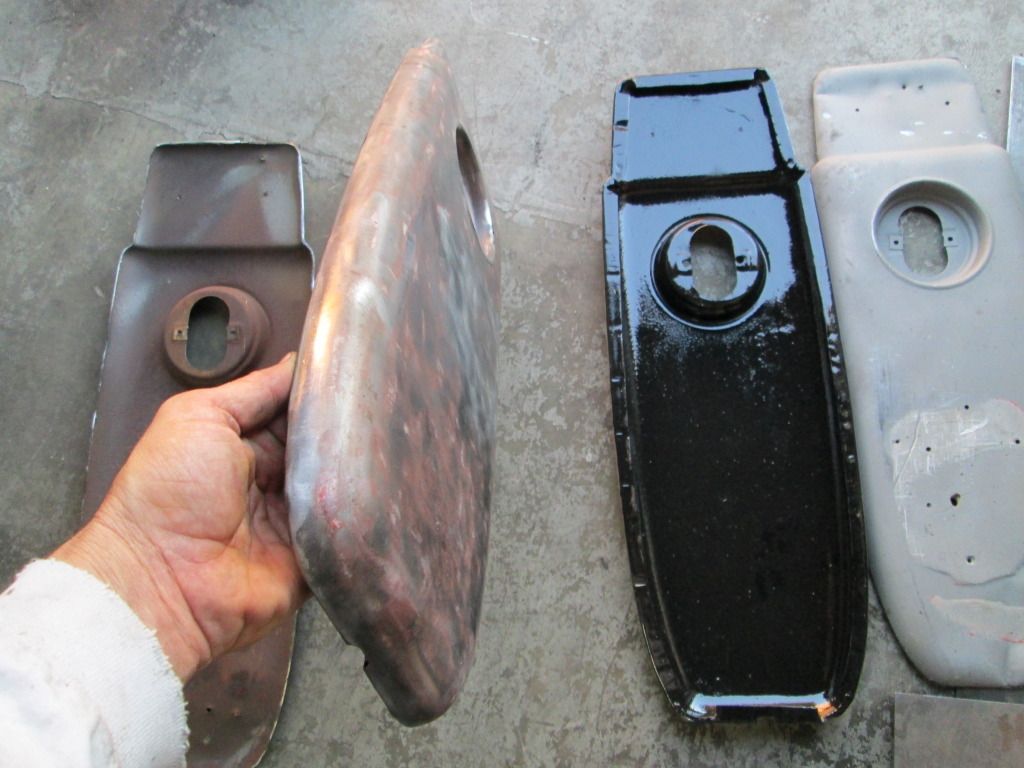

And the section behind the tail panels
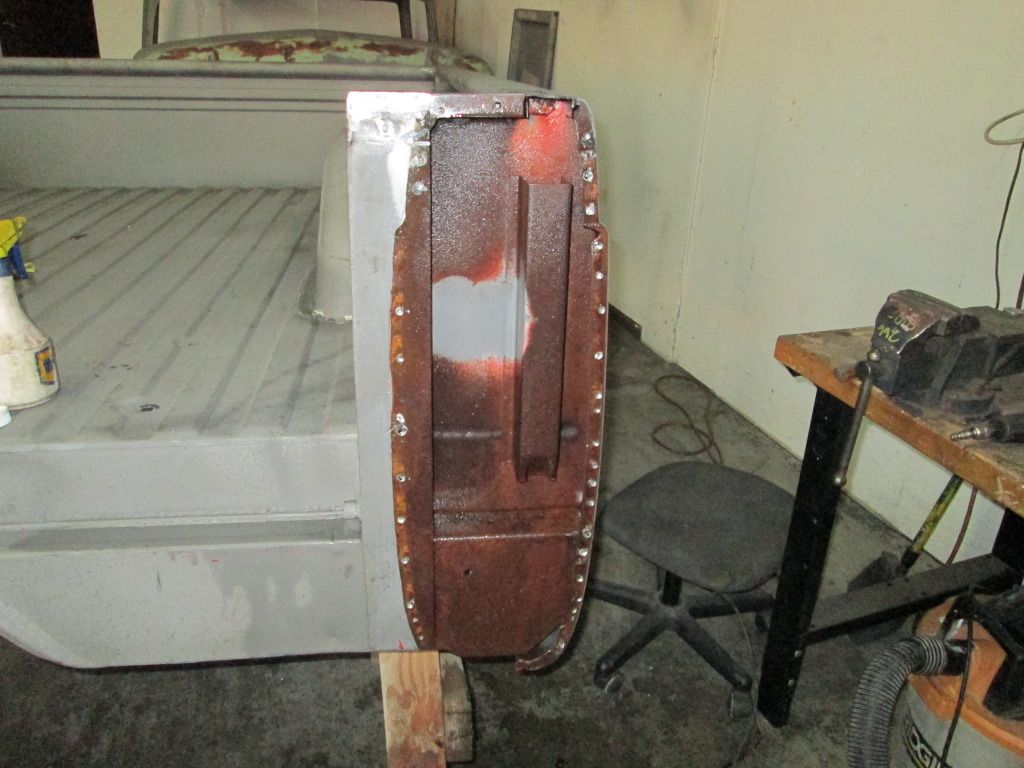
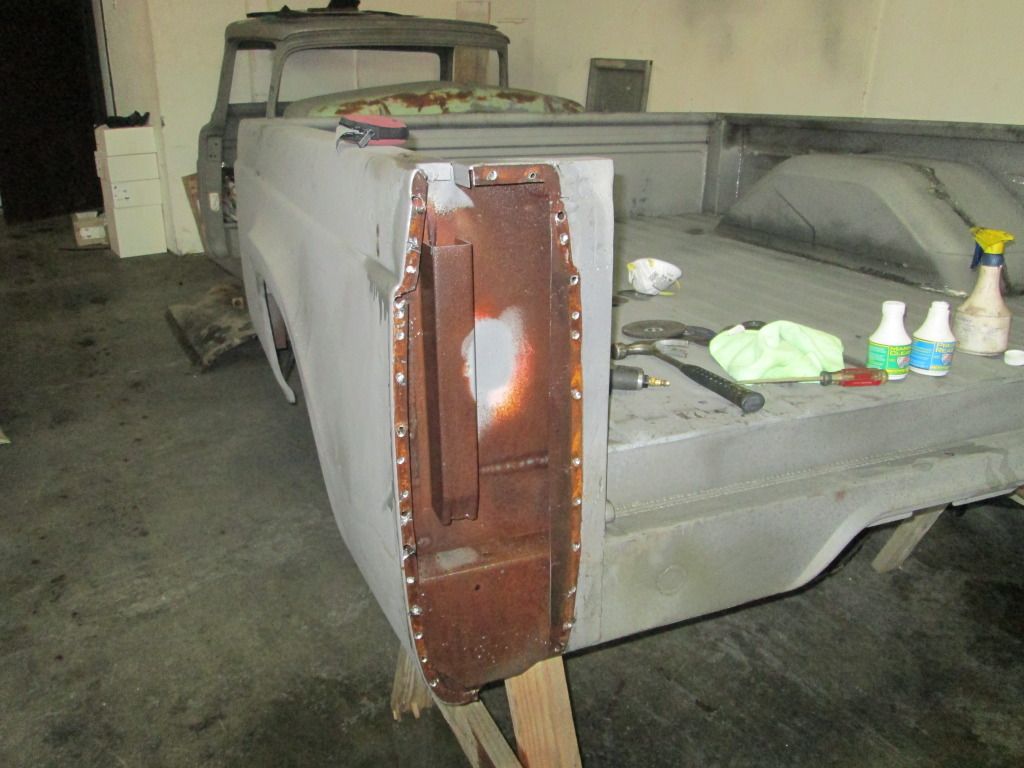
Marine clean, Prep then POR 15


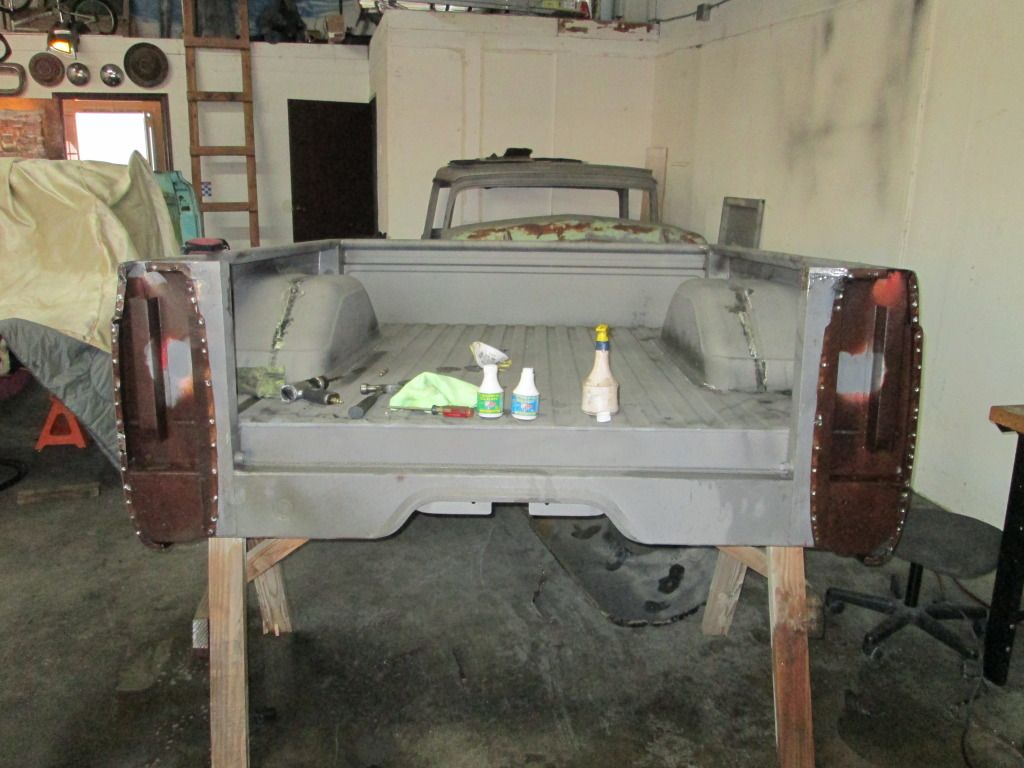
The plan is to weld the new pieces on and eliminate the seam that exists on the 57 trucks
If you look at the picture above of the bed you can see the bed has been raised 4 inches and the bedsides are all the same height. A stock tailgate is lower than the bedsides on a stocker.
And you cant see but the tailgate has been cut so that it will be flush and the hinge is a modern style mount...more pics to come later
Stay tuned
Ryan
So I took the opportunity to work on the beast again
The tail panel sections were going to need to be replaced, or at least heavily repaired so.........we ( I am not the welder, lol) cut off the old tail panels that hold the tail lights on and bought some really good ones from the junk yard.
I had to grind off the welds on the junk yard pieces and then drill out the spot welds on the existing bed pieces after I chopped em off.
Here are a couple of pics from Monday
Here are the dented pieces I cut off, and the new ones, which I cleaned prepped and POR 15, as they will never see the light of day again lol
And the section behind the tail panels
Marine clean, Prep then POR 15
The plan is to weld the new pieces on and eliminate the seam that exists on the 57 trucks
If you look at the picture above of the bed you can see the bed has been raised 4 inches and the bedsides are all the same height. A stock tailgate is lower than the bedsides on a stocker.
And you cant see but the tailgate has been cut so that it will be flush and the hinge is a modern style mount...more pics to come later
Stay tuned
Ryan