'86 F150 Resto-Mod or The (mis)Adventures of El Guapo
#1
 08-09-2012, 10:02 PM

Join Date: Oct 2009
Location: Jonesborough, TN
Posts: 723
Likes: 0
Received 0 Likes
on
0 Posts
'86 F150 Resto-Mod or The (mis)Adventures of El Guapo
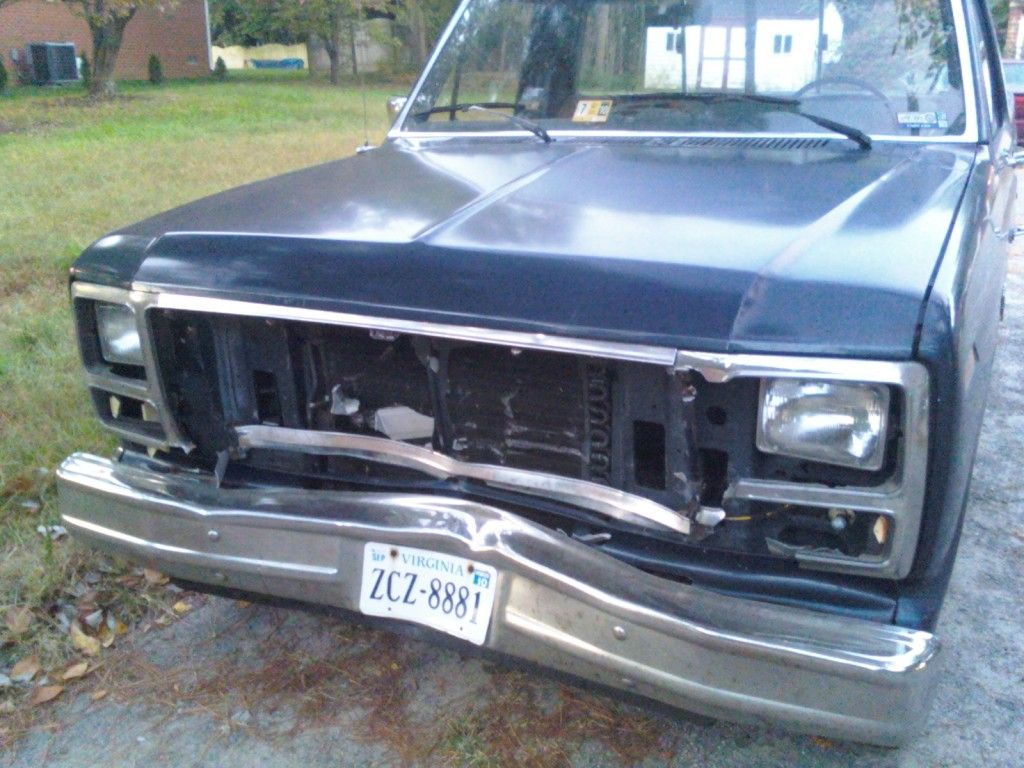
In the pre-dawn darkness of a crisp October morning, I was cruising northbound on I-95 in El Guapo, my 1986 F150. Suddenly, I saw a flash of brown up ahead, and then "BAM!" The head of a 6 point buck was beating repeatedly on the hood. As the buck fell away, I heard a rhythmic pinging that varied with the engine speed, as I pulled from the center lane to the shoulder.
The truck came to a stop with steam billowing from the grill. There was a huge pit in my stomach - as I walked to the front of the truck, the pit continued to grow. The bumper was dented in about 8 inches, the grill was gone except for some bit sticking into the AC condenser, the stone deflector was twisted, and water was covering the ground under the front of the truck.
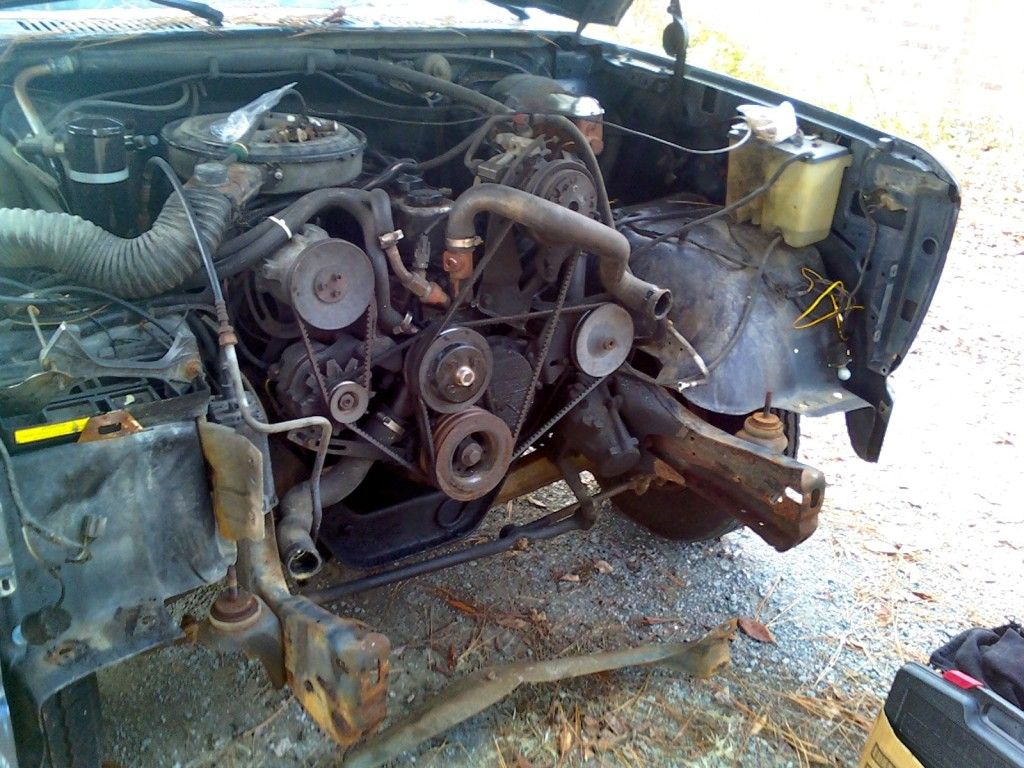
The good news was that the hood and fenders were intact. I lifted the hood and found the radiator core support bent, the radiator side tanks broken, and the radiator pushed back into the fan bending several of the blades.
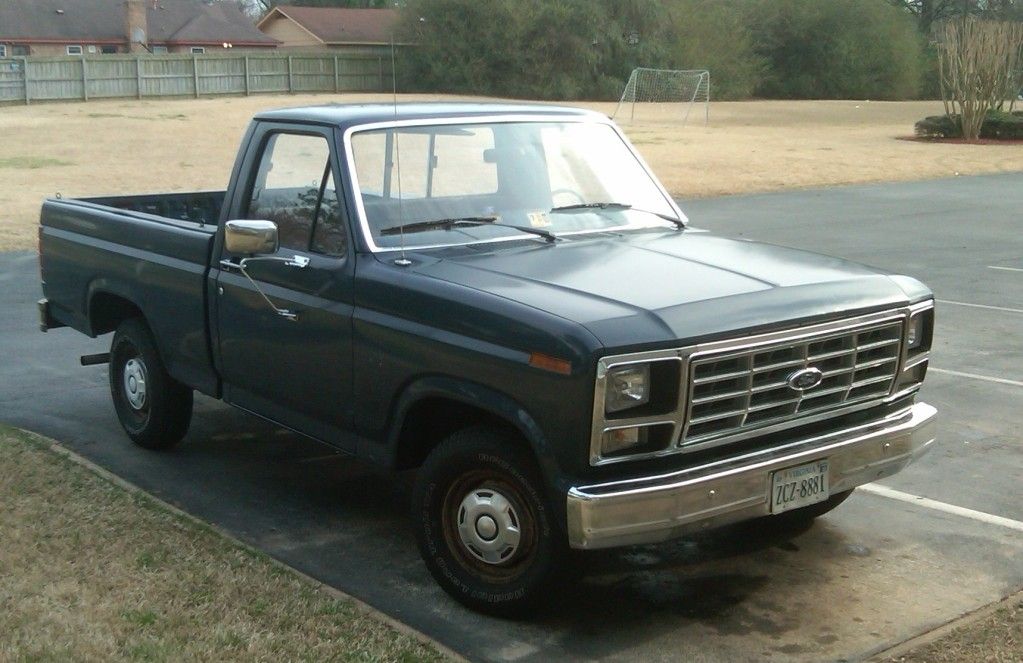
El Guapo was purchased new by my wife's dad in 1986, and he had given it to me back in late 1997. I had visions of fixing it up, and this was a crushing blow. State troopers called AAA for me, and the truck was towed home and dropped in the driveway. The decision to rebuild was a no-brainer, so later that day, I began disassembly and putting together the list of needed parts.
A trip to the local junk yard the next day netted me a radiator core support, stone deflector, radiator, AC condenser, and fan. A new bumper and all new grill parts were ordered from LMC Truck. Now it was time to start rebuilding.
Replacement of the core support, was first, and then the fan, radiator, and AC condenser. The stone deflector and bumper were also replaced. Finally, the grill and all of the trim pieces were replaced. It took nearly 6 weeks to complete.
I took it to the local auto shop to get the AC recharged, and several days later, the heater core failed, and it also had to be replaced. As this was my daily driver and I was going to be driving it to Memphis where I would begin a new job in less than a week, I decided to pay the local shop for this simple job.
Finally, $1400 later, El Guapo was whole once again, and on December 9, 2009, it was loaded and we drove 835 miles over 2 days to Memphis. It didn't miss a beat.
It's all Stacey David's fault. On his television shows, he has always says "You can do this", and so the (mis)Adventures of El Guapo has begun.
The truck came to a stop with steam billowing from the grill. There was a huge pit in my stomach - as I walked to the front of the truck, the pit continued to grow. The bumper was dented in about 8 inches, the grill was gone except for some bit sticking into the AC condenser, the stone deflector was twisted, and water was covering the ground under the front of the truck.
The good news was that the hood and fenders were intact. I lifted the hood and found the radiator core support bent, the radiator side tanks broken, and the radiator pushed back into the fan bending several of the blades.
El Guapo was purchased new by my wife's dad in 1986, and he had given it to me back in late 1997. I had visions of fixing it up, and this was a crushing blow. State troopers called AAA for me, and the truck was towed home and dropped in the driveway. The decision to rebuild was a no-brainer, so later that day, I began disassembly and putting together the list of needed parts.
A trip to the local junk yard the next day netted me a radiator core support, stone deflector, radiator, AC condenser, and fan. A new bumper and all new grill parts were ordered from LMC Truck. Now it was time to start rebuilding.
Replacement of the core support, was first, and then the fan, radiator, and AC condenser. The stone deflector and bumper were also replaced. Finally, the grill and all of the trim pieces were replaced. It took nearly 6 weeks to complete.
I took it to the local auto shop to get the AC recharged, and several days later, the heater core failed, and it also had to be replaced. As this was my daily driver and I was going to be driving it to Memphis where I would begin a new job in less than a week, I decided to pay the local shop for this simple job.
Finally, $1400 later, El Guapo was whole once again, and on December 9, 2009, it was loaded and we drove 835 miles over 2 days to Memphis. It didn't miss a beat.
It's all Stacey David's fault. On his television shows, he has always says "You can do this", and so the (mis)Adventures of El Guapo has begun.
#2
08-09-2012, 10:08 PM
Posting Legend
#3
08-09-2012, 10:20 PM
Join Date: Oct 2009
Location: Jonesborough, TN
Posts: 723
Likes: 0
Received 0 Likes
on
0 Posts
My wife's dad always complained that the truck was gutless. It had the 4.9L six cylinder engine, SROD transmission, and 3.55 rear end. As I said earlier, I had always wanted to restore the truck and got to thinking about what a 351W motor would do for it. After a bunch of research, I decided I would build a 408 Stroker to pep it up.
First, I needed a motor. I looked around, but I was having no luck finding a rebuildable block in the Memphis area. I mentioned it to my brother who lives in the Atlanta area. A few weeks later, he tells me he found a motor for me and I owe him $50. All I can think, is "Holy crap! What have you done?"
Well, it was mine, and only 6 hours away. I couldn't get down to pick it up right away, and he had to go out of town leaving his truck in long-term satellite parking at Hartsfield Int'l Airport. He couldn't leave the motor in the back of his truck, so he put a couple bags of bark mulch at the base of the tree in his side yard, tied a rope to the engine, and drove his truck out from under it. He did wrap it in a tarp, and there it stayed for 4 months.

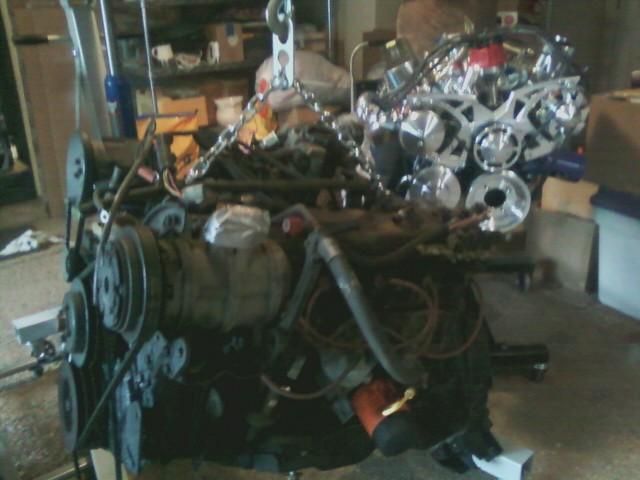
Labor Day rolled around, and my daughter and I drove down to visit. I was planning to bring the motor back with me, but when I got there, I was completely at a loss on how to get this thing from the ground into the back of my truck. "I've got an idea," my redneck brother says. He goes to the garage, grabs a come-a-long and a ladder, and you can guess the rest. We wrap the cable around the tree above a fairly large branch, and hook the other end to the rope around the engine. A few minutes later, the motor is hanging in the tree waiting for me to back my truck underneath it.
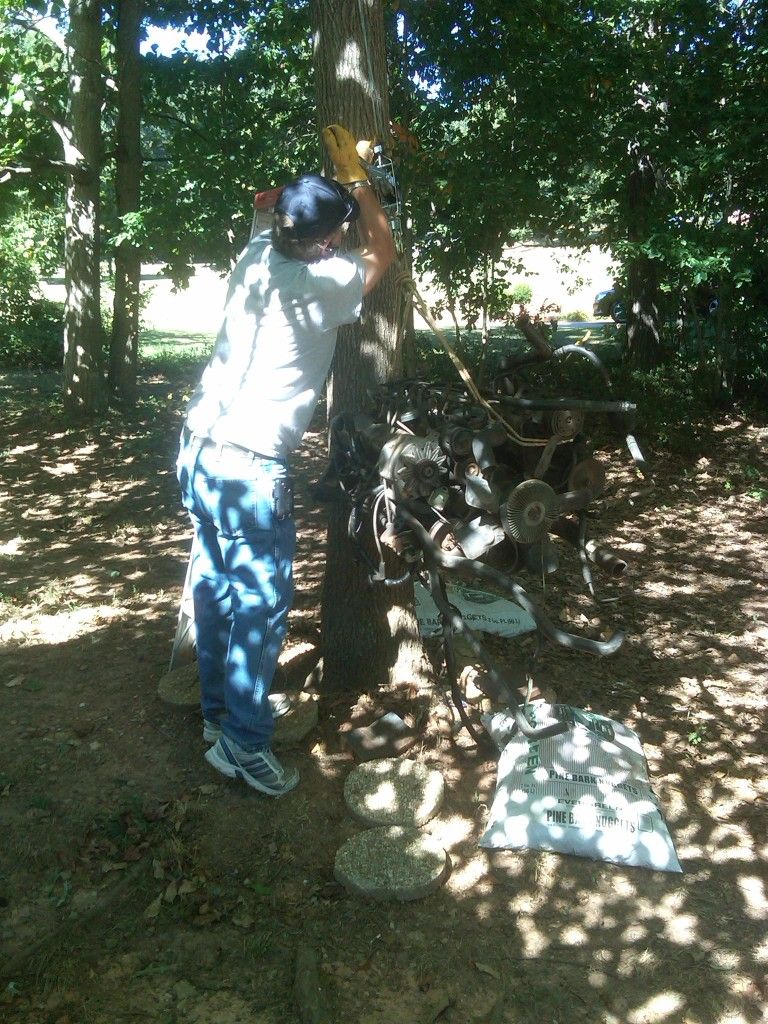
Shade tree mechanic, redneck � whatever - it worked.
In short order, the motor was in the back of my truck and tied down.

Monday afternoon, I was on my way back to Memphis with my "core" to disassemble. WooHoo. The adventure has begun.
First, I needed a motor. I looked around, but I was having no luck finding a rebuildable block in the Memphis area. I mentioned it to my brother who lives in the Atlanta area. A few weeks later, he tells me he found a motor for me and I owe him $50. All I can think, is "Holy crap! What have you done?"
Well, it was mine, and only 6 hours away. I couldn't get down to pick it up right away, and he had to go out of town leaving his truck in long-term satellite parking at Hartsfield Int'l Airport. He couldn't leave the motor in the back of his truck, so he put a couple bags of bark mulch at the base of the tree in his side yard, tied a rope to the engine, and drove his truck out from under it. He did wrap it in a tarp, and there it stayed for 4 months.
Labor Day rolled around, and my daughter and I drove down to visit. I was planning to bring the motor back with me, but when I got there, I was completely at a loss on how to get this thing from the ground into the back of my truck. "I've got an idea," my redneck brother says. He goes to the garage, grabs a come-a-long and a ladder, and you can guess the rest. We wrap the cable around the tree above a fairly large branch, and hook the other end to the rope around the engine. A few minutes later, the motor is hanging in the tree waiting for me to back my truck underneath it.
Shade tree mechanic, redneck � whatever - it worked.
In short order, the motor was in the back of my truck and tied down.
Monday afternoon, I was on my way back to Memphis with my "core" to disassemble. WooHoo. The adventure has begun.
#4
08-09-2012, 10:27 PM
Join Date: Oct 2009
Location: Jonesborough, TN
Posts: 723
Likes: 0
Received 0 Likes
on
0 Posts
It's been many years since I've rebuilt a motor. I've been watching them build a bunch of motors on HorsepowerTV, and read several books on rebuilding small block ford engines. I also searched the forums on FTE as well as other sites and sorted though the sometimes conflicting info I found.
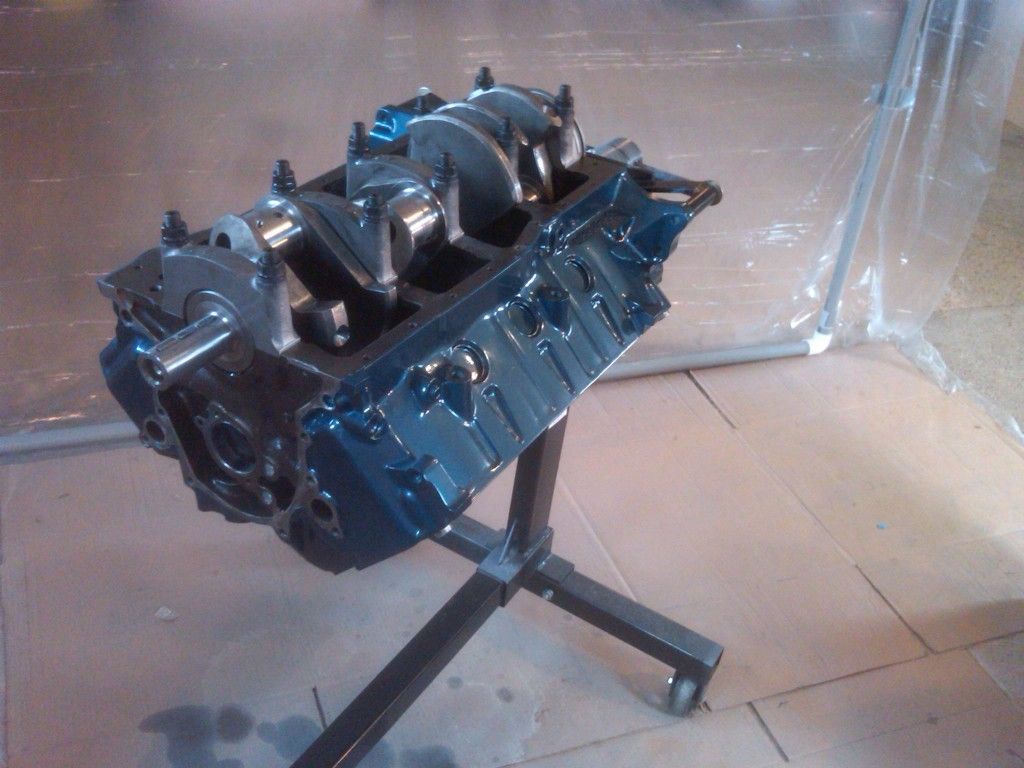
The old motor was stripped down and got the obligatory trip to the machine shop. We determined that we would bore it out at .040 over, and after cleaning, it was magnafluxed, bored, decked, and line honed (not necessarily in that order). The Eagle stroker kit (#16524) was ordered, as well as the new flywheel and hamonic balancer so the crank could be balanced. Finally, the machine shop completed their work, and I was able to bring the motor home and start building. WooHoo!
The old motor was stripped down and got the obligatory trip to the machine shop. We determined that we would bore it out at .040 over, and after cleaning, it was magnafluxed, bored, decked, and line honed (not necessarily in that order). The Eagle stroker kit (#16524) was ordered, as well as the new flywheel and hamonic balancer so the crank could be balanced. Finally, the machine shop completed their work, and I was able to bring the motor home and start building. WooHoo!

#6
08-09-2012, 10:32 PM
Join Date: Oct 2009
Location: Jonesborough, TN
Posts: 723
Likes: 0
Received 0 Likes
on
0 Posts
This truck is not going to be just a hot rod, but I want it to look good, too. I decided to paint the block the same color as the truck. I built a paint booth in the garage and painted the motor with primer sealer, 3 coats of Shadow Blue Metallic, and 3 coats of clear.

The power steering pump and timing cover were also painted. Looks totally awesome (I think). Reassembly starts. WooHoo!
The power steering pump and timing cover were also painted. Looks totally awesome (I think). Reassembly starts. WooHoo!
#7
08-09-2012, 10:36 PM
Posting Legend
This truck is not going to be just a hot rod, but I want it to look good, too. I decided to paint the block the same color as the truck. I built a paint booth in the garage and painted the motor with primer sealer, 3 coats of Shadow Blue Metallic, and 3 coats of clear.
The power steering pump and timing cover were also painted. Looks totally awesome (I think). Reassembly starts. WooHoo!
The power steering pump and timing cover were also painted. Looks totally awesome (I think). Reassembly starts. WooHoo!
Trending Topics
#8
08-09-2012, 10:41 PM
Join Date: Oct 2009
Location: Jonesborough, TN
Posts: 723
Likes: 0
Received 0 Likes
on
0 Posts


#10
08-09-2012, 11:36 PM
Join Date: Oct 2009
Location: Jonesborough, TN
Posts: 723
Likes: 0
Received 0 Likes
on
0 Posts
I installed the rotating assembly, making sure to insure that the rings were gapped properly, pistons were oriented correctly and installed in the cylinders they were gapped to fit. The kit has a cast crankshaft with 4.00" stroke, 6.20" rods, -27.5cc inverted dome hypereutectic pistons, and file fit rings.

I selected the Edelbrock Rollin' Thunder hydraulic roller cam and lifters. It has intake and exhaust duration of 235 and 238 degrees, .573/.582 of valve lift, and lobe separation of 112 degrees. It should be interesting to see what it will do. I hope I haven't overcammed it.
Cylinder heads are Edelbrock Performer RPM heads with 2.020 intake and and 1.600 exhaust valves. In the cylinder head installation instructions, Edelbrock specified several different models of valve covers, but the names and numbers didn't match. The first set I purchased would not fit their cylinder heads. Their tech support swore up and down they would fit, but there was no way.
I finally purchased some Summit brand valve covers, that I will paint to match the block.
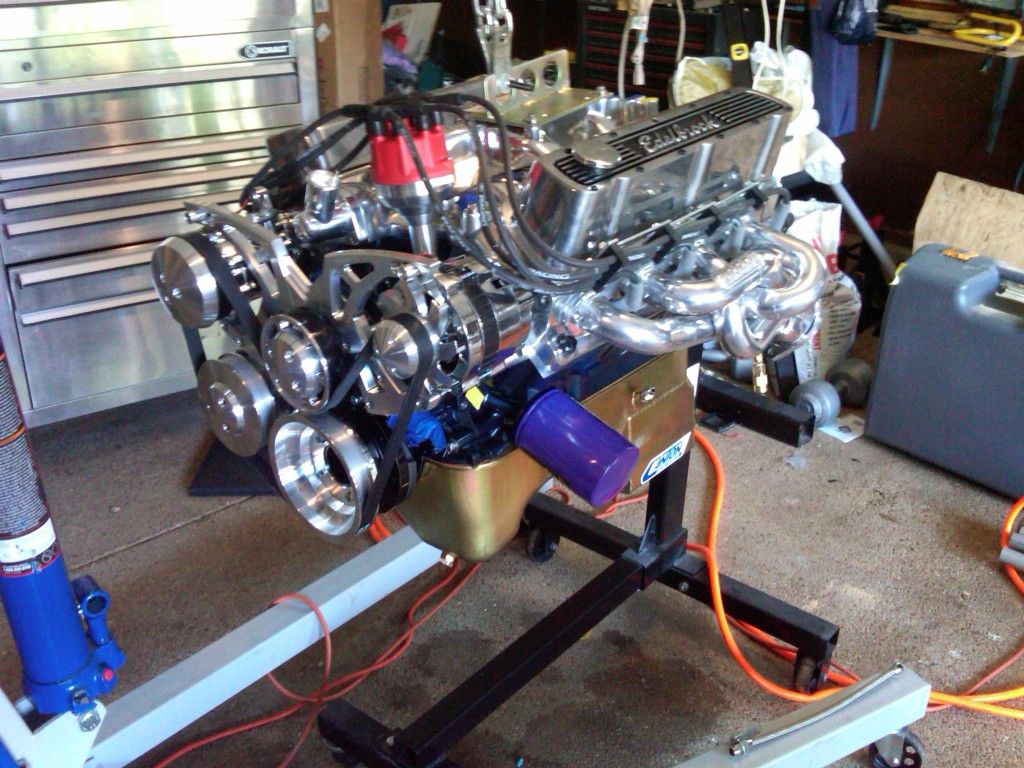
An Edelbrock Performer RPM dual plane intake and a FAST EZ-EFI throttle body sits on top. I have BBK equal length shorty headers. At this point, I still have to finish up the exhaust, but it fits in the engine bay, with only minimal trimming of one corner of the firewall.
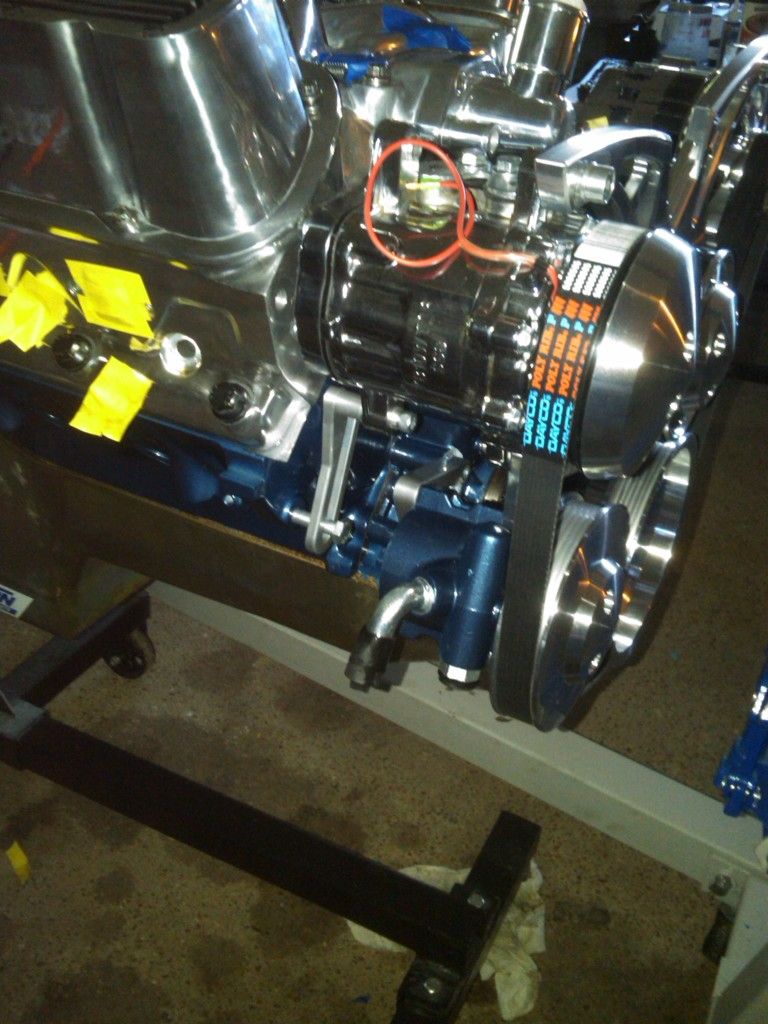
Up front, I've got a March Performance Serpentine kit. Oh yeah! It looks good. The instructions left something to be desired. Some bolts were to short, and others to long. The AC compressor rear mount was quite problematic, as the aftermarket heads didn't leave enough clearance to mount the support where the instructions said. I found, though, that I could rotate it, and mount the support from below and not above and it worked great.
With the engine essentially complete, I started on installation, which is not without it's own set of problems.
I selected the Edelbrock Rollin' Thunder hydraulic roller cam and lifters. It has intake and exhaust duration of 235 and 238 degrees, .573/.582 of valve lift, and lobe separation of 112 degrees. It should be interesting to see what it will do. I hope I haven't overcammed it.
Cylinder heads are Edelbrock Performer RPM heads with 2.020 intake and and 1.600 exhaust valves. In the cylinder head installation instructions, Edelbrock specified several different models of valve covers, but the names and numbers didn't match. The first set I purchased would not fit their cylinder heads. Their tech support swore up and down they would fit, but there was no way.
I finally purchased some Summit brand valve covers, that I will paint to match the block.
An Edelbrock Performer RPM dual plane intake and a FAST EZ-EFI throttle body sits on top. I have BBK equal length shorty headers. At this point, I still have to finish up the exhaust, but it fits in the engine bay, with only minimal trimming of one corner of the firewall.
Up front, I've got a March Performance Serpentine kit. Oh yeah! It looks good.
The instructions left something to be desired. Some bolts were to short, and others to long. The AC compressor rear mount was quite problematic, as the aftermarket heads didn't leave enough clearance to mount the support where the instructions said. I found, though, that I could rotate it, and mount the support from below and not above and it worked great. With the engine essentially complete, I started on installation, which is not without it's own set of problems.
#11
08-10-2012, 12:28 AM
Join Date: Oct 2009
Location: Jonesborough, TN
Posts: 723
Likes: 0
Received 0 Likes
on
0 Posts
The engine was complete and I had a long weekend. My wife and I went on a drive through the country, Thursday evening, and Friday morning, I drove El Guapo to the local garage and had the refrigerant removed from the AC system. I drove the truck home, and in the driveway, drained the oil, and then pulled the grill and core support as one unit. This gave me great access to remove the 4.9L (300 c.i.) six banger. I had to cut the exhaust north of the cats, and removed the exhaust system.
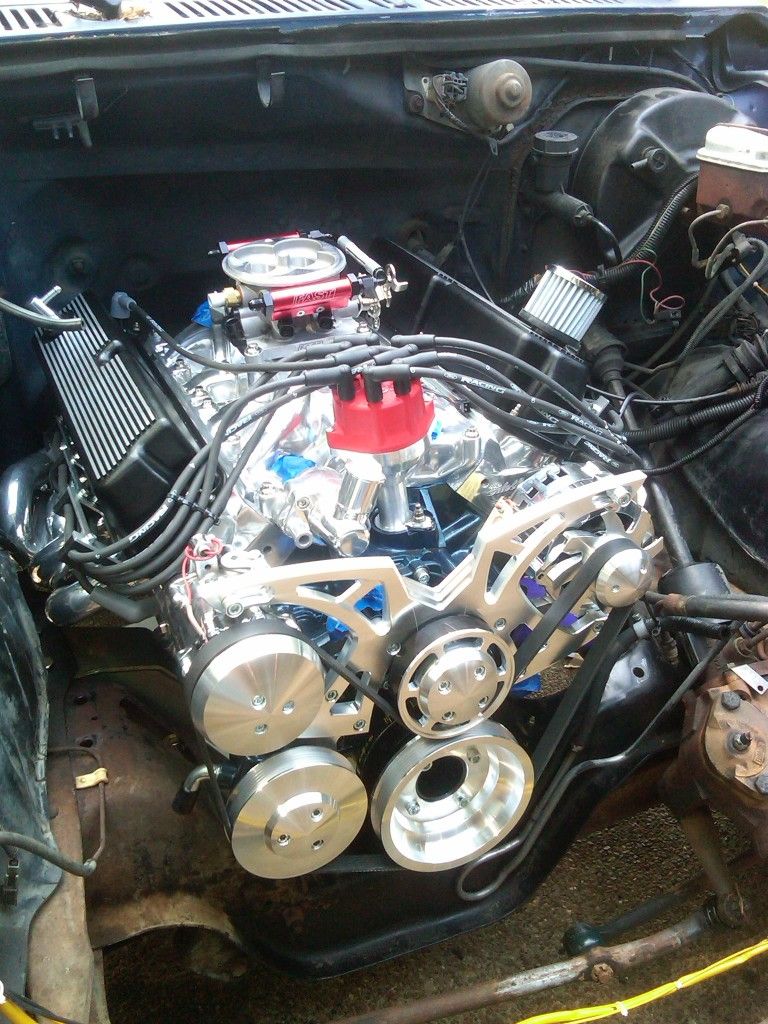
I pulled the engine and transmission, and then fought with the frame perches for the straight six, finally getting them removed, so I could install the new frame perches for the 5.8L I purchased from Bronco Graveyard. They fit like a glove. I bolted them in with grade 8 hardware. I attached the new motor mounts and dropped the motor in. It did drop right in - until it got hung up. We finally figured out that it was the end of the driver side header interfering with the firewall - by less than � inch. Wouldn't you know? Nothing that a little firewall surgery can't fix.
Pulled the motor, and trimmed the edge of the firewall along the pinch seam, and it slipped right in. Awesome. Bolted it in, and there she sits.
I started to fab up the exhaust, but the heat and climbing under the truck, back out to cut, back under to check, back out to tack it, back under to check it, and repeat got to be to much. I decided to wait to finish the exhaust until I could get better access and maybe some help.
I pulled the engine and transmission, and then fought with the frame perches for the straight six, finally getting them removed, so I could install the new frame perches for the 5.8L I purchased from Bronco Graveyard. They fit like a glove. I bolted them in with grade 8 hardware. I attached the new motor mounts and dropped the motor in. It did drop right in - until it got hung up. We finally figured out that it was the end of the driver side header interfering with the firewall - by less than � inch. Wouldn't you know?
Nothing that a little firewall surgery can't fix. Pulled the motor, and trimmed the edge of the firewall along the pinch seam, and it slipped right in. Awesome. Bolted it in, and there she sits.
I started to fab up the exhaust, but the heat and climbing under the truck, back out to cut, back under to check, back out to tack it, back under to check it, and repeat got to be to much. I decided to wait to finish the exhaust until I could get better access and maybe some help.
#12
08-10-2012, 12:48 AM
Freshman User
Join Date: Aug 2012
Location: Coeur'd Alene, ID
Posts: 26
Likes: 0
Received 0 Likes
on
0 Posts
#13
08-10-2012, 06:12 AM
Senior User
Join Date: Jul 2010
Location: Connecticut
Posts: 205
Likes: 0
Received 0 Likes
on
0 Posts

#15
08-10-2012, 08:56 AM
Posting Legend