When you click on links to various merchants on this site and make a purchase, this can result in this site earning a commission. Affiliate programs and affiliations include, but are not limited to, the eBay Partner Network.
There have been several threads over the years about doing this swap, but most of them went a little beyond what I was interested in doing. I had a functioning factory installed system with the York compressor on my 460 powered '79 F150.
Last summer the compressor failed and I became more interested in doing this swap. I was not interested in doing an R134a conversion because it would require a bigger condenser and new lines. R12 is available on Ebay and I have a good supply of it.
I was able to find all the components required to do the swap on Ebay for $200 shipped, which included.
1. 9285 SANDEN SD508 STYLE COMPRESSOR W/ CLUTCH
2. YORK TO SANDEN /SELTEC ADJUST. COMPRESSOR MOUNT KIT
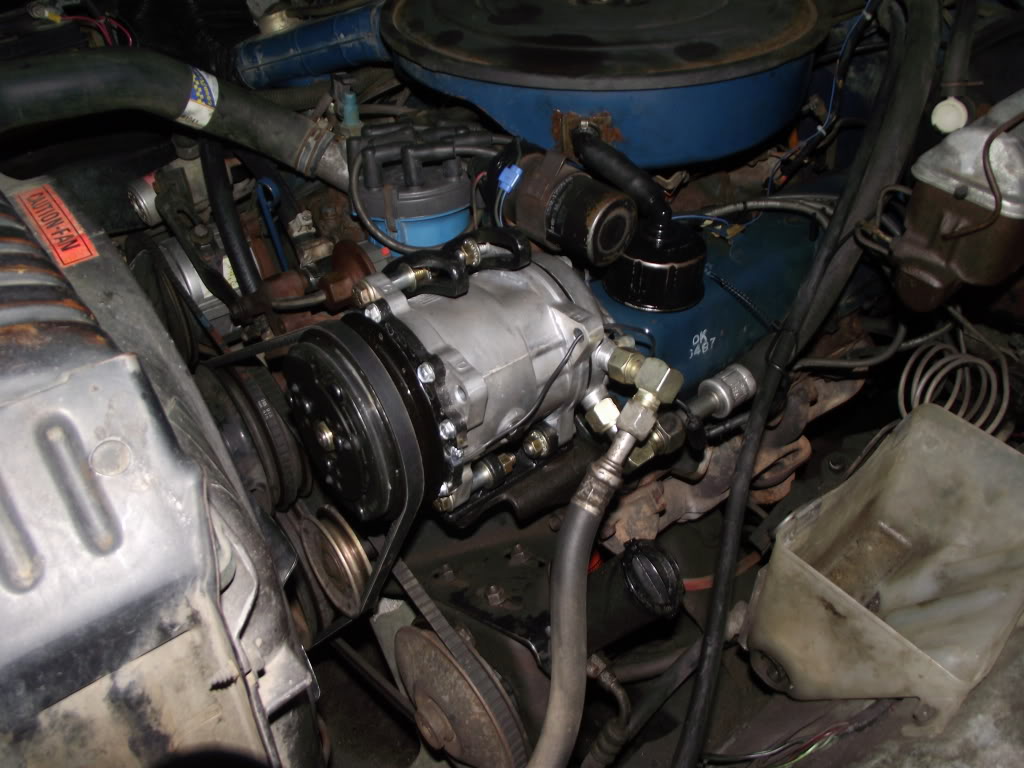
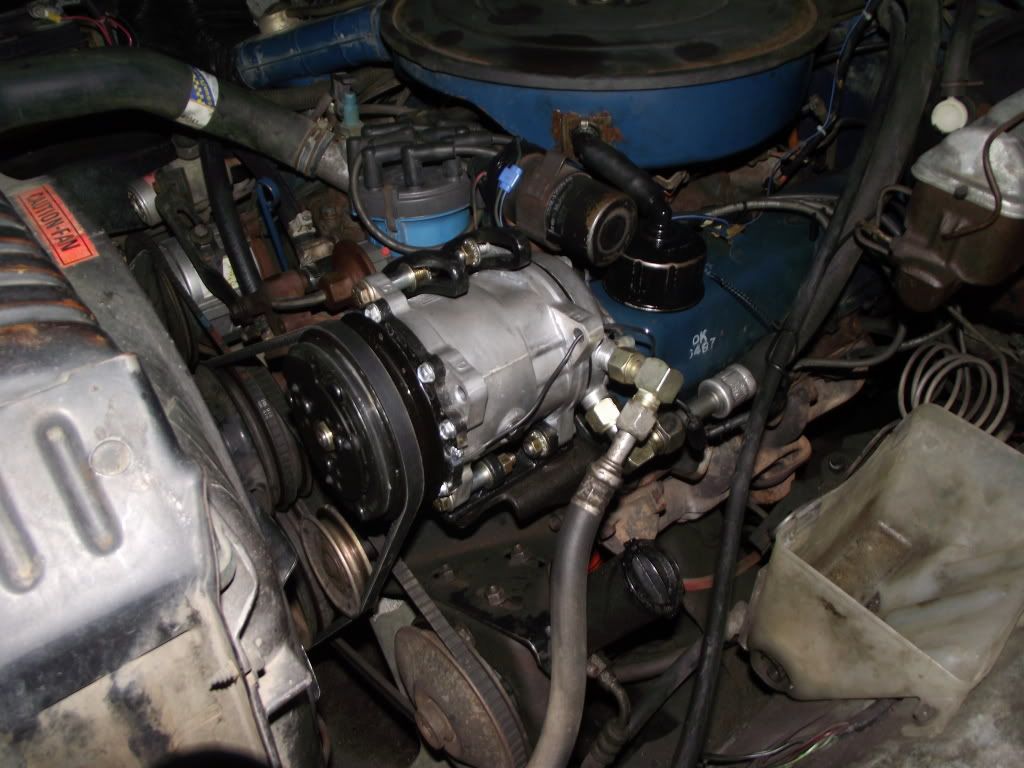
3. MALE O RING TO FEMALE O RING #8 90 DEGREE ADAPTER FITTING
4. MALE O RING TO FEMALE O RING #10 90 DEGREE ADAPTER FITTING
(all of them came from FORD ELECTRICAL SWITCHES, MOTOR MOUNTS items in MR FOMOCO MOTORCRAFT store on eBay! who nicely combined the shipping costs)
I also locally purchased a new receiver dryer, longer V belt, some orings, and some longer bolts for the A/C mount bracket.
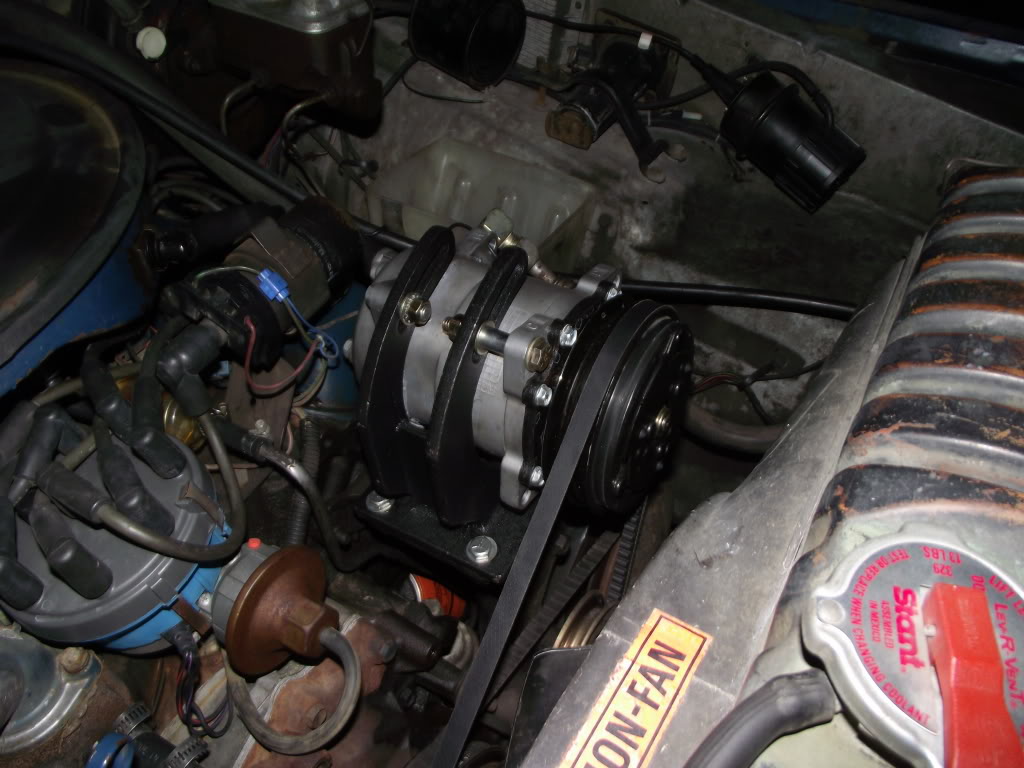
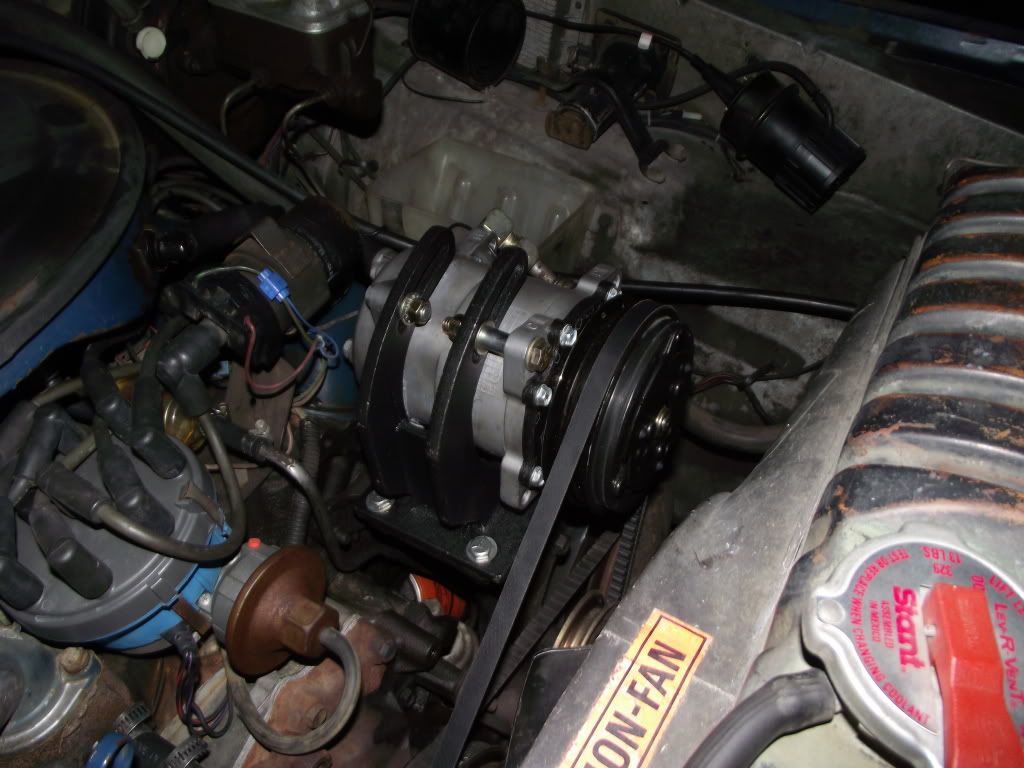
It was entirely bolt on except for cutting some spacers to locate the compressor in the mount. The original lines connected easily and the A/C is working great, even at idle with no vibration. The only minor annoyance is the high pressure service port on the compressor is a #3 flare fitting instead of the normal #4 size so I had to dig up an adapter for my gauge set.
I like the look of the Sanden compressor and am thinking about doing the conversion, but I have a good working York right now, so I will keep that until I need a new one.
I like the look of the Sanden compressor and am thinking about doing the conversion, but I have a good working York right now, so I will keep that until I need a new one.
Anyone have the complete P/N's for new brackets and all, etc, to convert a york compresor to a Sanden on a 76 F250 with a 390? It seems to me, the york draws down on HP compared to modern compressors. I want to convert mine.
On another note..does anyone have a description/picture of the txv bulb location for a 77 F150?
Anyone have the complete P/N's for new brackets and all, etc, to convert a york compresor to a Sanden on a 76 F250 with a 390? It seems to me, the york draws down on HP compared to modern compressors. I want to convert mine.
I would guess that all of the stuff I used would be the same, the hose sizes seemed to be standard sizes for compressors. Searching the descriptions I posted on ebay should take you there.
1. what do you mean "cutting some spacers"?
2. why did you go with the SD5 instead of the SD7- my understanding is the SD7xx has more output, which you would want with a 460, or it that more related to cab space and the SD5XX works fine?
3. Did you keep the idler pulley? I notice something that looks like one under the compressor. i have a 76 460 & mine's up top to the left of the compressor
I did the Sanden conversion too. The Sanden is lighter, quieter, and more efficient than the York. Plus, at least in my area, you can buy a new Sanden complete with clutch for less than a rebuilt York w/o clutch.
I had new hoses made also so I didn't use the adapter fittings.
I got my bracket from Nostalgic Air in Tampa, Fl. They make the bracket I used that allows the original tensioning setup to be used. They also make a bracket that allows the compressor to pivot to tighten the belt. Aftermarket Air Conditioning For Automobiles and AC parts
There have been several threads over the years about doing this swap, but most of them went a little beyond what I was interested in doing. I had a functioning factory installed system with the York compressor on my 460 powered '79 F150.
Last summer the compressor failed and I became more interested in doing this swap. I was not interested in doing an R134a conversion because it would require a bigger condenser and new lines. R12 is available on Ebay and I have a good supply of it.
I was able to find all the components required to do the swap on Ebay for $200 shipped, which included.
1. 9285 SANDEN SD508 STYLE COMPRESSOR W/ CLUTCH
2. YORK TO SANDEN /SELTEC ADJUST. COMPRESSOR MOUNT KIT
3. MALE O RING TO FEMALE O RING #8 90 DEGREE ADAPTER FITTING
4. MALE O RING TO FEMALE O RING #10 90 DEGREE ADAPTER FITTING
(all of them came from FORD ELECTRICAL SWITCHES, MOTOR MOUNTS items in MR FOMOCO MOTORCRAFT store on eBay! who nicely combined the shipping costs)
I also locally purchased a new receiver dryer, longer V belt, some orings, and some longer bolts for the A/C mount bracket.
It was entirely bolt on except for cutting some spacers to locate the compressor in the mount. The original lines connected easily and the A/C is working great, even at idle with no vibration. The only minor annoyance is the high pressure service port on the compressor is a #3 flare fitting instead of the normal #4 size so I had to dig up an adapter for my gauge set.
I am about to do a similar conversion on my 67 F100. I bought a a kit from Mr. Fomoco as well. How's yours holding up? Any regrets? What size condensor did you purchase? Any fitment issues?
Anyone have the complete P/N's for new brackets and all, etc, to convert a york compresor to a Sanden on a 76 F250 with a 390? It seems to me, the york draws down on HP compared to modern compressors. I want to convert mine.
On another note..does anyone have a description/picture of the txv bulb location for a 77 F150?
I used this one on my FE it looks a lot like the one in this post and worked really well. Downloads - www.vintageair.com
I've been working on getting A/C back in my '78 F150 400 - I read a lot of the FTE articles and settled on the setup that Beechkingd got.
For my 400:
(http://www.ebay.com/itm/FORD-351M-V8-A-C-SANDEN-CONVERSION-KIT-9263-SANDEN-STYLE-COMPRESSOR-/401057764716?vxp=mtr&hash=item5d60e7d56c)
I installed it and found that the compressor pulley was 3/8" off center from the tension and crank pulley. Pisser was I had it adjusted as far out as it would go...I'm not a welder so I went with the bolt modification...
(note: In addition to the 3/8" to align the pulleys I moved it out about 1/2" as well as the front of the pulley was within 1/2" of the fan blade. (and added 3rd bolt not in pic).
I have the liquid line to replace and then I should be ready to charge and go!
Hi,
does any body know where I can get a V belt pulley as apposed to the serpentine pulley I have on a compressor at the moment.
As I would like to use the compressor in an AC retrofit.
Thanks,
I would get the model number of the compressor and call a shop that specializes in just auto A/C and see whats available.
I installed it and found that the compressor pulley was 3/8" off center from the tension and crank pulley. Pisser was I had it adjusted as far out as it would go...I'm not a welder so I went with the bolt modification...
(note: In addition to the 3/8" to align the pulleys I moved it out about 1/2" as well as the front of the pulley was within 1/2" of the fan blade. (and added 3rd bolt not in pic).
I have the liquid line to replace and then I should be ready to charge and go!
Did you make the bracket your self, do you have any dimensions.
I have to fit one to a V8 Cleveland that did not have a compressor to start with. How did you mount a pulley wheel? I bought a Sanden 508 too. Thanks,
I got the top bracket from the same place I got the Sanden, as you see in the thread It wasn't the correct dimensions and I had to offset it to make fit. There are places that have AC bracket pulley kits (Ford 351C Alternator and Power Steering Brackets).
Do you have the bottom AC Compressor bracket? I have an extra
On the tension pulley - I had to find and buy (on the FTE Forum / Ebay) the Pulley bracket that mounted to the front of the engine since mine was missing. (You can see it in the pics in the thread below)

 07-07-2012, 10:12 PM