
 11-18-2014, 04:54 PM
Last edit by: IB Advertising
See related guides and technical advice from our community experts:
Browse all: Exterior Guides
- How To Install Tonneau Cover
Step by step instructions for do-it-yourself repairs
- Truck Bed Accessories
Important information to help you understand your Ford truck
Browse all: Exterior Guides

NEW Peragon Bed Cover Installation
#1
10-07-2011, 10:32 AM


NEW Peragon Bed Cover Installation
Peragon Bed Cover Critique
Today, September 23, 2011 I ordered the Peragon Bed Cover for my 2005 Ford F250 after receiving the email from the President, Heath Copp.
Cover shipped Sept 27, 2011 – FedEx – Est. arrival Fri. Sept 30. And it did arrive on the 30<sup>th</sup>. About 8:30 in the morning! Nice going FedEx!
Scheduled for install Tuesday Oct 4 PM. Actually, Mr Heath Copp was on a business trip in my area and he actually scheduled time to help me with the installation. He arrived about 1:00PM and after much discussion and comparison with this new design and my previous cover we got started. All during the install, he was taking notes from me and my reaction to the instructions that was provided in the carton, good and bad. (Looks like they plan on revising the instruction manual because of my inability to read correctly.) I suggest that you read all the instructions BEFORE you start the job so you can be familiar with each step. DO NOT JUMP AHEAD WITH ANY STEPS AS YOU WILL HAVE TO DIS-ASSEMBLE AND DO IT OVER!
Tools for the job are very simple....Everyone should already have the required tools for your vehicle if you do ANY of your own maintenance..... a few wrenches (2) 7/16”, 3/8 and 1/2”, a power drill, one 1/8” Allen, and a #1 Phillips screwdriver should do it.
You will need one helper to help you do a few things.... Now let's start.
Bed Rails.......
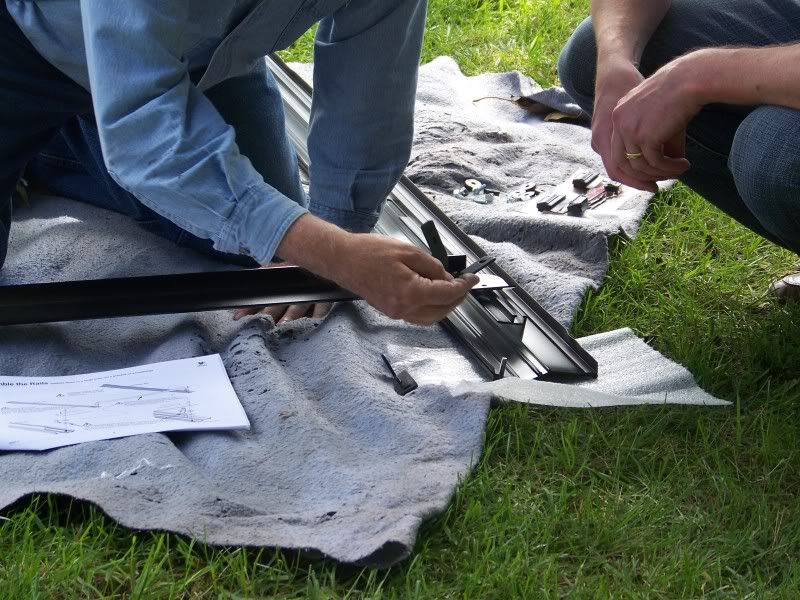
I laid out the rails on an old blanket on my front lawn... Remember (I had to be reminded) that when upside down that driver's side is on the left, not right! They are stamped D and P.
Note: All the hardware has been pre-packaged in packs as you need them....
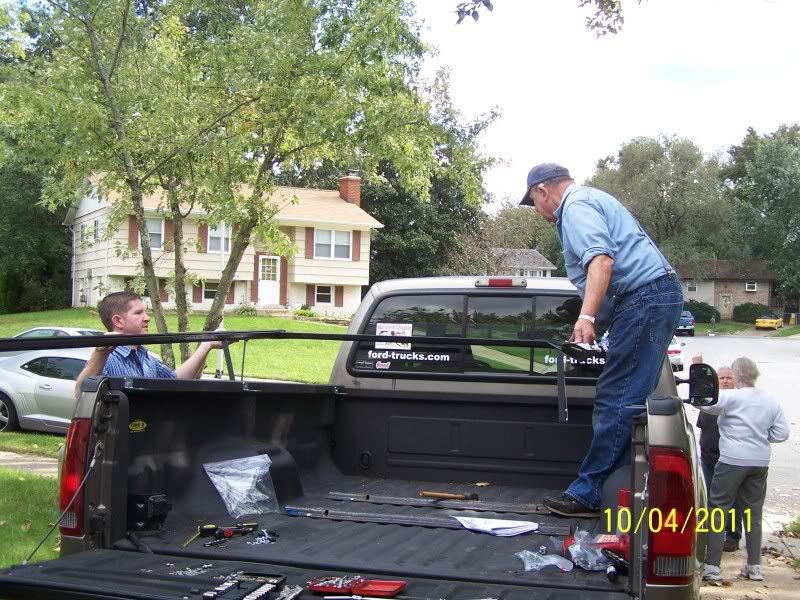
Setting Bed Rails: This is one reason why 2 people are required.
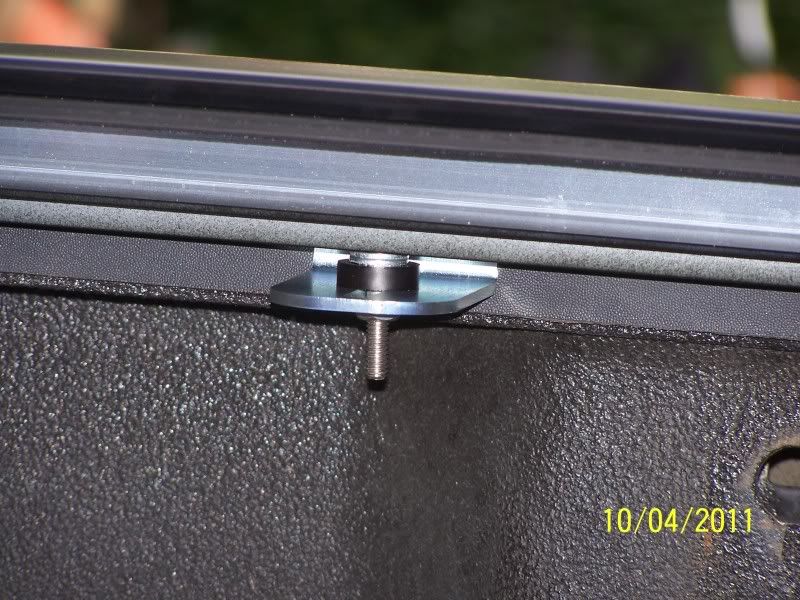
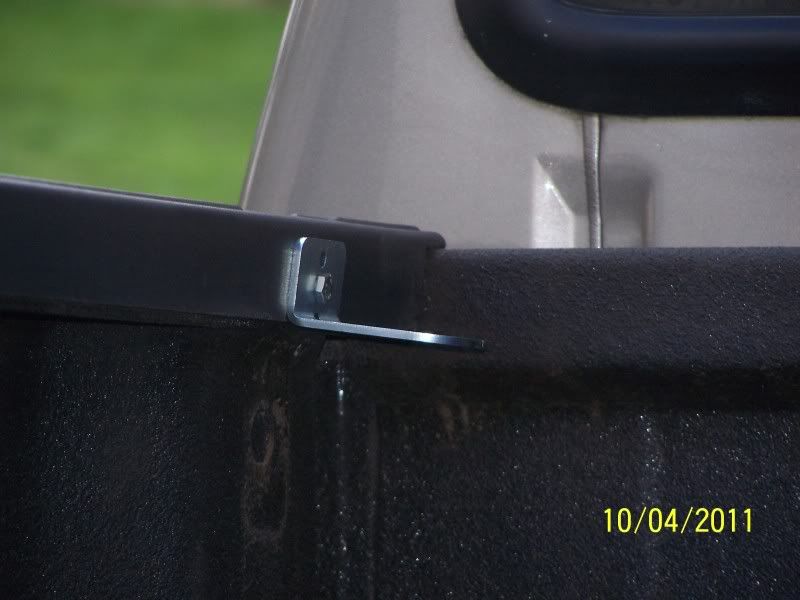
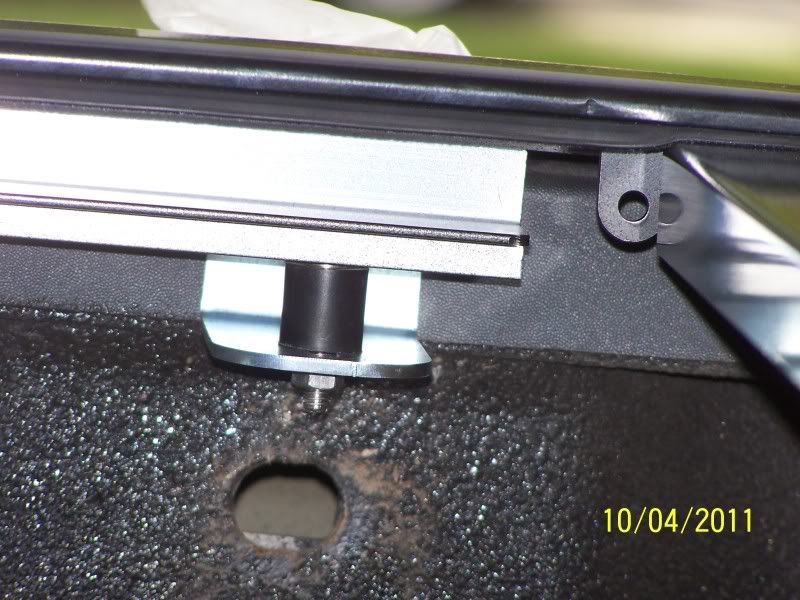
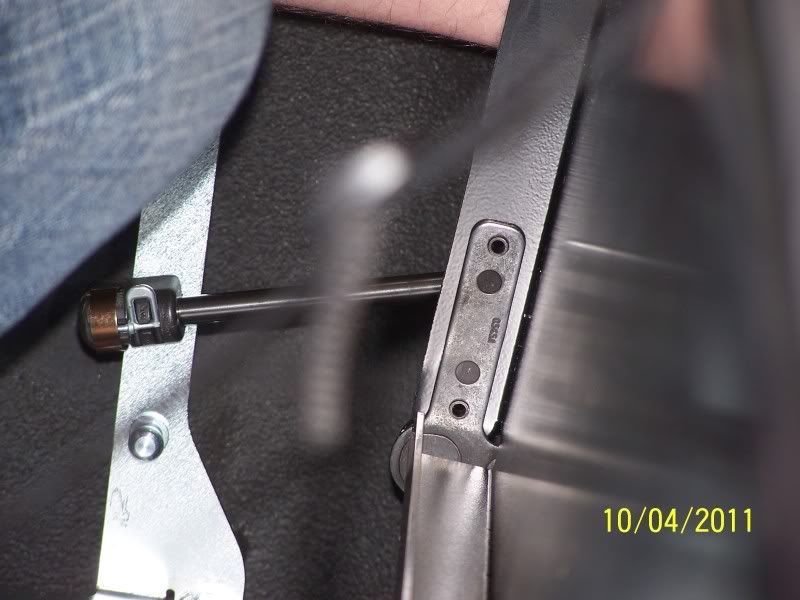
I had already drilled and mounted the Rail Brackets along the bed rail of the truck. Peragon is in the process of replacing the older thinner steel brackets with a thicker bracket. Both were sent with my kit and I used the thicker bracket. This is a BIG improvement from my 6 year old Peragon cover. I had to have my son weld gussets on my original brackets to make them hold the cover up. The new ones also mount in a different location to improve their strength. MUCH BETTER. Here's photo of one installed.
And here you can see the change of location from the old to the new. Look below the new bracket - see the shadow of the old bracket.
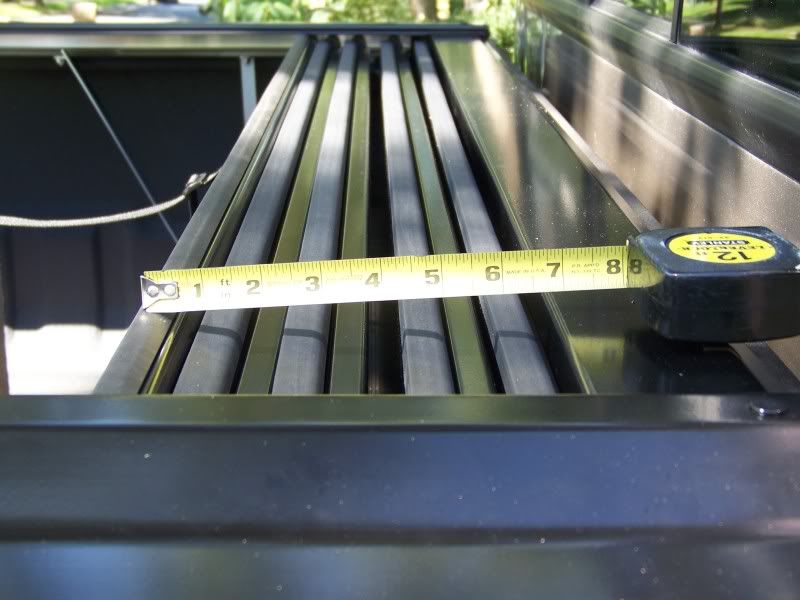
Once the brackets are all installed and the Peragon Rails lifted on, the height is set to 3/16” by installing plastic spacers (provided) and washers as shown here:
All the nuts are installed LOOSELY until the rails are parallel to each other and the width is the same between the rails at the front and back..... THEN tighten the front and back bracket nuts. (My truck is the long bed – 8' – so mine has a set of 3 brackets per side. Short beds have only 2 per side.)
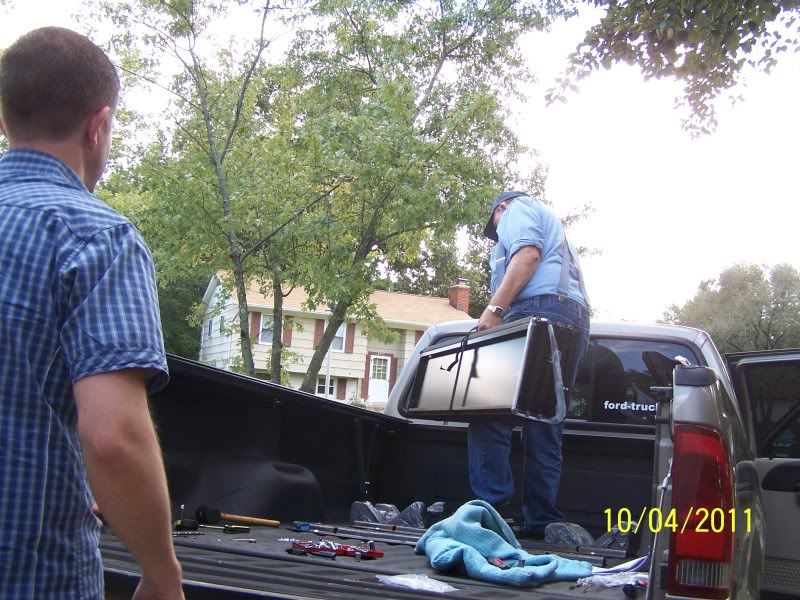
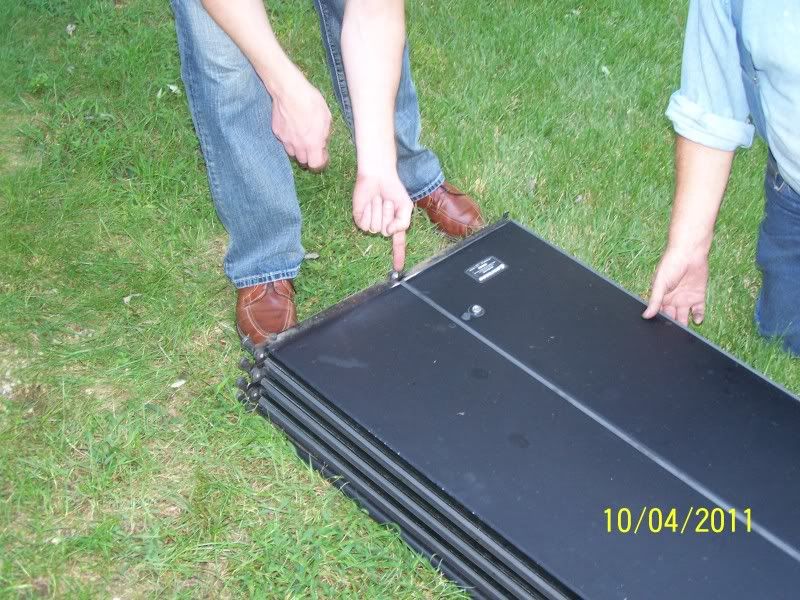
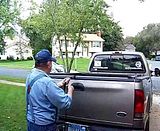
Now we get the panel assembly ready for installation by installing the gas spring brackets
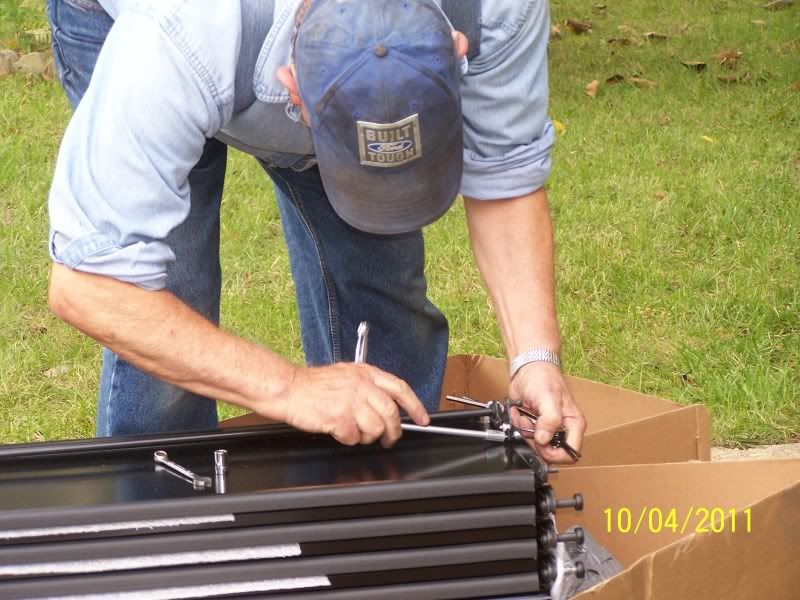
and lifting the panels into truck: (The Panel Strap doubles as a great handle.)
Left and set the drivers side pin on the panel assembly into the corner bracket by setting it kitty-corner into the rail slot and slide it forward and set the pin into the bracket hole.
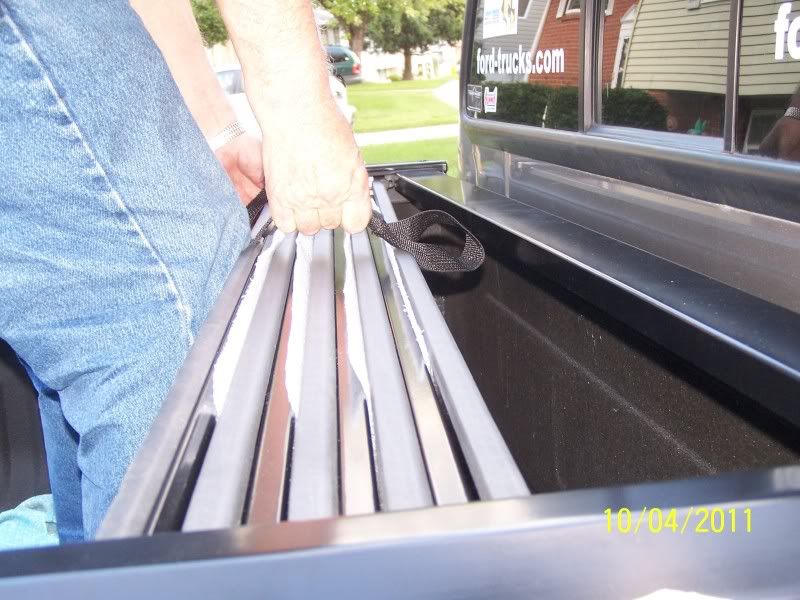
Then set the passenger side into the rail slide-slot and slide it forward and it will snap into it's corner bracket when pushed past the spring clip. (It's harder to describe than it is to do!) See below:

The adjustment is then done to set the rollers on the panel to meet the ramp on the side rails by a long bolt on each side rail ramp so that the rollers will run up the ramp into the side rail guides.

At this point, the cover should be pulled back to check for smooth and proper extension. In my case, everything went VERY smoothly! Heath said I had the BIGGEST smile on my face as the original one I did 6 years ago most definitely did NOT roll smoothly at this point!
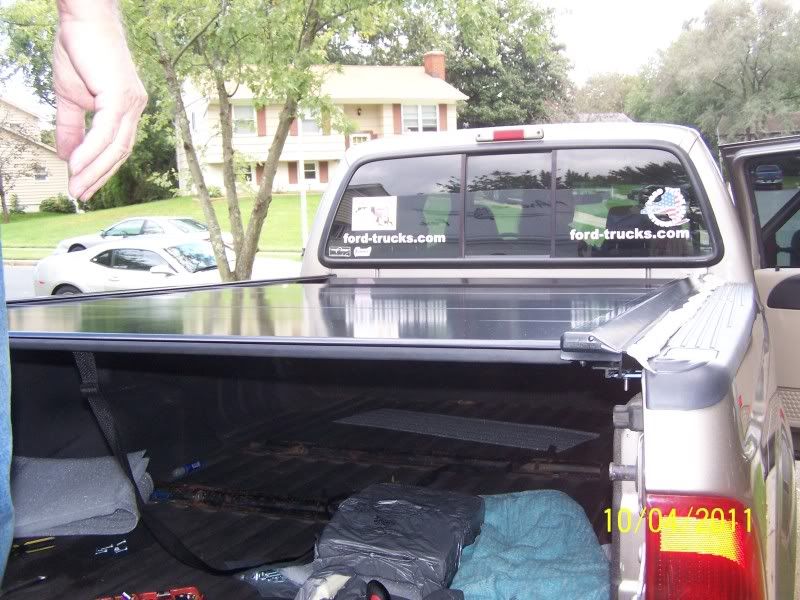

All that's left is to attach the two gas springs to the panel and ramp studs:
Note: This was another improvement.... the way they are attached/removed is much simpler.
Here's a photo of the old panel assembly.... you can not see the rusted/very worn rollers here that we are pointing to.
These old rollers were manufactured in China. They looked to have been pop-riveted to the panels!! I had to drill them out when I sold the old aluminum to the scrap dealer. Not one was as tight as when installed. The new ones are now a machined fit, made in USA steel precision bearing. The rollers have impregnated lubricant that cushions the roller in the guide rail and is also much quieter went opening/closing. This is probably one of the two best differences in the manufacture of this new Bed cover by Peragon. The other being the better rail brackets.
The total install time, INCLUDING all the B/S ing that was done was 3 � to 4 hours and they was a LOT of talking and explaining what and why they changed different things. Here's a few photos of the finished product and a movie of the operation – one going open, one going closed.

[IMG]http://i260.photobucket.com/albums/ii28/BPofMD/Paragon/000_0020.jpg[/IMG"]
After we did the movie of the opening, Heath showed me the error of my ways. It is recommended to open it by pushing down on the TWO front panels – one hand on each. I tried this and , wow! It works much better and easier.... my F250 with 4 wheel drive is SO tall it's hard for my 72 year old body and 5'8” frame to get much push force! Also, when I close the cover I normally have the tailgate DOWN. It wouldn't be so awkward as shown in the movie. It will also get easier after a few weeks of use as the seals between the panels will “break in”.
I have had the change to use it in the past few days too. I can say that it is a completely different cover than the one I bought 6 years ago! I will let you all know if there are any changes for the worse over the time I have it. I plan on keeping the truck until the wheels fall off, as they say!
If you have any questions, post 'em up. I do have LOTS more photos I haven't used here to TRY to keep this as short as I possibly could and still have a decent write-up on it. In that regard, I wish to publicly thank Charlie (Dusty Bumpers) for handling all the great camera work for me! Also thanks to Mr. Heath Copp for the pleasure of his company and expertize on the purchase and installation help. By the way, he wanted to help MUCH more than I wanted to let him! I really needed to know the customers feeling on the whole installation. He did point out any mistakes I was about to make before I made them..... they were more than one.... And as I said earlier, he was taking lots of notes for both making the product and the manual more consumer helpful. A big change he agreed to was to switch to all stainless steel hardware! I had already purchased a lot of the bolts/nuts to use instead of the ones sent with the kit. That's all folks......
Today, September 23, 2011 I ordered the Peragon Bed Cover for my 2005 Ford F250 after receiving the email from the President, Heath Copp.
Cover shipped Sept 27, 2011 – FedEx – Est. arrival Fri. Sept 30. And it did arrive on the 30<sup>th</sup>. About 8:30 in the morning! Nice going FedEx!
Scheduled for install Tuesday Oct 4 PM. Actually, Mr Heath Copp was on a business trip in my area and he actually scheduled time to help me with the installation. He arrived about 1:00PM and after much discussion and comparison with this new design and my previous cover we got started. All during the install, he was taking notes from me and my reaction to the instructions that was provided in the carton, good and bad. (Looks like they plan on revising the instruction manual because of my inability to read correctly.) I suggest that you read all the instructions BEFORE you start the job so you can be familiar with each step. DO NOT JUMP AHEAD WITH ANY STEPS AS YOU WILL HAVE TO DIS-ASSEMBLE AND DO IT OVER!
Tools for the job are very simple....Everyone should already have the required tools for your vehicle if you do ANY of your own maintenance..... a few wrenches (2) 7/16”, 3/8 and 1/2”, a power drill, one 1/8” Allen, and a #1 Phillips screwdriver should do it.
You will need one helper to help you do a few things.... Now let's start.
Bed Rails.......
I laid out the rails on an old blanket on my front lawn... Remember (I had to be reminded) that when upside down that driver's side is on the left, not right! They are stamped D and P.
Note: All the hardware has been pre-packaged in packs as you need them....
Setting Bed Rails: This is one reason why 2 people are required.
I had already drilled and mounted the Rail Brackets along the bed rail of the truck. Peragon is in the process of replacing the older thinner steel brackets with a thicker bracket. Both were sent with my kit and I used the thicker bracket. This is a BIG improvement from my 6 year old Peragon cover. I had to have my son weld gussets on my original brackets to make them hold the cover up. The new ones also mount in a different location to improve their strength. MUCH BETTER. Here's photo of one installed.
And here you can see the change of location from the old to the new. Look below the new bracket - see the shadow of the old bracket.
Once the brackets are all installed and the Peragon Rails lifted on, the height is set to 3/16” by installing plastic spacers (provided) and washers as shown here:
All the nuts are installed LOOSELY until the rails are parallel to each other and the width is the same between the rails at the front and back..... THEN tighten the front and back bracket nuts. (My truck is the long bed – 8' – so mine has a set of 3 brackets per side. Short beds have only 2 per side.)
Now we get the panel assembly ready for installation by installing the gas spring brackets
and lifting the panels into truck: (The Panel Strap doubles as a great handle.)
Left and set the drivers side pin on the panel assembly into the corner bracket by setting it kitty-corner into the rail slot and slide it forward and set the pin into the bracket hole.
Then set the passenger side into the rail slide-slot and slide it forward and it will snap into it's corner bracket when pushed past the spring clip. (It's harder to describe than it is to do!) See below:
The adjustment is then done to set the rollers on the panel to meet the ramp on the side rails by a long bolt on each side rail ramp so that the rollers will run up the ramp into the side rail guides.
At this point, the cover should be pulled back to check for smooth and proper extension. In my case, everything went VERY smoothly! Heath said I had the BIGGEST smile on my face as the original one I did 6 years ago most definitely did NOT roll smoothly at this point!
All that's left is to attach the two gas springs to the panel and ramp studs:
Note: This was another improvement.... the way they are attached/removed is much simpler.
Here's a photo of the old panel assembly.... you can not see the rusted/very worn rollers here that we are pointing to.
These old rollers were manufactured in China. They looked to have been pop-riveted to the panels!! I had to drill them out when I sold the old aluminum to the scrap dealer. Not one was as tight as when installed. The new ones are now a machined fit, made in USA steel precision bearing. The rollers have impregnated lubricant that cushions the roller in the guide rail and is also much quieter went opening/closing. This is probably one of the two best differences in the manufacture of this new Bed cover by Peragon. The other being the better rail brackets.
The total install time, INCLUDING all the B/S ing that was done was 3 � to 4 hours and they was a LOT of talking and explaining what and why they changed different things. Here's a few photos of the finished product and a movie of the operation – one going open, one going closed.
[IMG]http://i260.photobucket.com/albums/ii28/BPofMD/Paragon/000_0020.jpg[/IMG"]
After we did the movie of the opening, Heath showed me the error of my ways. It is recommended to open it by pushing down on the TWO front panels – one hand on each. I tried this and , wow! It works much better and easier.... my F250 with 4 wheel drive is SO tall it's hard for my 72 year old body and 5'8” frame to get much push force! Also, when I close the cover I normally have the tailgate DOWN. It wouldn't be so awkward as shown in the movie. It will also get easier after a few weeks of use as the seals between the panels will “break in”.
I have had the change to use it in the past few days too. I can say that it is a completely different cover than the one I bought 6 years ago! I will let you all know if there are any changes for the worse over the time I have it. I plan on keeping the truck until the wheels fall off, as they say!
If you have any questions, post 'em up. I do have LOTS more photos I haven't used here to TRY to keep this as short as I possibly could and still have a decent write-up on it. In that regard, I wish to publicly thank Charlie (Dusty Bumpers) for handling all the great camera work for me! Also thanks to Mr. Heath Copp for the pleasure of his company and expertize on the purchase and installation help. By the way, he wanted to help MUCH more than I wanted to let him! I really needed to know the customers feeling on the whole installation. He did point out any mistakes I was about to make before I made them..... they were more than one.... And as I said earlier, he was taking lots of notes for both making the product and the manual more consumer helpful. A big change he agreed to was to switch to all stainless steel hardware! I had already purchased a lot of the bolts/nuts to use instead of the ones sent with the kit. That's all folks......
#2
10-07-2011, 10:51 AM

Elder User
Join Date: Jan 2004
Location: Texas
Posts: 757
Likes: 0
Received 0 Likes
on
0 Posts

#5
10-07-2011, 01:43 PM
FTE Legend
Join Date: Mar 2009
Location: North Bay Ont Canada
Posts: 161,147
Received 5,155 Likes
on
1,688 Posts

#7
10-07-2011, 03:01 PM
Trending Topics
#8
10-07-2011, 03:08 PM
He did and I just finished my write up and pics. I posted in the numerous sites: superduty, 2009 F-150, 2004-2008 F-150, 1997-2003 F-150, 1987-1996 F-series.
Heath is a helluva nice man and has earned an opportunity to get as much exposure as possible.
Again Bud, nice job!
Heath is a helluva nice man and has earned an opportunity to get as much exposure as possible.
Again Bud, nice job!
#12
10-07-2011, 08:34 PM
FTE Legend
Join Date: May 2008
Location: In my own world
Posts: 56,542
Likes: 0
Received 0 Likes
on
0 Posts
#13
10-07-2011, 11:54 PM


Bud -
Many thanks to you and Charlie for the detailed review and the time you spent to put it together! I'm just happy we were able to take care of you and earn you back as a happy Peragon truck bed cover owner!
If you need anything else at all, please let me know and we'll be all over it.
Many thanks to you and Charlie for the detailed review and the time you spent to put it together! I'm just happy we were able to take care of you and earn you back as a happy Peragon truck bed cover owner!
If you need anything else at all, please let me know and we'll be all over it.

#14
10-15-2011, 04:52 PM
Peragon Truck Bed Cover - FTE Member Discount
Here it is - hot off the press - the FTE member discount on a Peragon truck bed cover order!
I'm happy to answer any questions about our product, or you can contact our friendly Customer Support team right here in Minnesota: (877) 473-7246.
- $40 off! Peragon already offers an unbeatable value for a solid aluminum, retractable truck bed cover. This just makes it even better.
- It's exclusive! This discount is only available to FTE members. Please provide your member name in your online order comments or tell us when ordering by phone. Example: "My ford-trucks.com member name is: x. Please apply the $40 FTE discount to my order." We'll apply the discount and adjust your order total before processing. If you're not a member, join!
- Limited time! Don't snooze - this offer ends at midnight on Sunday, November 27, 2011. What better Christmas gift for your Ford truck?
- PLUS a Military / Law Enforcement / Fire Discount! If you're active or retired Military / LE / Fire, we'll give you an additional $25 discount and a FREE Tailgate Seal Kit. Just mention it in your online order comments or when ordering by phone, then email us a copy of your ID or other proof of status. We'll adjust your order total and add the free Tailgate Seal before processing your order. It's a small way for us to honor those who serve our country. (There is no time limit for this discount. It is available anytime to qualified Peragon customers.)
I'm happy to answer any questions about our product, or you can contact our friendly Customer Support team right here in Minnesota: (877) 473-7246.
#15
10-16-2011, 08:28 AM
FTE Legend
Join Date: Mar 2009
Location: North Bay Ont Canada
Posts: 161,147
Received 5,155 Likes
on
1,688 Posts