
Painting interior trim pieces thread :)
#1
 02-05-2011, 09:18 PM

Painting interior trim pieces thread :)
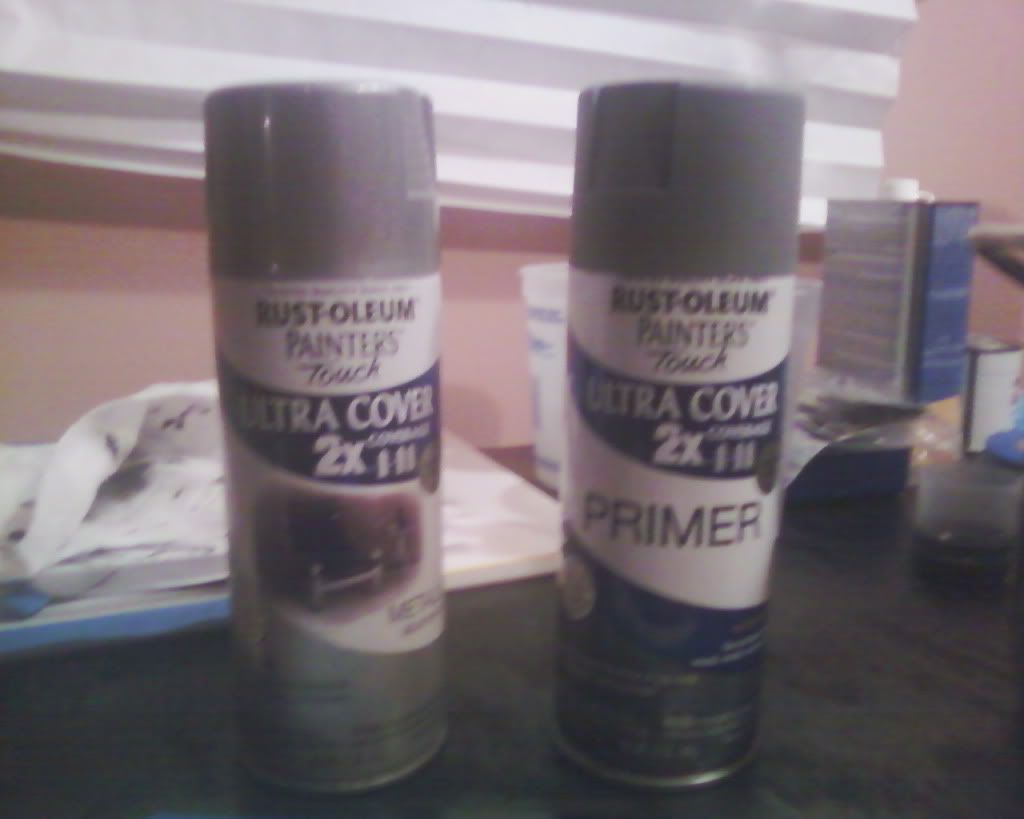
Well as you all may know i am doing a ton of things to the exterior/motor/drive train so i figured i will do some updating on the interior as well  Its easy to do, cheap and can make a big difference. I will first be doing the actually trim pieces, awhile back one broke and had to replace it and i dont really like the stock coloring on them. I will be painting them metallic silver to match the metallic silver pin striping on the outside of the truck. Heres what i will be using...
- Rost-oleum Painters Touch Ultra Cover Primer
- Rost-oleum Painters Touch Ultra Cover Metallic aluminum
- 600 grit wet sand paper
- Acholol wipes
In order to pop off the trim pieces i used a knife, do NOT force them off or you will break the clips. Slightly pry upwards with the knife and work your way down the trim piece. The ones on the doors are metal so are more tricky well the plastic ones pop off really easy. I will also be doing the grills of the speakers, the plastic covering around the gauges and a few other little things after i finish this little project still not sure if i want to paint them silver or go with a gloss black. I will be adding pictures as i go

Its easy to do, cheap and can make a big difference. I will first be doing the actually trim pieces, awhile back one broke and had to replace it and i dont really like the stock coloring on them. I will be painting them metallic silver to match the metallic silver pin striping on the outside of the truck. Heres what i will be using... - Rost-oleum Painters Touch Ultra Cover Primer
- Rost-oleum Painters Touch Ultra Cover Metallic aluminum
- 600 grit wet sand paper
- Acholol wipes
In order to pop off the trim pieces i used a knife, do NOT force them off or you will break the clips. Slightly pry upwards with the knife and work your way down the trim piece. The ones on the doors are metal so are more tricky well the plastic ones pop off really easy. I will also be doing the grills of the speakers, the plastic covering around the gauges and a few other little things after i finish this little project still not sure if i want to paint them silver or go with a gloss black. I will be adding pictures as i go
#2
02-05-2011, 11:26 PM
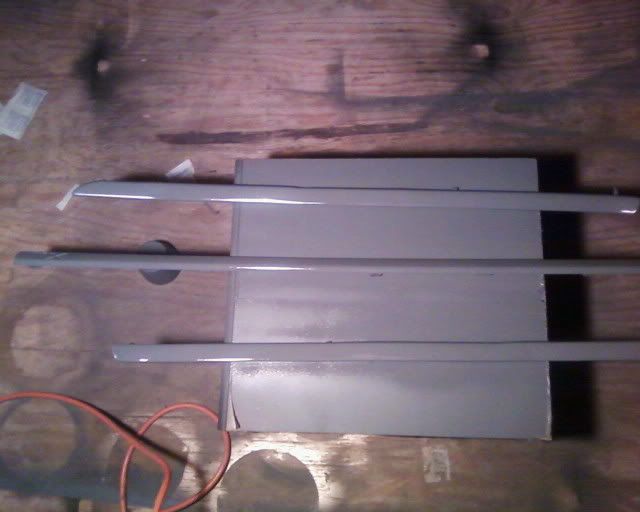
Just finished wet sanding everything, then wiped everything down with acholol pads to get any of the dirt off to make the paint apply better without any little dirt specs in it. The black piece that has the XL on it was rough unlike the other ones that were smooth, i sanded it down so it is smooth like the rest with 600 grit. I should have done it with 320 grit then finished with 600 to smooth it out but alittle extra elbow grease never hurts anything... Be very careful with the 2 metal trim pieces they bend very easily and are a pain to bend back. When you wet sand the smooth pieces you dont need to apply much pressure because you the surface is already smooth you just need to get that clear coating on it off. After the second coat of primer i will post up pictures.


#5
02-06-2011, 02:31 AM
I like the headliner! i was thinking about doing something like that with some mossy oak camo sense i will be getting mossy oak seat covers and bench seat cover :0 I am still debating on weather to paint the speaker grill covers, gauge cover, and a few other things this metallic silver or gloss black  i guess when i put these in the truck this morning ill see how it looks and go from there
i guess when i put these in the truck this morning ill see how it looks and go from there
#7
02-06-2011, 02:43 AM
Trending Topics
#9
02-06-2011, 05:40 AM
This is 2 coats of primer and 2 coats of paint later one piece is still drying which is why it is not in this picture but i think i will end up painting them gloss black along with everything else (gauge cover, plastic by power windows, vents, and a few other things i am probably forgetting) It came out well, and if you plan on doing this even though it says it will dry in 30 mins give it a good hour in between coats just to make sure. I will have to pick up some gloss black later today and will post up pictures either tonight or Monday.
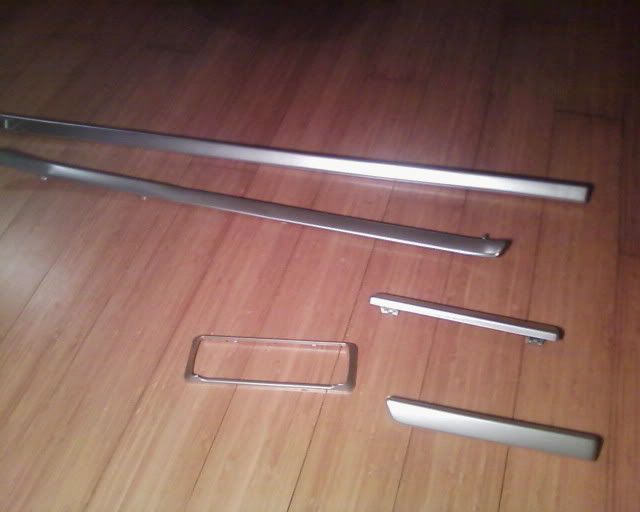
one piece is still drying which is why it is not in this picture but i think i will end up painting them gloss black along with everything else (gauge cover, plastic by power windows, vents, and a few other things i am probably forgetting) It came out well, and if you plan on doing this even though it says it will dry in 30 mins give it a good hour in between coats just to make sure. I will have to pick up some gloss black later today and will post up pictures either tonight or Monday.
#10
02-06-2011, 06:57 AM
More Turbo
I like the headliner! i was thinking about doing something like that with some mossy oak camo sense i will be getting mossy oak seat covers and bench seat cover :0 I am still debating on weather to paint the speaker grill covers, gauge cover, and a few other things this metallic silver or gloss black i guess when i put these in the truck this morning ill see how it looks and go from there
i guess when i put these in the truck this morning ill see how it looks and go from there 


#13
02-06-2011, 11:33 AM

Senior User
Join Date: Dec 2010
Location: Southern California
Posts: 266
Likes: 0
Received 0 Likes
on
0 Posts
#14
02-06-2011, 11:39 AM

#15
02-07-2011, 12:19 AM
I didnt break any clips lol i said if you pull them out they are very fragile and will break easy... If you do happen to break the clips, double sided tape is your best friend. 2 clips are broken on my gauge cover and did this and works great. I went and bought a few cans of gloss black and will be painting everything tonight and go from there... I have a ton of red in my truck so still deciding on what i want to keep red or switch to black.